

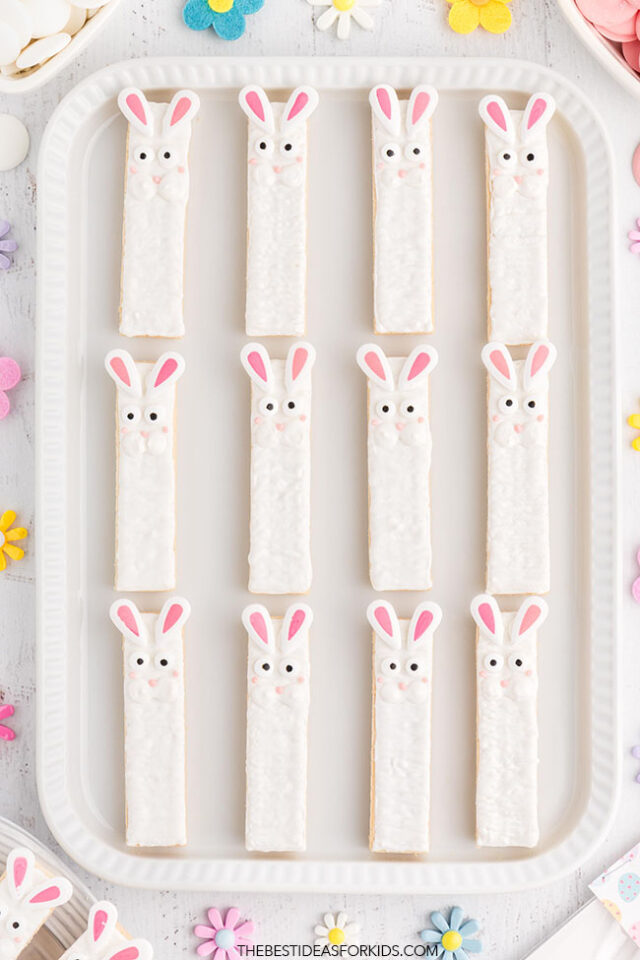
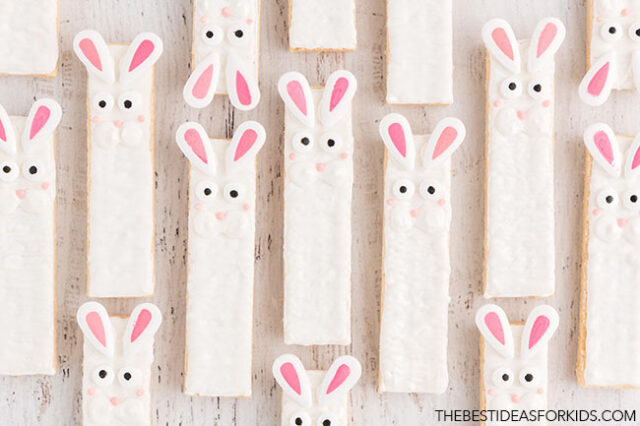
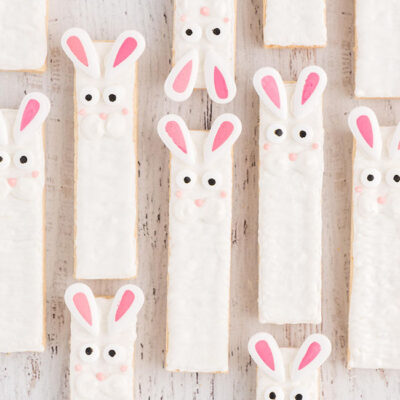
These adorable Easter Bunny Wafers are the perfect Easter treat to make with your kids this spring! This is a simple no-bake recipe, so kids of all ages can have fun decorating these sweet Easter bunnies.
RELATED: Rice Krispie Bunnies
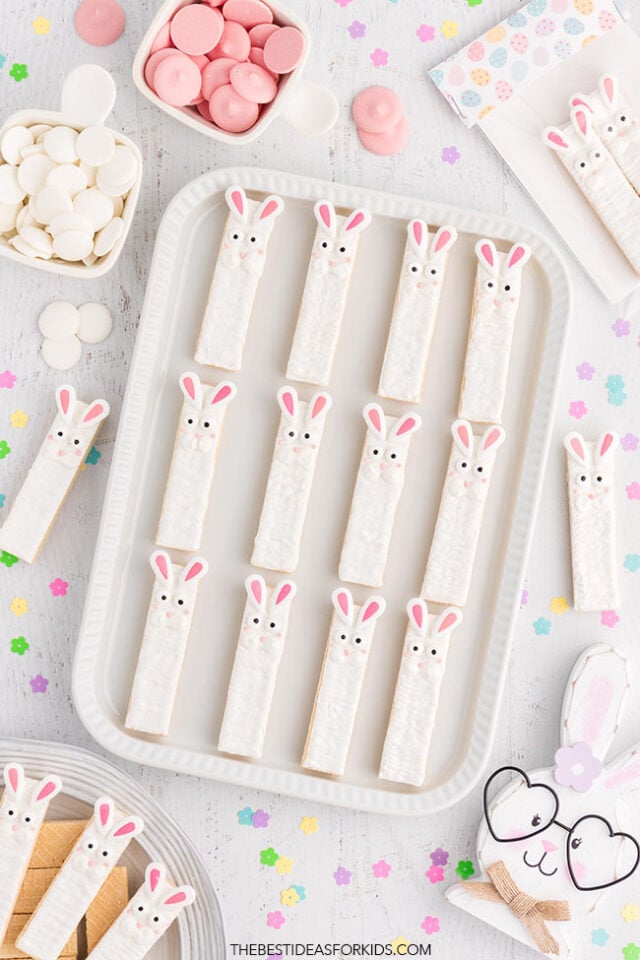
An Easy Easter Treat for Kids
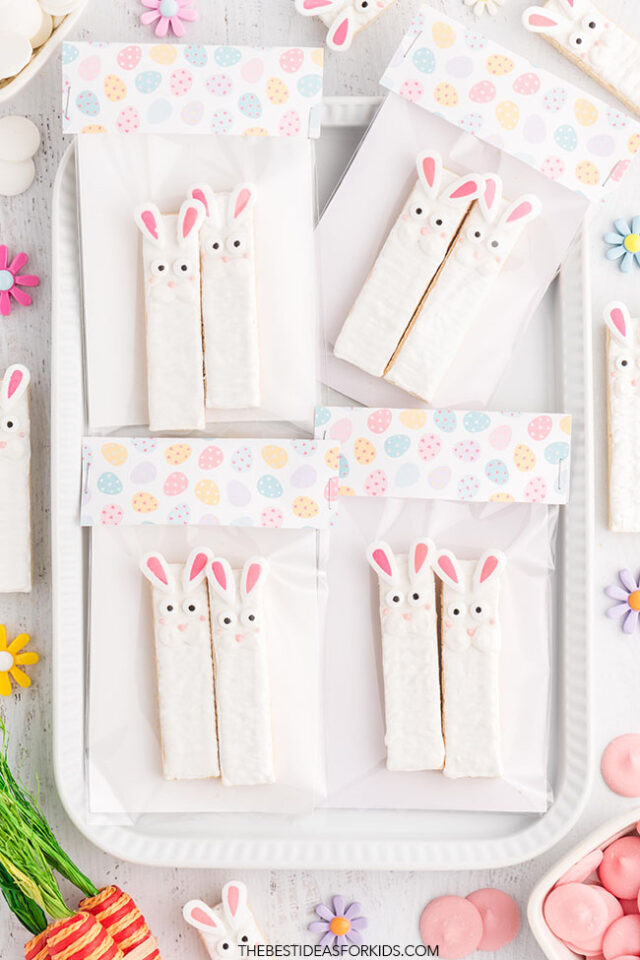
Not only are they fun to make, but they’re a fun treat to eat too! Once the chocolate has hardened, gently pack them away into clear cello bags and add a cute Easter bag topper.
You can get the free printable topper at the bottom of the post.
We used vanilla wafers and white chocolate melts to make these bunnies, but you can use whatever colors of wafers and chocolate melts that you have on hand!
Supplies Needed
- Vanilla wafer cookies
- Small mixing bowls
- Spoon
- Stapler
- Scissors
- Icing bags or Sealed top bags
- Bag toppers – find the free printable at the bottom of the post
- 4×6 clear cello bags – with a self-adhesive sealing edge
- White cardstock
- Toothpick
Watch the Video Tutorial
How To Make Bunny Wafers
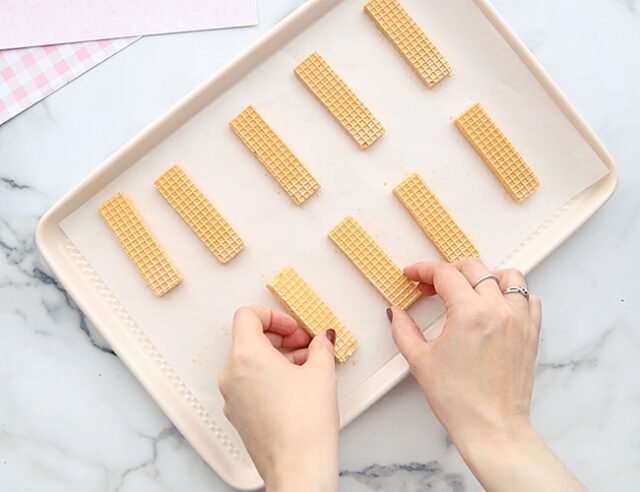
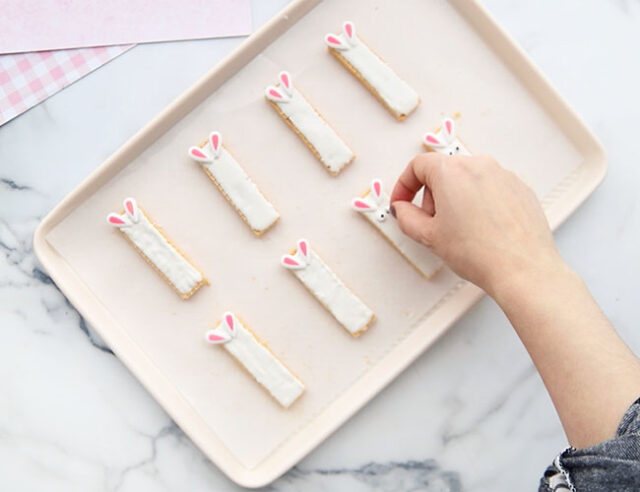
1. Lay out the wafers.
Place the plain wafers onto a baking sheet or tray, leaving some space between them.
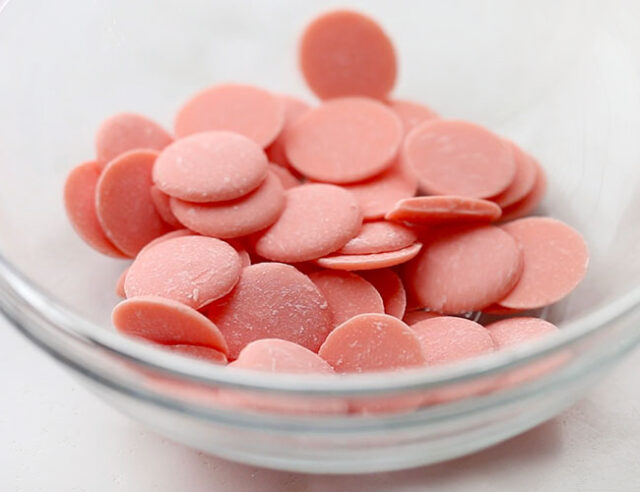
2. Melt the chocolate melts.
Put the white chocolate melts into one small bowl and the pink ones into another small bowl. Melt the chocolate melts as directed on the back of the package.
Mix until smooth and then pour them each into their own icing or Ziploc bags.
Note: Be sure to use pink chocolate melts – adding pink food coloring to the white chocolate melts unfortunately does not work and will cause the chocolate to harden and be unusable.
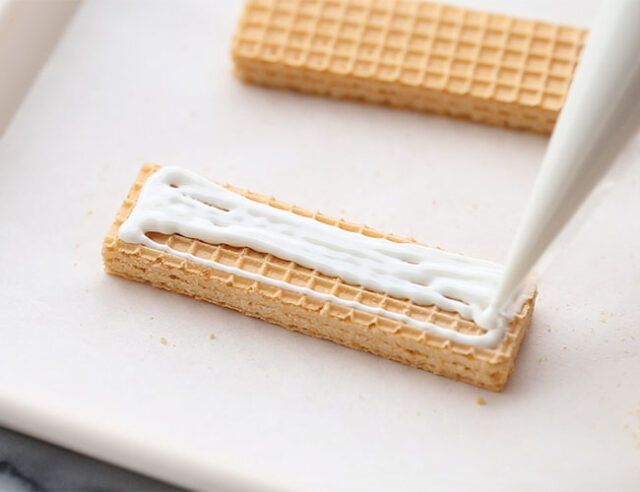
3. Pipe chocolate onto the wafers.
Pipe the melted white chocolate into an outline along the edges of the wafer and then using a side-to-side motion to fill in the rest of the wafer with white chocolate.
Use a toothpick to smooth and move the chocolate around as needed.
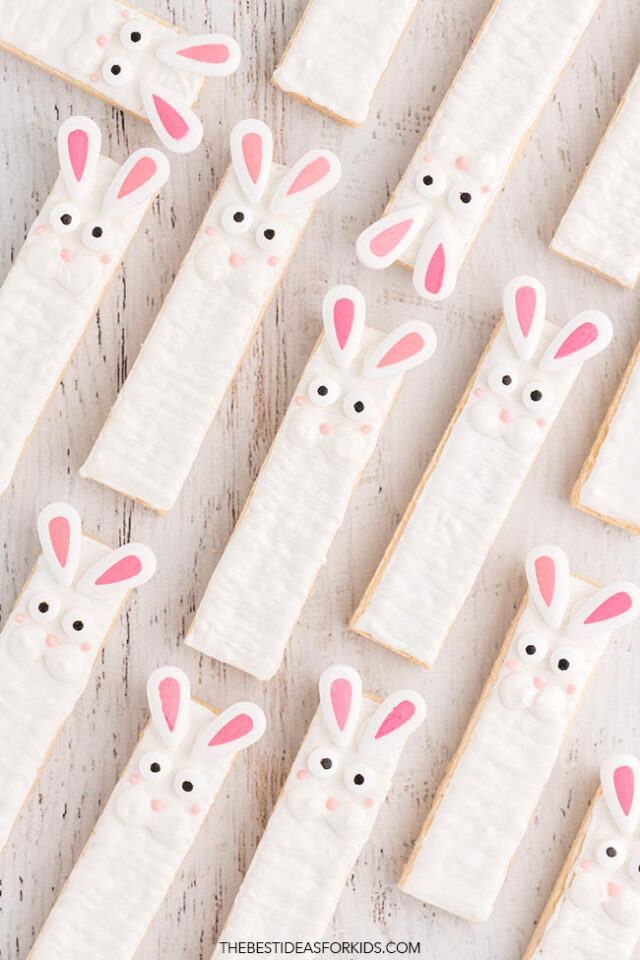
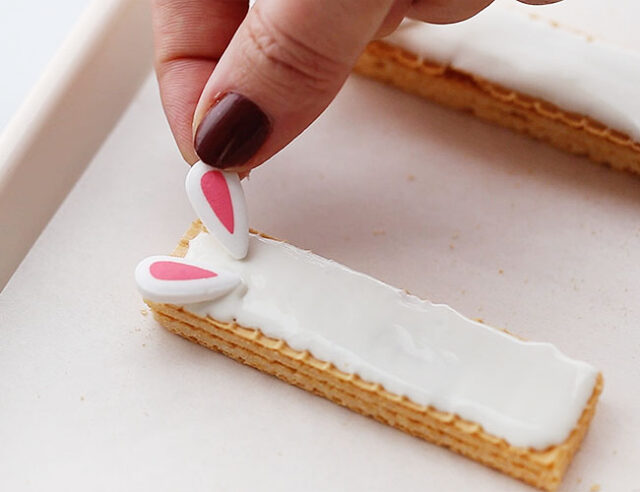
4. Add the bunny ears.
Once the white chocolate on the wafers has hardened for at least 2 minutes, you can add the bunny ears.
Carefully apply a dot of melted white chocolate to the back of a candy bunny ear, by the pointed base.
Place the ear onto the wafer at an angle, so that half of the ear overhangs the edge of the wafer. Do this for the second bunny ear, and repeat for the remaining wafers.
Use a toothpick to gently adjust the placement of the ears as needed, before the chocolate hardens.
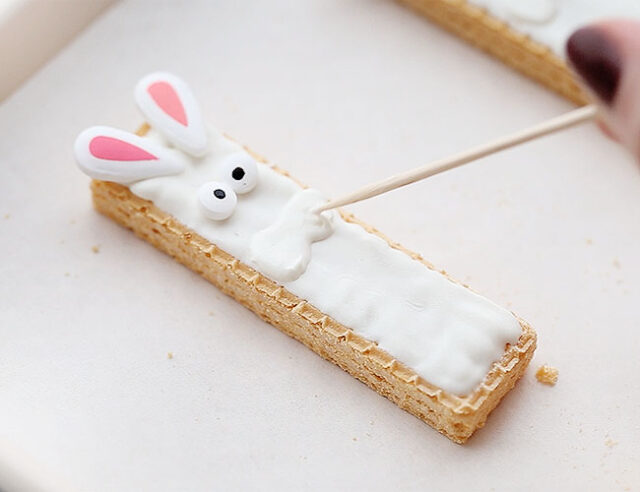
5. Add the eyes.
Apply a small dot of white chocolate on the wafer where you would like the eyes to go and place the candy eyes on top.
Use the toothpick again to reposition the eyes as needed.
6. Make the cheeks.
Below the eyes, pipe melted white chocolate into a figure 8 shape and fill it in.
Use the toothpick to smooth the white chocolate and to make the shape more rounded, as needed.
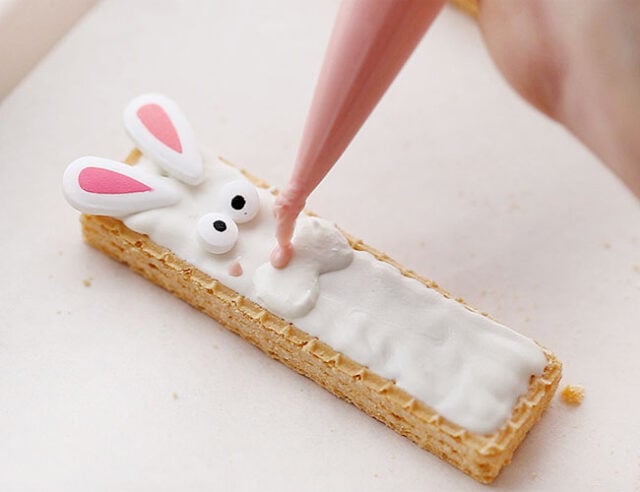
7. Add the pink details.
To make the nose, apply a small dot of melted pink chocolate at the center of the cheeks.
Make 2 pink dots above the cheeks on each side.
Let the wafers dry completely for about 30 minutes before serving or storing.
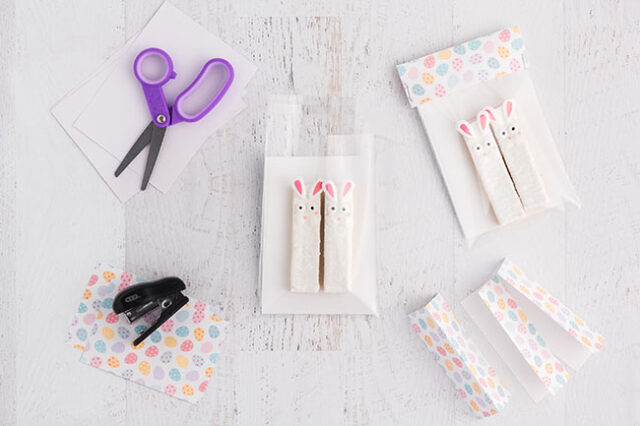
8. Pack cookies into bags.
To make the favor bags, cut out the easter egg bag toppers (you can get them at the bottom of the post) and fold them in half to make a paper tent.
Cut a 4″ by 6″ piece of cardstock and insert it into a clear cello bag. Place 2 bunnies inside each bag and seal the bag closed. Repeat for as many bags you’d like to make.
Only 2 bunnies will fit into a 4″ by 6″ cello bag – adding more may cause the ears to break off.
Place the bag topper (in the shape of a paper tent) over the top edge of the bag. Staple each side of the paper topper, close to the side edges so that you’re catching both the cello bag and the paper topper.
Note: If you staple the bag toppers too far in from the edge, this will put too much pressure on the bags and risk the bunny ears breaking or falling off.
You can make as many bunny wafers as you’d like! The package of candy eyes and candy ears
Serve and enjoy!
Easter Bunny Wafers
Ingredients
- 8 vanilla wafers
- 16 small candy eyes
- 16 small candy bunny ears
- pink chocolate melts
- white chocolate melts
Instructions
- Melt the chocolate melts as directed on the back of the package. Mix until smooth and then pour the chocolate into an icing bag or Ziploc bag.
- Cut a small tip off the icing bag. You don’t want the hole to be too big because it will be harder to make small dots if it is.
- Begin to outline the wafer with white chocolate. After the outline, fill in the wafer with the white chocolate going down the wafer in a side-to-side motion. You can use a toothpick to move the chocolate around as needed.
- Next, let the wafer dry for about 2 minutes before applying the ears. Once the chocolate looks a little hard apply white chocolate to the back side of the ears near the pointed part. Place each ear on top of the wafer at an angle with half of the ear off the wafer. You can use a toothpick to move the ears on the wafer as needed.
- For the eyes, apply a small dot of white chocolate where the eyes will go on the wafer and place the candy eyes on top. You can use the toothpick again to position the eyes as needed.
- Below the eyes make a figure 8 shape for the cheeks and fill them in using the white chocolate. Use the toothpick to move the white chocolate around to make the shape more rounded.
- Apply a small dot of pink chocolate for the nose in the middle above the cheeks and 2 pink dots above the cheeks on each side.
- Let the wafers dry completely for about 30 minutes before serving or placing them into clear cello bags.


Wow! And to think you posted these seven days ago is amazing! Thanks so much!
Great!