

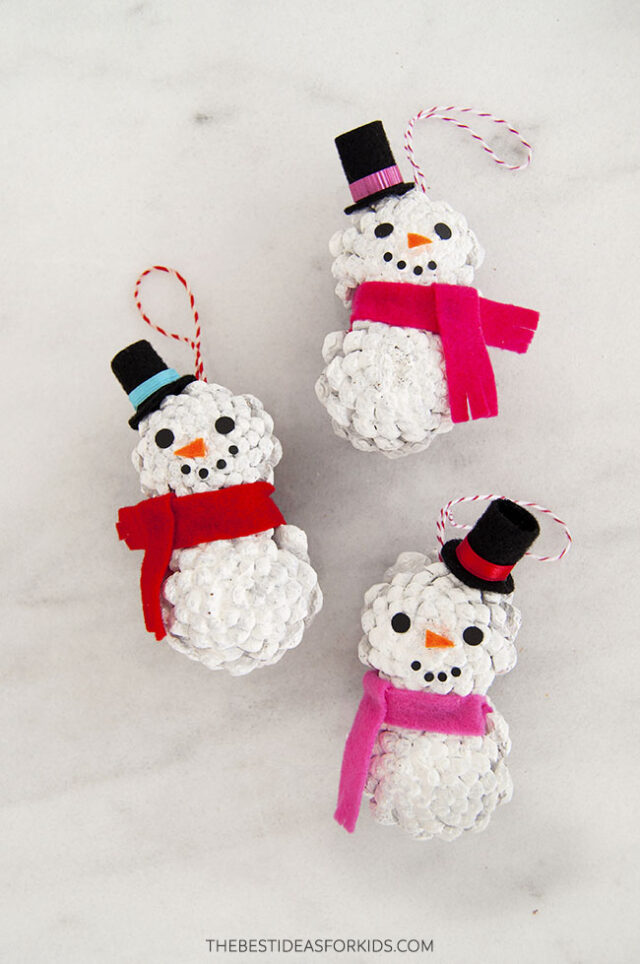
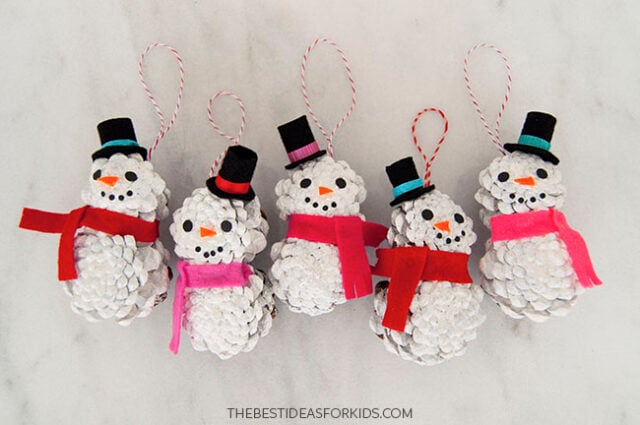
This pine cone snowman craft is a fun wintery craft to make this holiday season – add a loop to turn them into ornaments, or stand them up as-is on a bookshelf or window ledge.
RELATED: Pine Cone Christmas tree

Pine cone Snowman Craft
Each snowman needs two pine cones that are about the same size, or if one is a bit smaller it will make the perfect head.
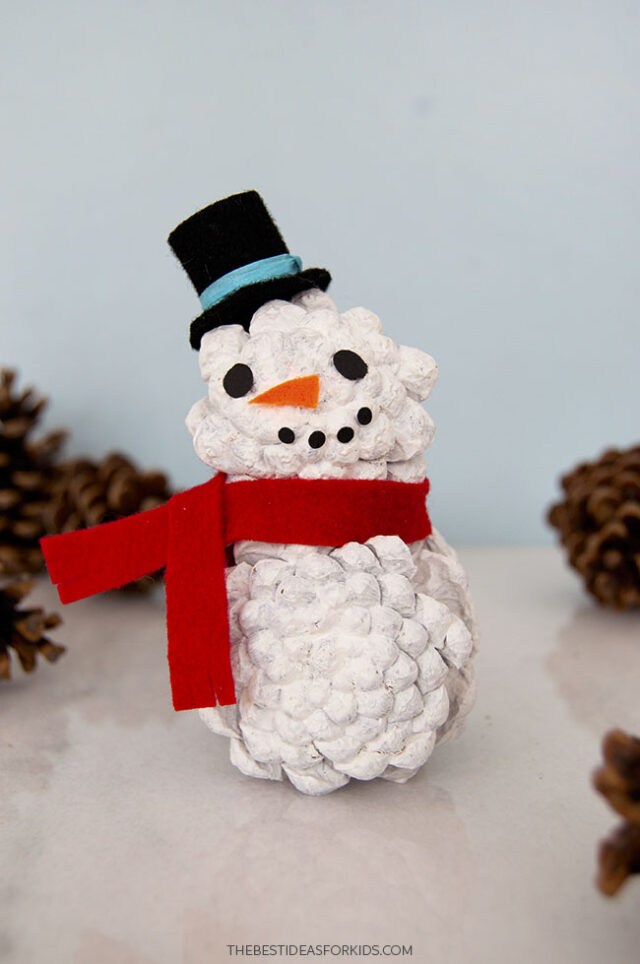
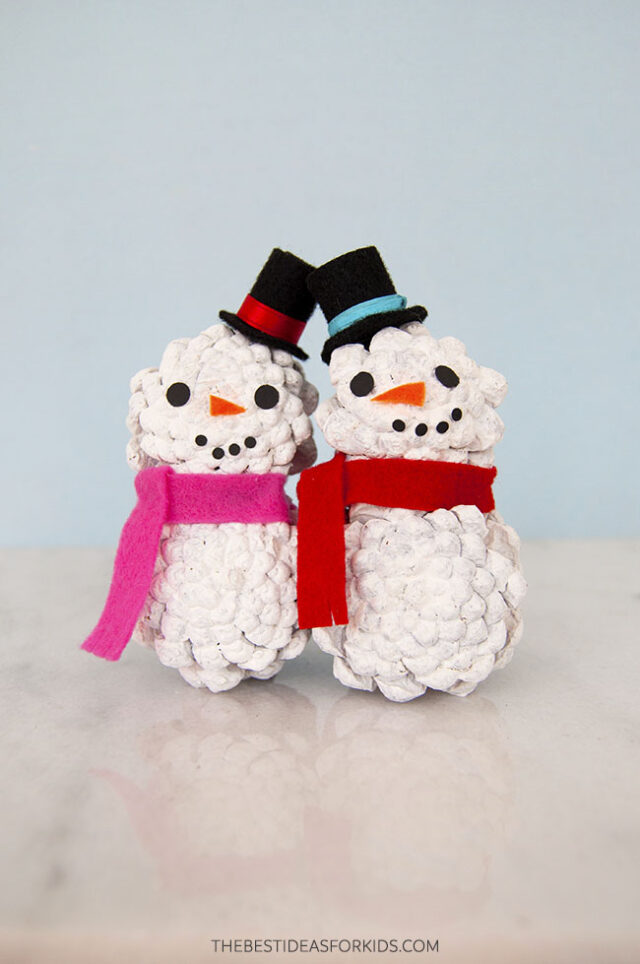
Mix and match colors of scarves and hats to make a whole family of snowmen. Even if it isn’t snowing yet where you live, these pine cone snowmen are a fun craft to make in winter. They also make adorable ornaments you can gift for Christmas.
Supplies Needed
- Pine cones – 2 per snowman
- Hot glue gun – used with adult assistance
- White glue or tacky glue – to attach the snowman’s facial features
- Felt – black for the hat, orange for the carrot nose, and any color for the scarf
- Scissors – for cutting the felt details
- White acrylic paint – for painting the pine cones
- Paintbrush – a medium-sized one
- Ribbon – to add the stripe detail on the hat
- Black cardstock – for the eyes and mouth
- Hole punch – to make the eyes and a mini hole punch for the mouth dots. You can also paint the eyes and mouth on with black acrylic paint.
- String or twine – to turn the snowman into an ornament
How to Make a Pine Cone Snowman
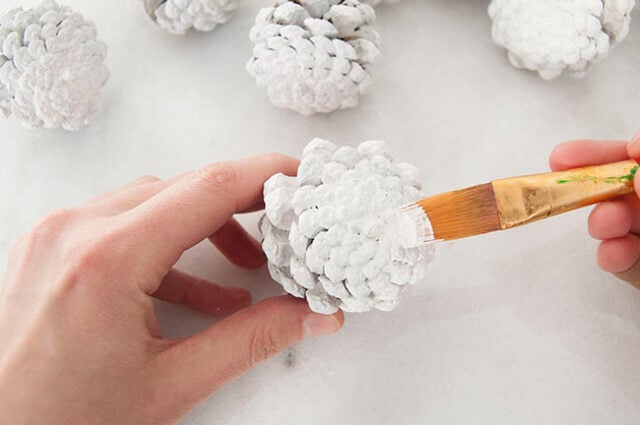
1. Paint the pine cones white.
Use a medium-sized paintbrush to apply white paint to the bottom of 2 pine cones. You can also paint the whole pine cone if you want the back to be white also.
Paint 2 pine cones per snowman and set aside to dry.
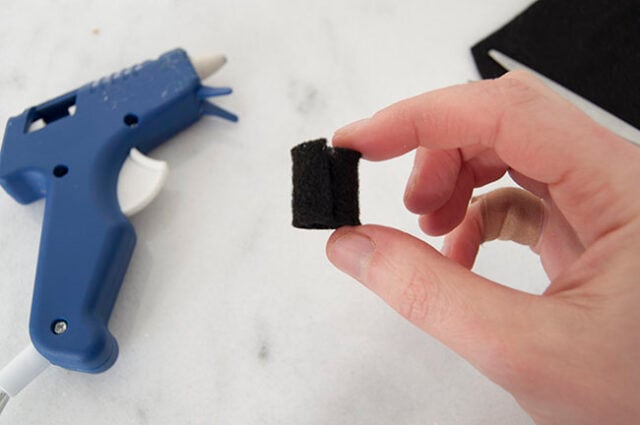
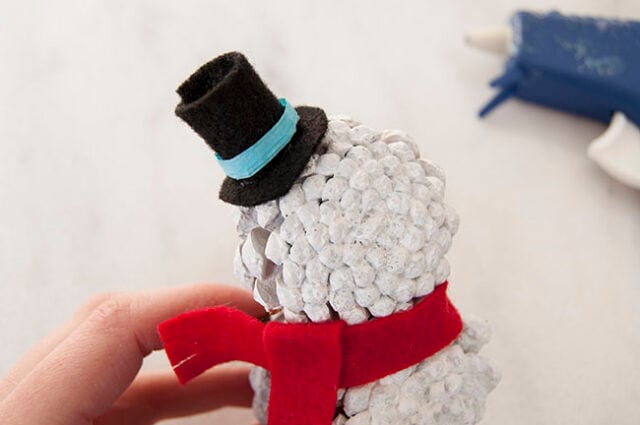
2. Start assembling the top hat.
Cut out a rectangle from black felt that is about 1″ wide and 2 1/4″ long.
With adult assistance, apply hot glue to the short end and roll the felt into a tube.
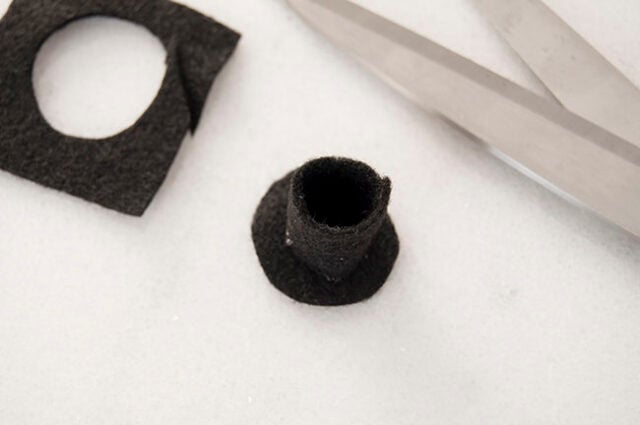
3. Create the brim.
Apply tiny dots of hot glue onto one end of the felt tube and attach it to a piece of black felt.
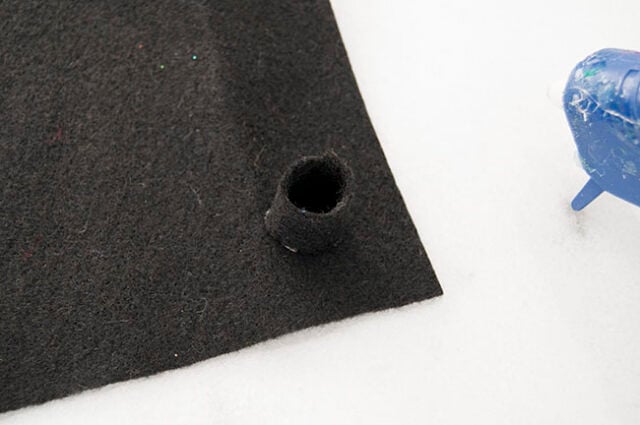
Use scissors to cut out a circle around the tube, forming a brim.
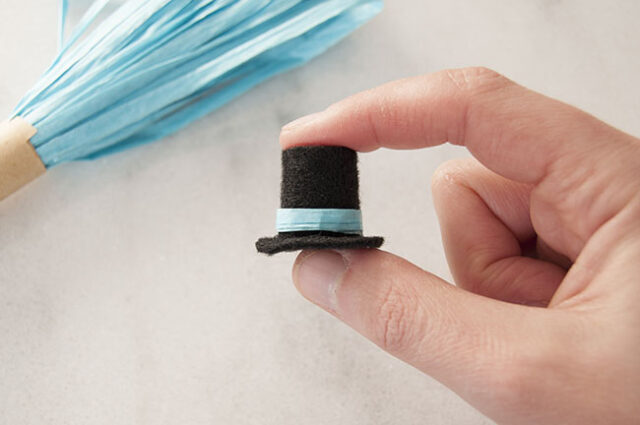
4. Add the hat detail.
Cut a piece of ribbon or trim and wrap it around the hat, using glue to secure it in place.
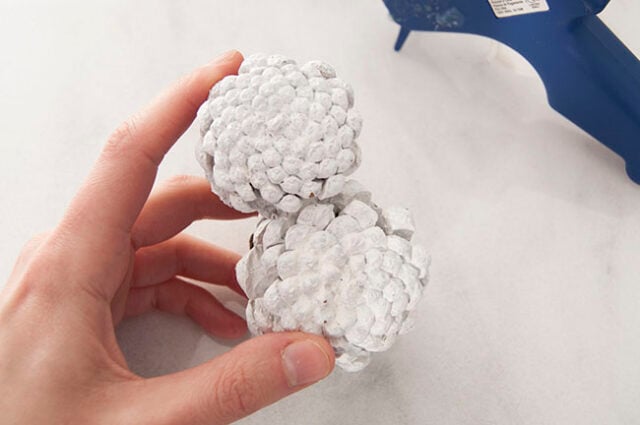
5. Glue the pine cones together.
When the painted pine cones are dry, use hot glue (with adult assistance) to attach them together.
You may need to adjust how each pine cone fits together depending on the size. You will likely find that certain sides will sit together more easily, almost like puzzle pieces, which will make it easier to glue them together.
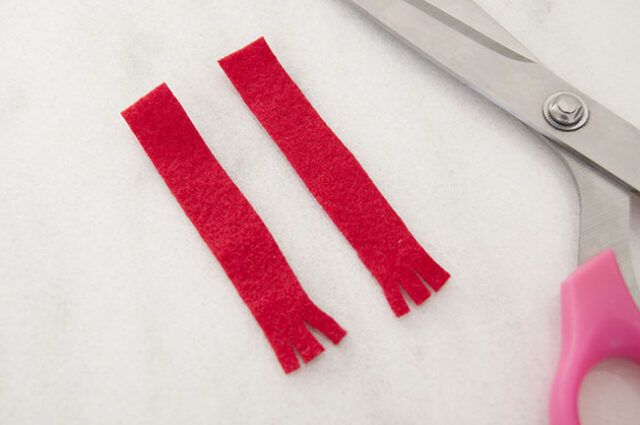
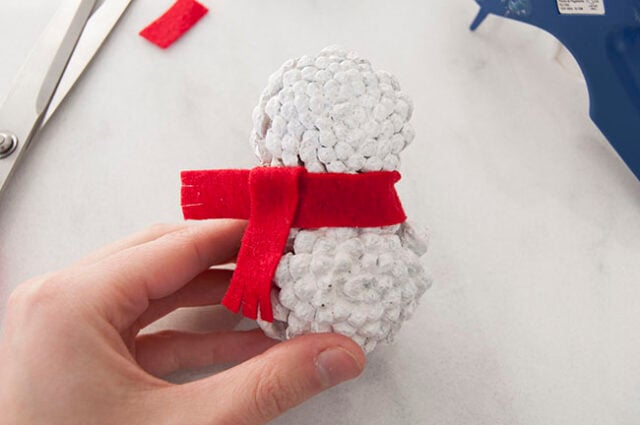
6. Make the snowman’s scarf.
Choose a color of felt for the scarf and cut 2 pieces, each about 3″ long and 3/8″ wide. Use your scissors to snip a fringe into one end of each piece.
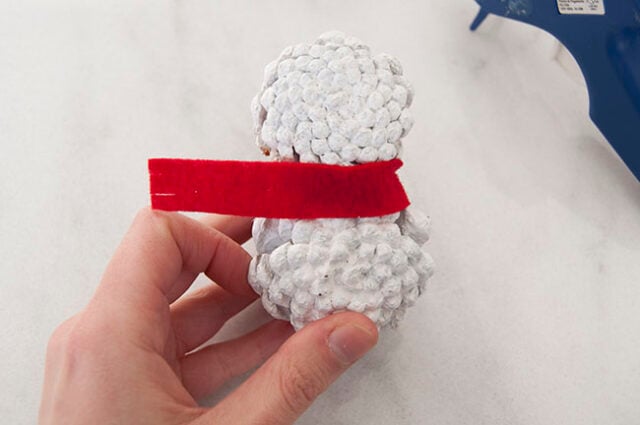
7. Attach the scarf.
Take 1 of the red felt pieces and with adult assistance, hot glue it in between the 2 pine cones, so that the un-fringed end can wrap around to the side a little.
The fringed end should be hanging away from the snowman’s body by about 1″ or so.
Now take the second red piece and lay it across the first piece, with the fringed end pointing down.
Fold the un-fringed edge over the horizontal scarf and hot glue (adult assistance) in place.
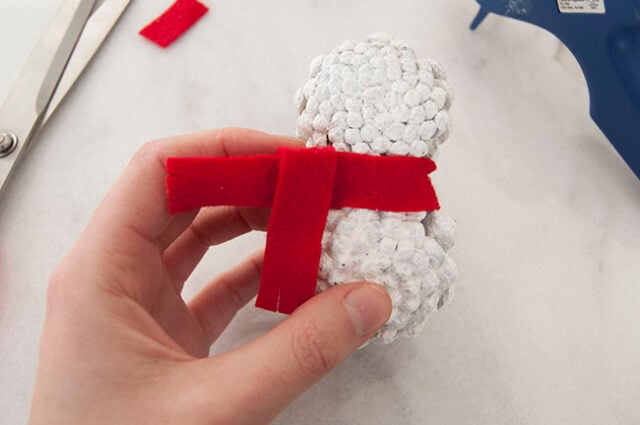
Now glue down the back of the scarf to the back of the pine cone.
It should now look like the snowman has a scarf wrapped around him. If the scarf is looking too long, trim and re-fringe the ends as needed.
8. Attach the hat.
With adult assistance, hot glue the felt top hat to the top of the pine cone snowman’s head.
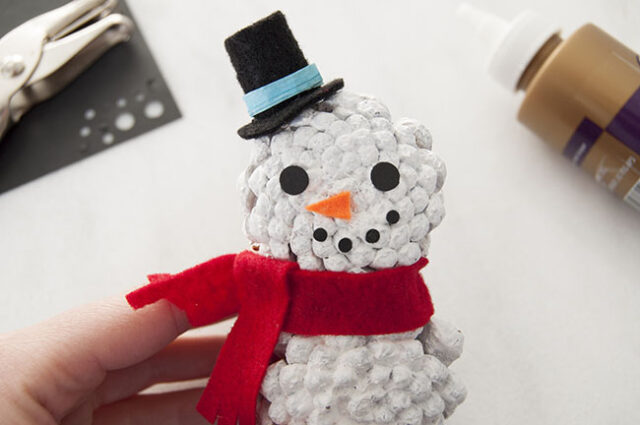
9. Make the snowman’s face.
For the eyes: Use a regular hole punch on black cardstock to make 2 circles – these will be the snowman’s eyes.
For the mouth dots: use a mini circle puncher.
If you don’t have a mini circle puncher, you can cut circles out with scissors or paint them on with black acrylic paint. Use the back of a paintbrush and pencil to make dots with the paint on the snowman’s face.
For the nose: cut out a small triangle from orange felt and glue to the face.
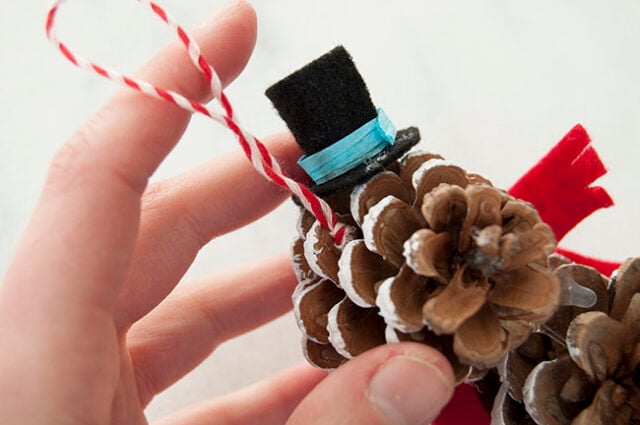
10. Attach a string loop.
To turn your snowman into an ornament, cut a piece of string and tie it into a loop.
With adult assistance, hot glue the loop to the top of the pine cone and let dry.
You can make as many snowmen as you’d like!
This is a fun way to craft with pine cones that you already have or extend the activity by taking a nature walk to look for them.
These snowmen make great decorations all winter long, not just for the holiday season.
Dress them up in colorful scarves, felt top hats, and you can even get creative with other accessories – sticks for arms, pipe cleaner glasses, you name it!


Share a Comment!
We LOVE hearing from you! Submit your question or comment here.
Your email address will not be published.
Required fields are marked *