

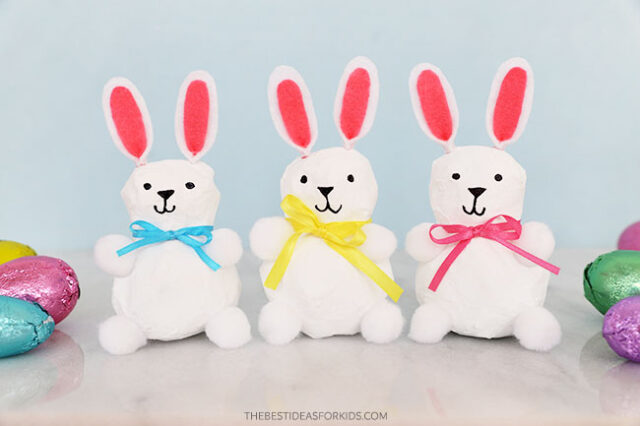
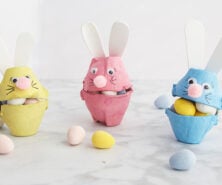
Get ready for Easter with this cute Paper Mache Easter Bunny! This is a great project to introduce your kids to paper mache (papier-mâché). Since the bunnies are first sculpted with crumpled up newspaper, you only need to do one layer of paper mache, so that means less drying time!
RELATED: Easter Crafts for Kids
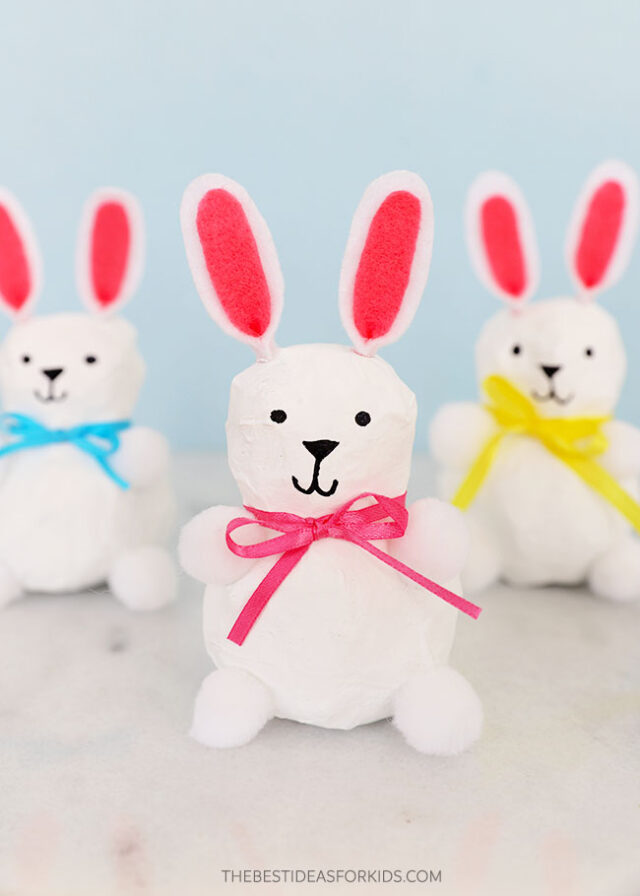
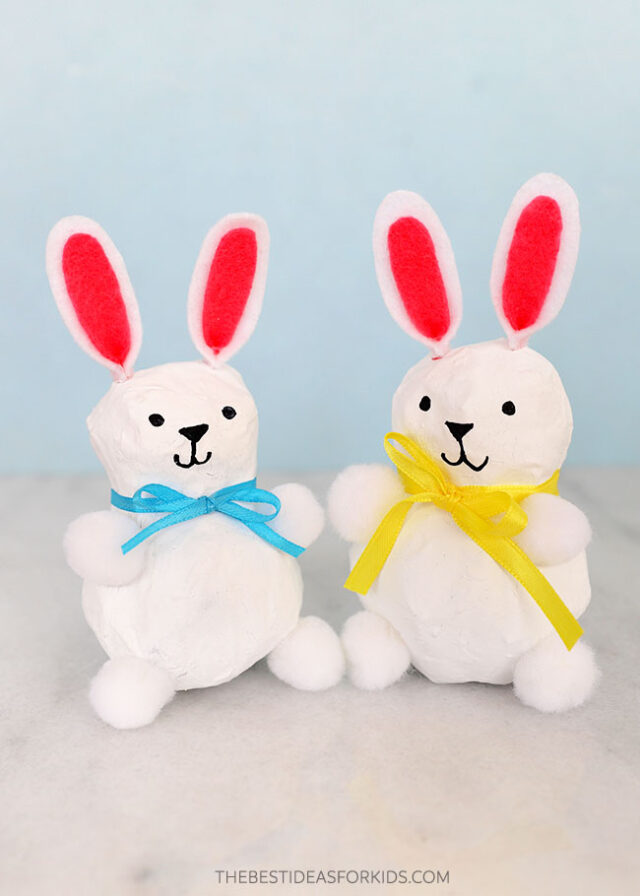
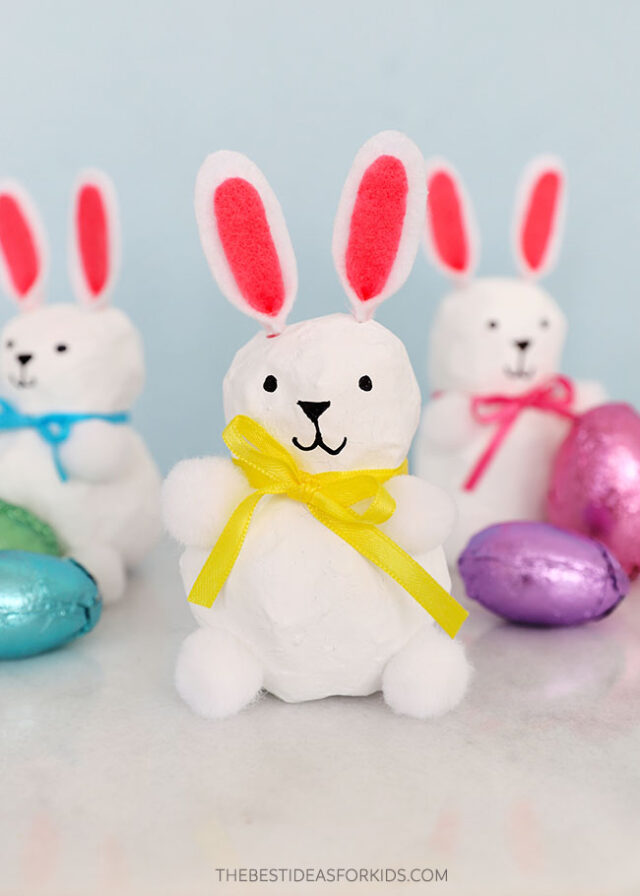
Paper Mache Bunny Craft
These cute bunnies will last for years to come and easily store away in your Easter storage bin.
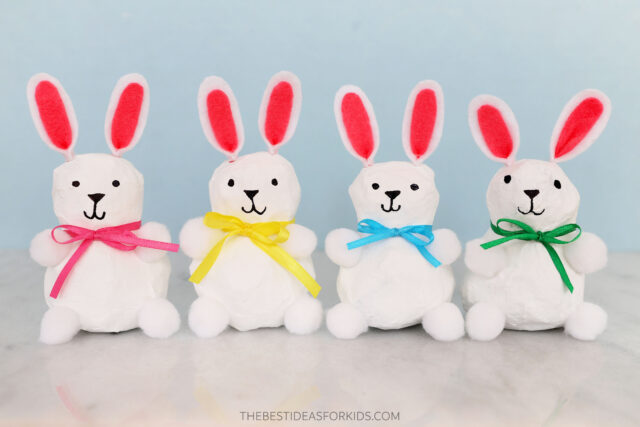
Make a whole family of bunnies and use them to decorate your house for Easter. Or give them out to friends and family.
Kids will love playing with them too!
Supplies Needed
- Newspaper – or flyers
- Flour and water – to make the paste
- Paintbrush
- Felt – white and pink for the ears
- Chalk – for tracing the templates onto the felt
- Printable bunny ear templates – you can find the template at the bottom of the post
- Scissors
- Pom poms – white, for the arms and legs
- Black marker – permanent black marker, for the face
- Hot glue gun – used with adult assistance
- Ribbon – in bright colors, narrow enough to tie a small bow
How To Make Paper Mache Easter Bunnies
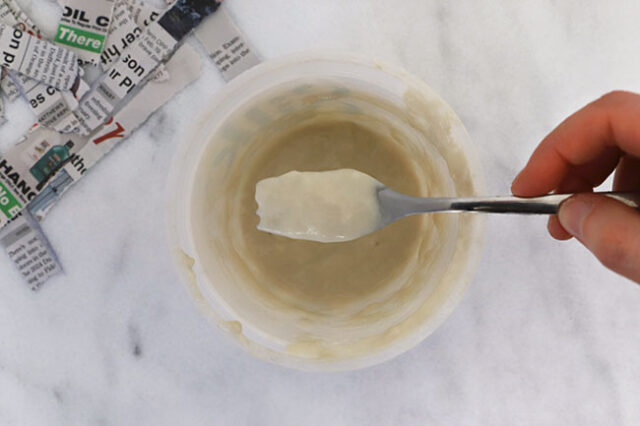
1. Make the paper mache paste.
- In a container or jar, add 1 part flour to 2 parts water. To make 3 bunnies, 1/2 cup flour and 1 cup of water is a good amount.
- Stir the flour and water together until it’s as smooth as possible.
- Microwave in 15 second bursts, stirring well between each time. For the first few bursts, it won’t look like anything is changing, but then you’ll notice the paste really thickens up and clumps will form. When this happens, stop microwaving and stir well again, breaking up any clumps with your spoon or fork as much as possible. Adults do the mixing as it will be hot.
- Set aside to cool before using. Adults: check the temperature of the paste to be sure it’s cool enough to touch before using.
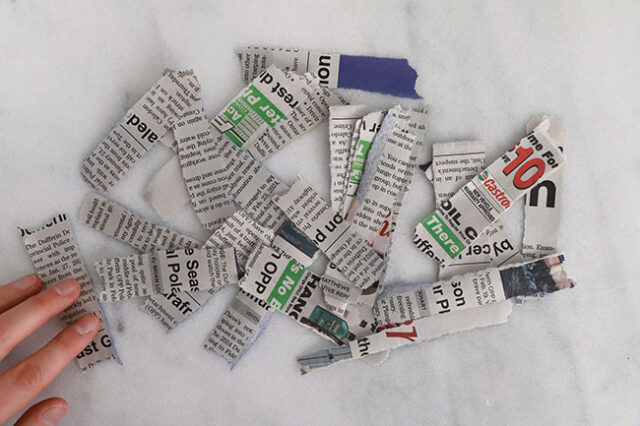
2. Rip the newspaper strips.
Rip up a newspapers or flyers into narrow strips, about 1/2″ wide and 3″ to 5″ long. The exact size of the strips doesn’t matter, and it can be helpful to have them vary in size a little bit.
Tip: When ripping the newspaper into strips, be sure to rip off and throw away any of the straight machine edges. These won’t blend as smoothly when applying later, and can leave noticeable lines on your bunnies.
3. Make the bunny bodies.
Crumple a large piece of newspaper into a ball, a bit bigger than a ping pong ball.
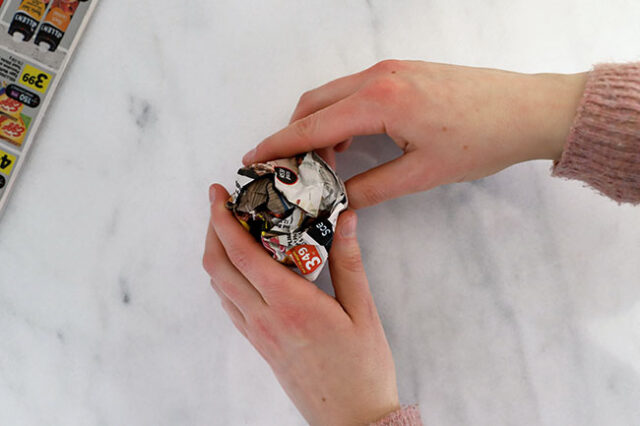
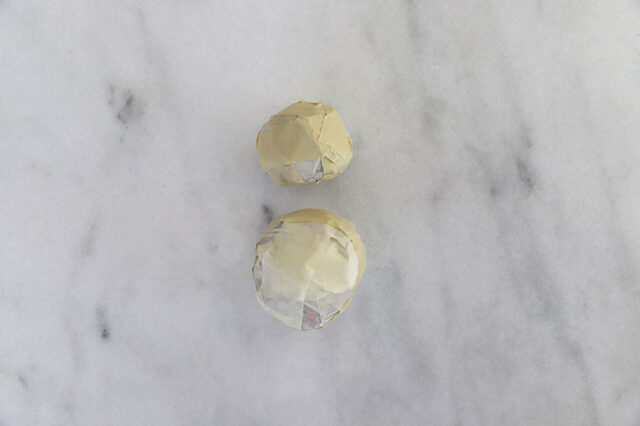
Use masking tape to wrap around the newspaper ball, keeping it in its round shape.
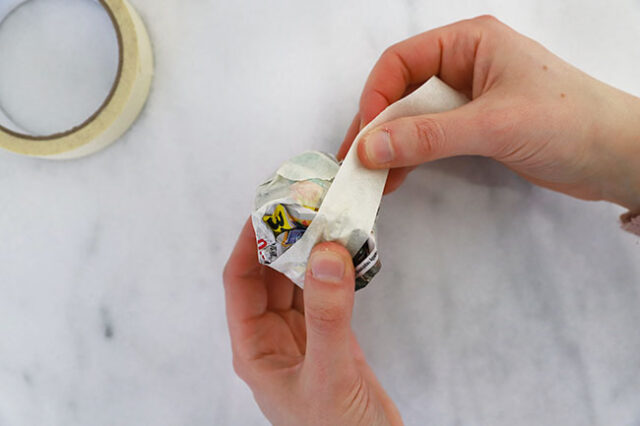
Continue wrapping with tape until the newspaper ball is completely covered, with no newspaper visible.
This is important for later: paper mache dries best over non-porous surfaces, like the masking tape. If the newspaper ball inside isn’t taped over, and paste soaks into the ball, it may not dry completely and could get moldy in the future.
Make another newspaper ball, covering it in masking tape as you did with the first one. The second ball should be slightly smaller. The larger ball will be the bunny’s body and the smaller one is the head.
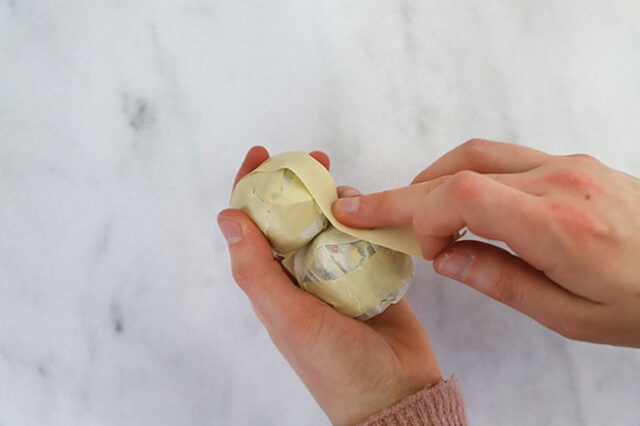
Hold the larger ball in your hands and find the flattest side – if you put it on a table, see which side it likes to sit on. This flat side will be the base of the bunny.
Take the smaller ball and hold it to the top of the larger ball, so that it looks almost like a snowman, with the flat side on the bottom.
Use masking tape to attach the two balls together securely.
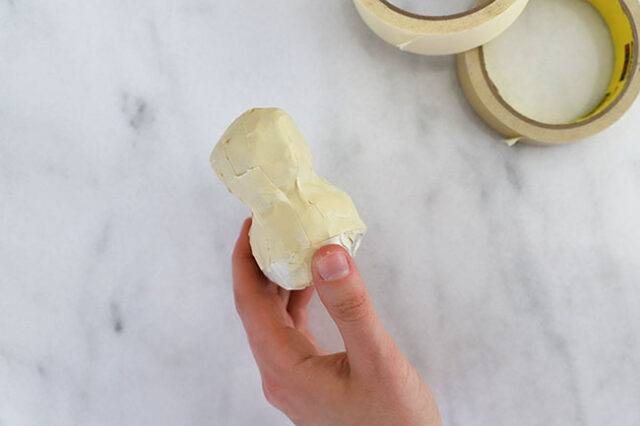
It’s okay if the body doesn’t sit perfectly flat on the table – adding the pom pom legs later will help keep it stable.
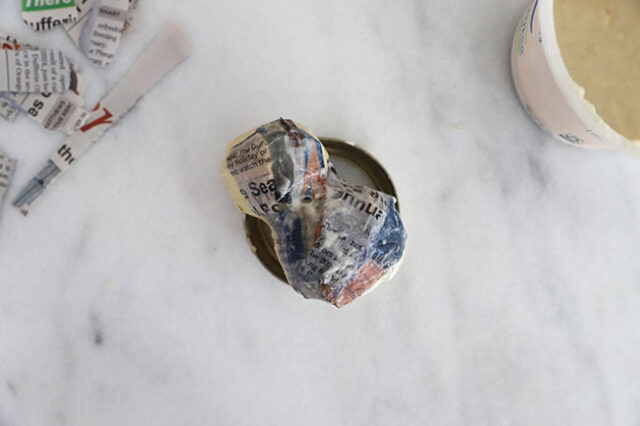
4. Paper mache the bunny.
Once the paste is cool, take a strip of newspaper and dip it into the paste. Use your fingers to wipe away the excess paste, so that the strip is still wet and coated, but not dripping.
Apply the strip onto the bunny body, smoothing it around the shape of the body.
Continue applying newspaper strips onto the bunny body in the same way, overlapping them each slightly and keeping it as smooth as possible. Continue until the entire bunny is covered.
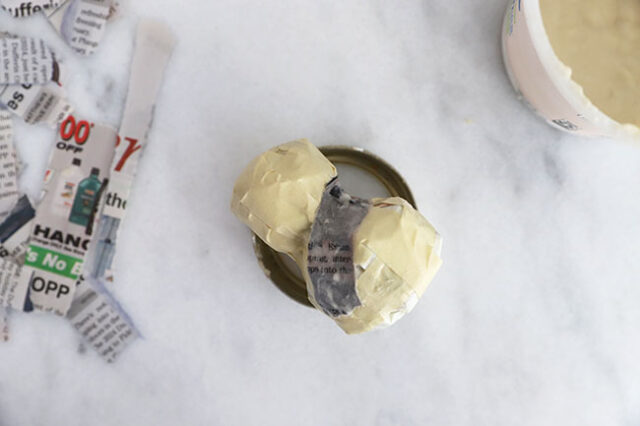
Rest the body in a jar lid as you work.
It can also be helpful to work over a piece of parchment paper to keep your work surface tidy.
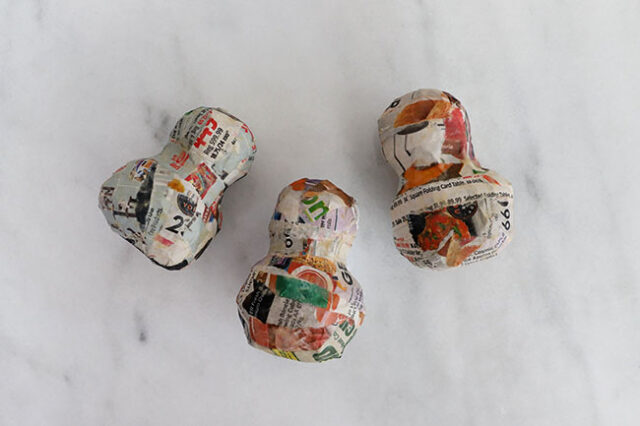
Set aside to dry completely, at least overnight but ideally 24 hours. They will feel dry and hard when they’re ready to use.
5. Paint the bunny bodies.
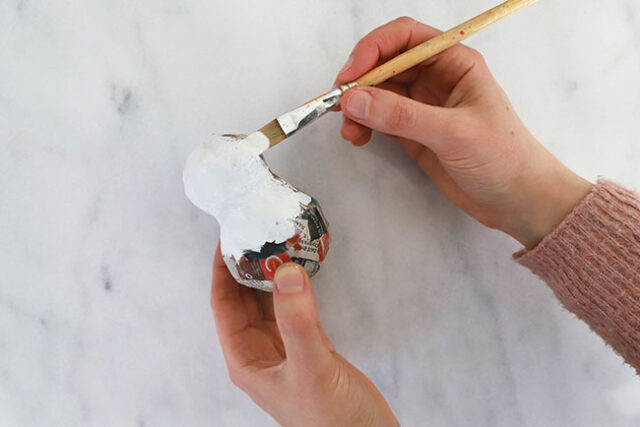
Apply a coat of white paint onto the bunny body.
If you notice that as the paint dries, small cracks form in the paint, that usually means the paper maché layer hasn’t completely dried underneath. Give it a little more time to dry, and apply another coat of white paint on top to cover any of the cracks.
Set aside to dry completely.
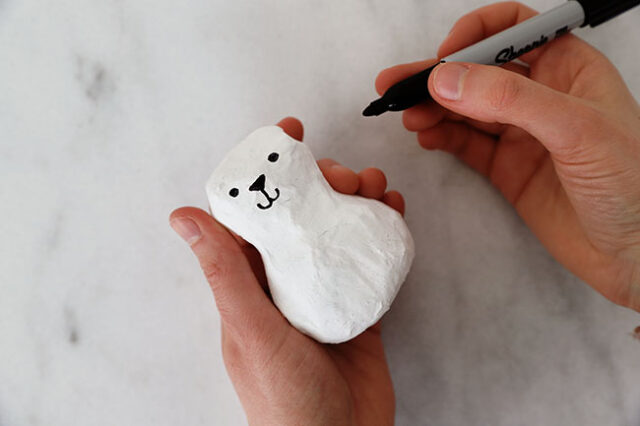
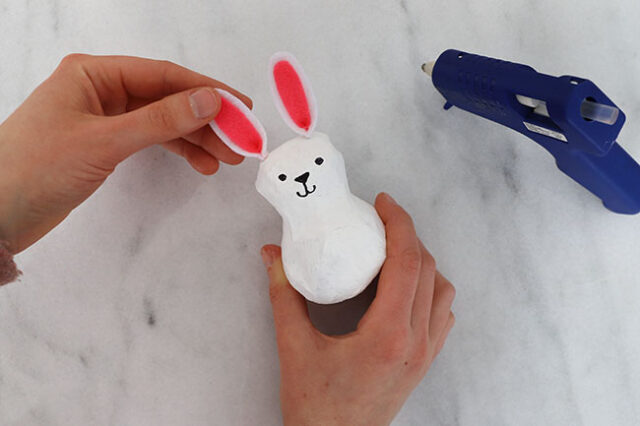
6. Draw the bunny face.
Once the paint is dry, use a black permanent marker to draw the bunny’s face onto the head.
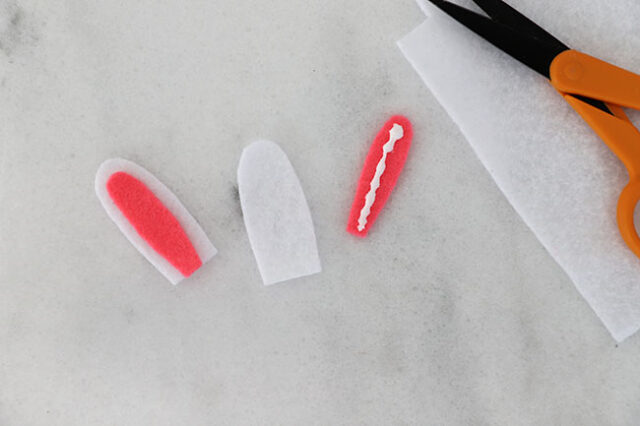
7. Make the bunny ears.
Print out the printable template. You can get the template at the bottom of the post.
Cut out the shapes. Use chalk to trace them onto felt – you need 2 outer ears on white felt and 2 inner ears on pink felt.
Cut them out and glue the 2 layers together with tacky glue.
With adult assistance, apply a small dab of hot glue at the center of the bottom edge of the ears. Carefully pinch the felt together, forming a small fold in the felt. Repeat for the second ear.
Apply another small dab of hot glue to the bottom of the felt ear and attach it to the top of the bunny’s head.
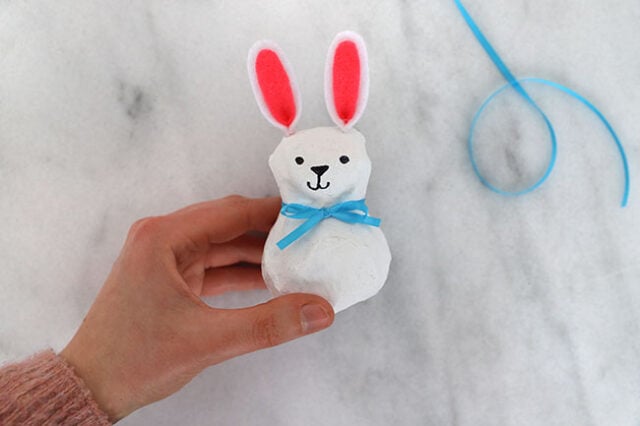
8. Add a neck bow.
Tie a ribbon around the bunny’s neck, tying a small bow in front. Cut off any excess ribbon.
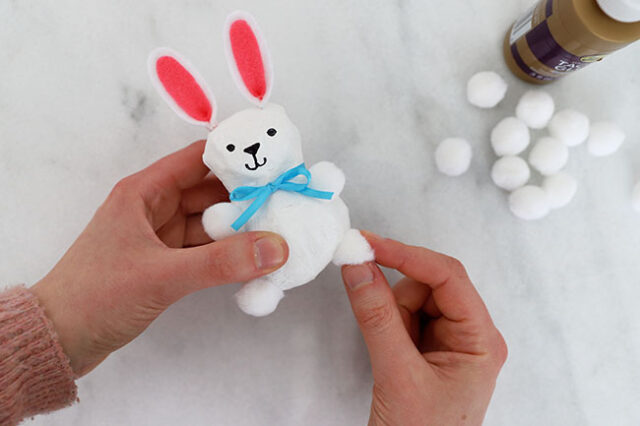
9. Add the arms and legs.
Use hot glue or tacky glue to glue on 4 white pom poms to the bunny’s body for the arms and legs.
When gluing on the legs, position them to help the bunny stand upright on the table.
Glue 1 last pom pom onto the back of the bunny as a tail.
You can make as many bunnies as you’d like!
We made all these bunnies white, but you can also choose to make the bunnies different colors like yellow, pink or blue.

Share a Comment!
We LOVE hearing from you! Submit your question or comment here.
Your email address will not be published.
Required fields are marked *