

If you are looking for a DIY project that’s perfect for fall, make some leaf lanterns! These paper lanterns are simple enough for kids to help make and will look beautiful as a part of your fall décor.
Related: Pressed Flower Lanterns
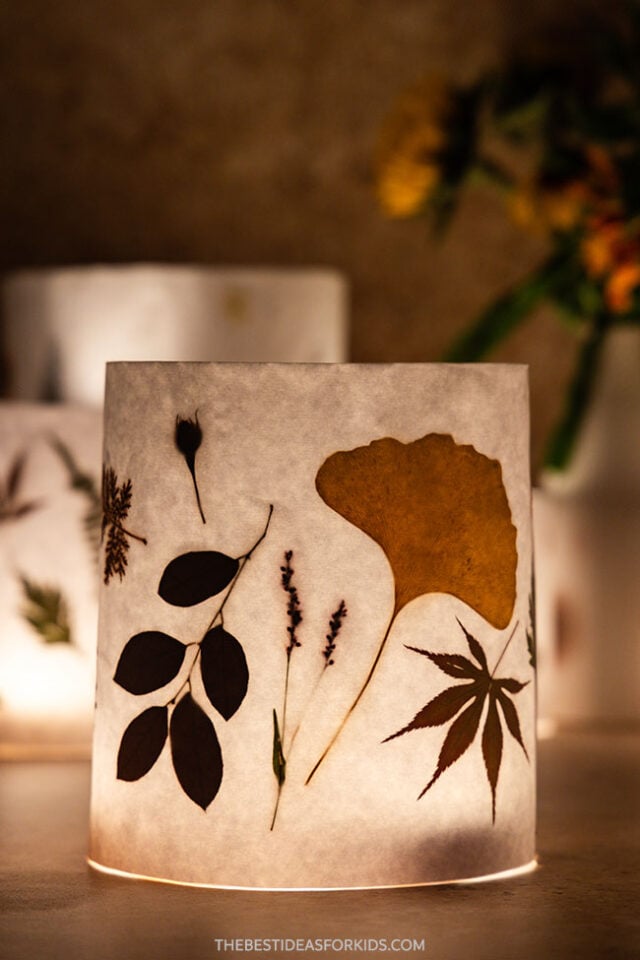
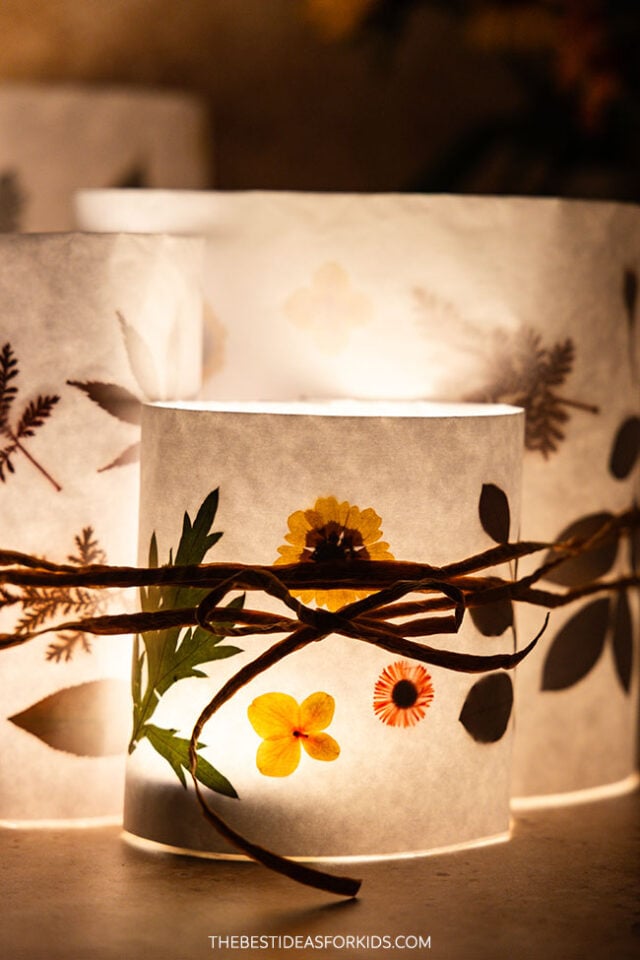
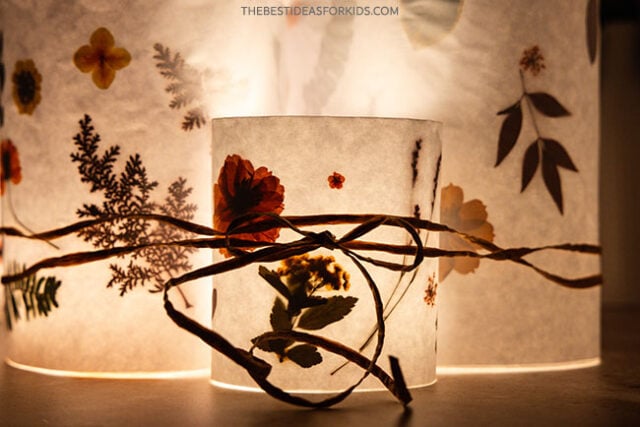
These leaf lanterns use pressed leaves and flowers for a beautiful look when they are illuminated. You can choose a variety of leaves and flowers to customize them.
Head outside on a fall scavenger hunt to find leaves to use.
See how to press your own flowers.
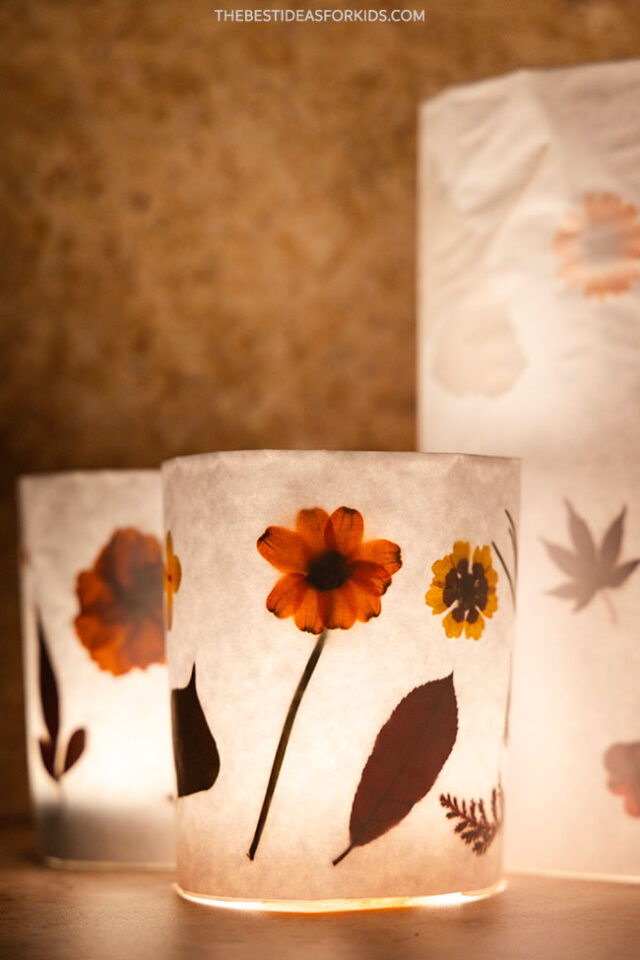
Kids will love to turn out the lights and see them light up! They look so pretty in a dark room.
Supplies Needed
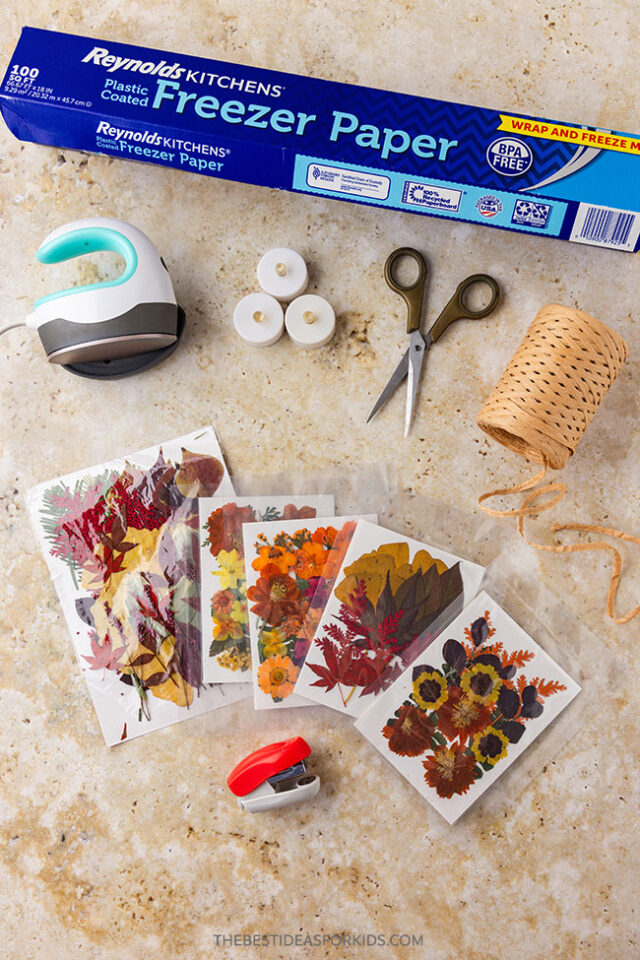
Here’s what you need:
- Dried leaves and flowers – or you can learn how to press your own flowers
- Scissors
- Iron (adults only)
- Stapler
How to Make Leaf Lanterns
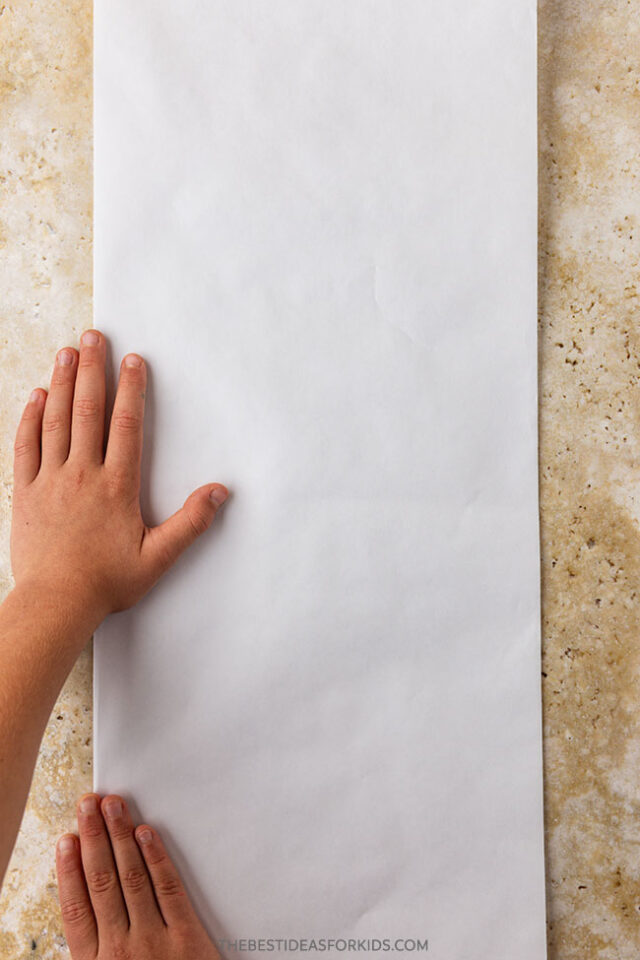
1. Cut long strips of freezer paper.
For our largest lantern, we pulled the freezer paper out to about 24 inches.
To make the smallest lanterns, we cut the width and height in half. You can play with the height and width to find the size that’s right for you!
2. Preheat your iron (adults to do this part).
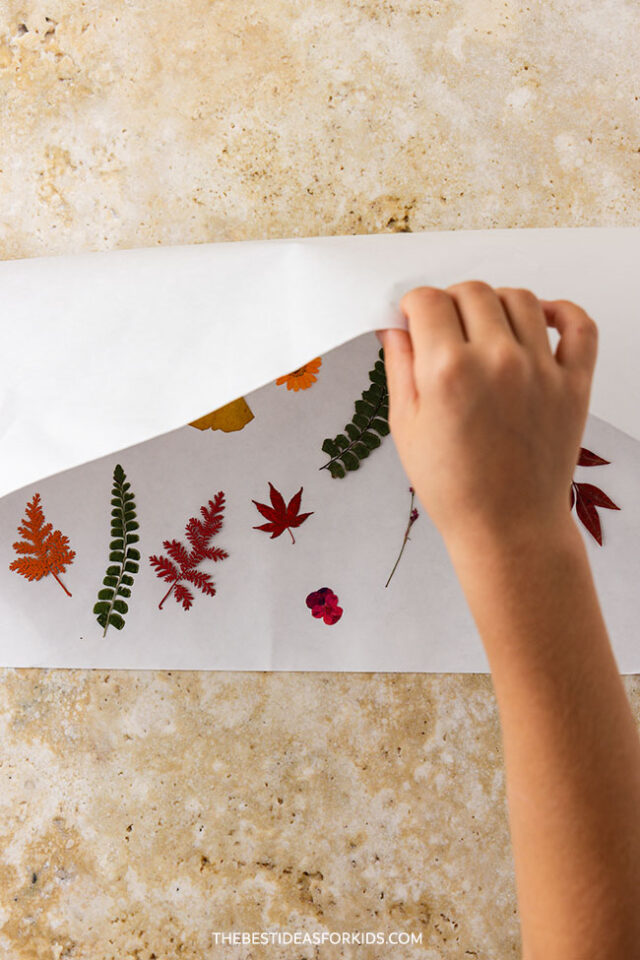
3. Fold one strip of freezer paper in half, lengthwise, waxy sides together, and press flat.
4. Open the freezer paper back up.
The folded edge should be up top, and the open edge closest to you.
Place the dried leaves and flowers on the bottom half of the luminary.
Leave about 1-2 inches of free space on each side close to the edges.

5. When you’ve filled in the paper with as many flowers as you’d like, carefully fold the freezer paper in half again, covering the leaves and flowers.
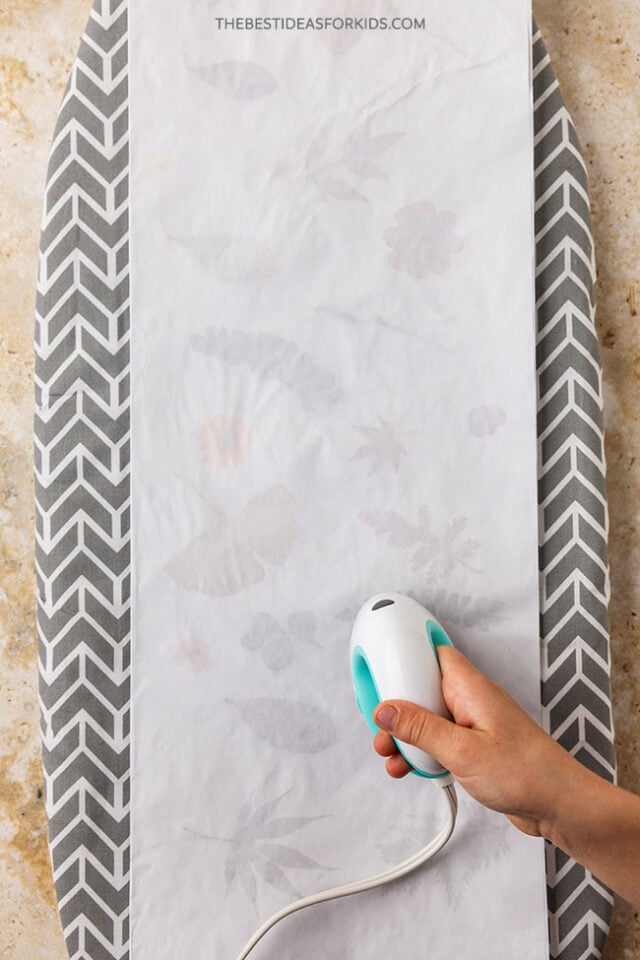
6. Use the iron.
Have an adult press the iron onto the top of the wax paper, making sure to go over each leaf and flower to melt the wax, locking everything in place.
Note: Before pressing, if you need to move your leaves to a safe surface for ironing, do so carefully.
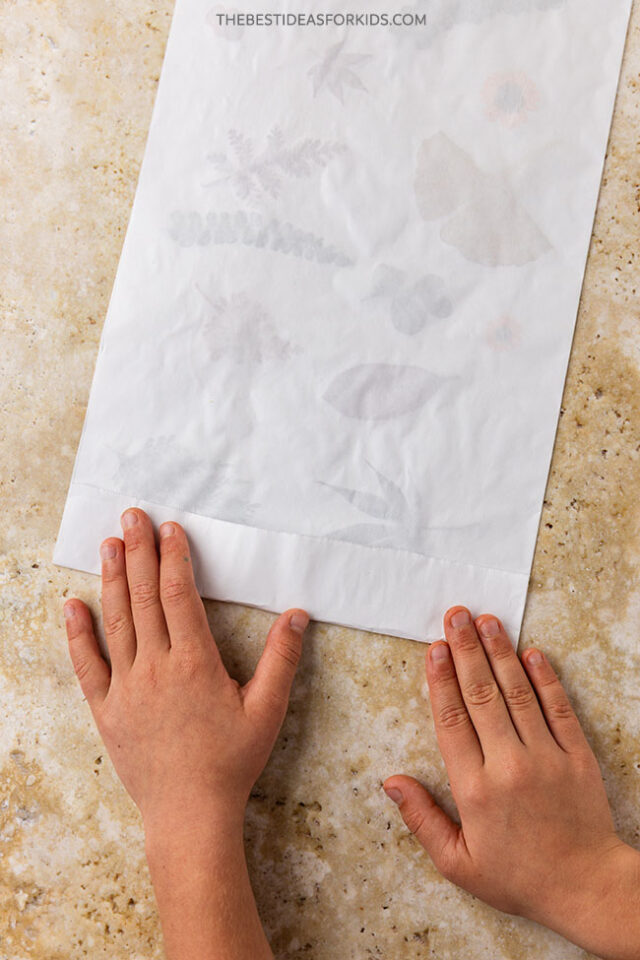
7. Turn the paper.
Turn the paper over, so that the backs of the leaves are facing up and fold each end over about 1 inch- this will give your lantern a nice, finished edge when stapled.
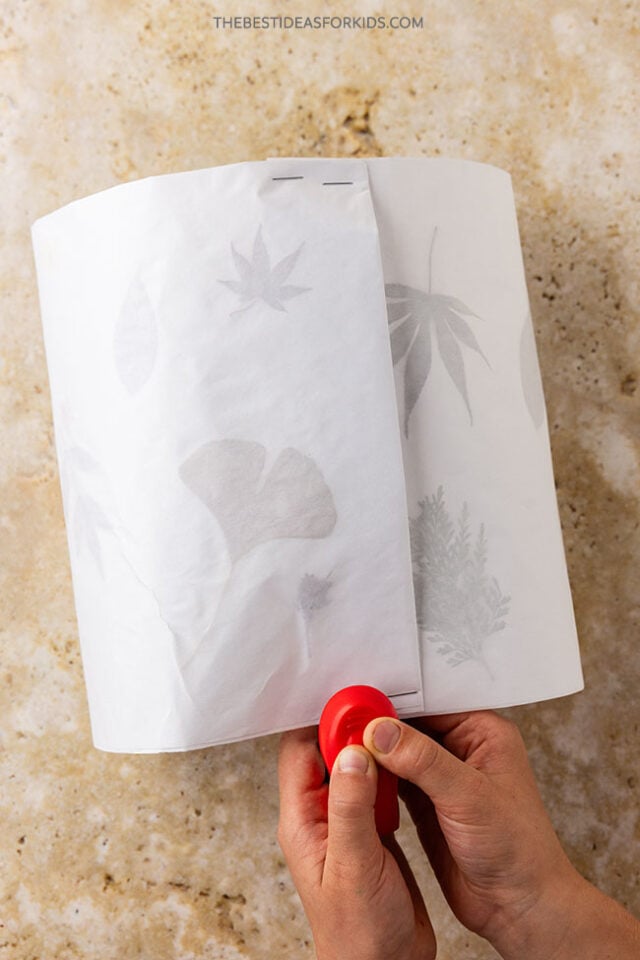
8. Form a cylinder.
Make sure the fronts of the leaves and flowers are facing out, then overlap the folded edges to create the seam on the backside of the lantern. Staple to attach.
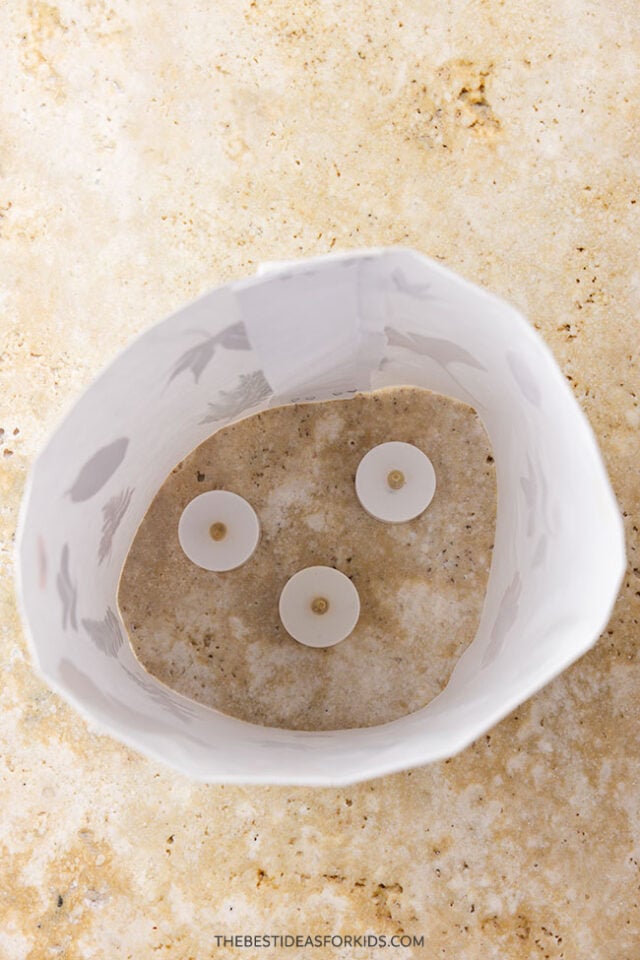
9. Light up the lanterns.
To set up your lanterns, place a few battery-powered tea light candles in the middle – the more you place inside, the brighter they will glow!
Try adding more than one tea light to see how it changes the look of the lanterns in the dark!
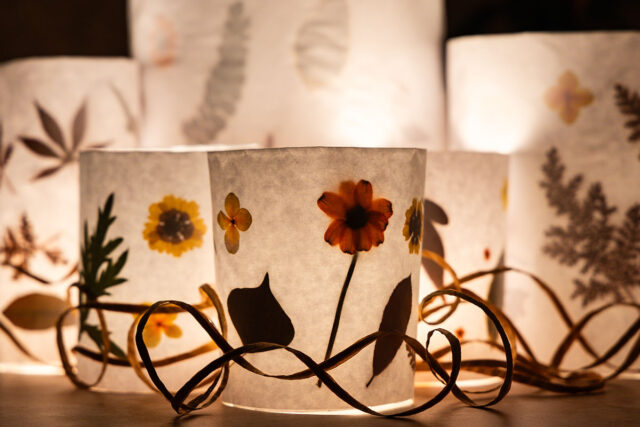
These pressed leaf lanterns are easy enough for kids to help make and they are fun to place around for fall!
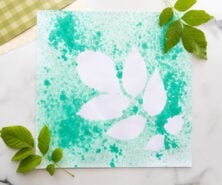
For more leaf activities, try making Leaf Silhouette Art.


Share a Comment!
We LOVE hearing from you! Submit your question or comment here.
Your email address will not be published.
Required fields are marked *