

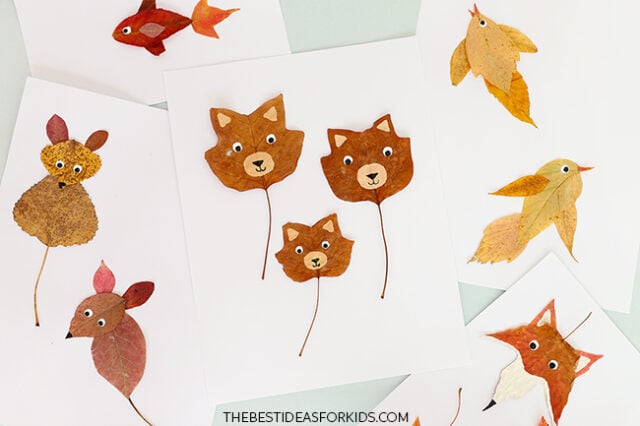
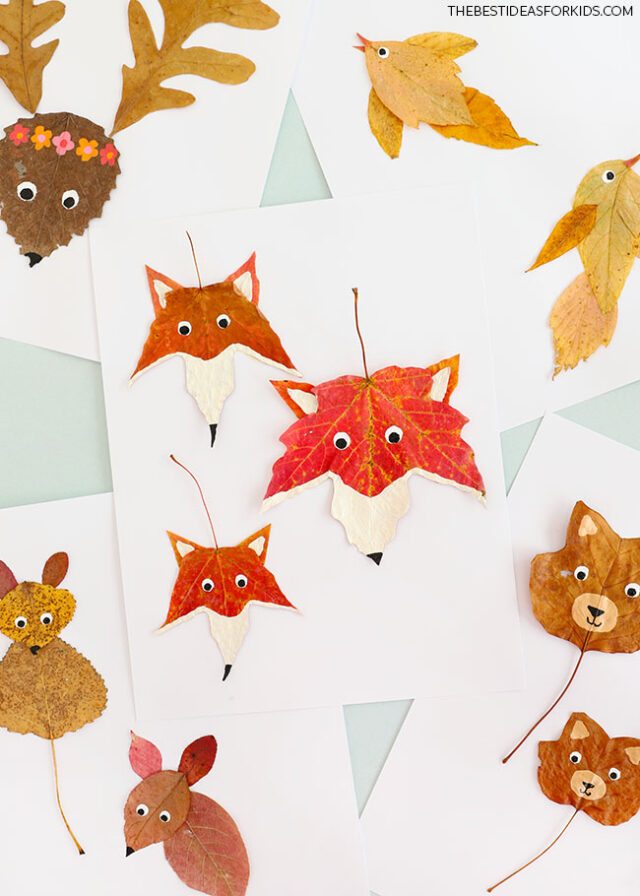
What better way to celebrate the season than to make some adorable leaf animals. This craft is fun for the whole family and kids of all ages will love arranging and rearranging fall leaves to create different animals and shapes.
RELATED: Leaf Painting
We created 8 different animals to inspire you – you can see the step-by-step instructions for each one below. Use these as inspiration to create your own custom leaf animals, too!
You’ll likely find that in your area, you have access to different leaves than we’ve shown here, so have fun adapting and experimenting to come up with your own fall leaf animals.
Supplies Needed
- Fall leaves – see tips and tricks below!
- Scissors
- White glue
- Paint – white, black, and beige
- Paintbrushes
- Black marker
Before starting, follow these steps:
- When gathering leaves, look for leaves that are still flexible and soft – if a leaf is curled up and crunchy, skip it, it’ll be too hard to work with.
- When collecting leaves in the morning, they’ll be wet with dew. This is fine, but if this is the case, look out for slugs. We found that they like to attach themselves to wet leaves, so be sure to check your leaves before you add them to the keep pile.
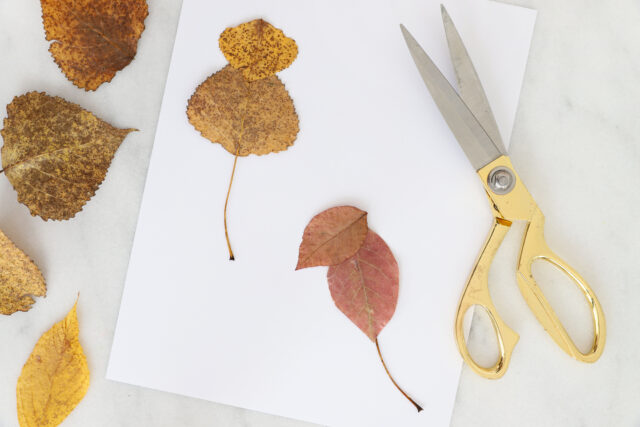
- Make sure to collect more leaves than you think you’ll need, especially oval-shaped leaves. It’s a lot easier to have lots of options to choose from and having lots of oval-shaped leaves in various sizes comes in handy when making these leaf animals.
- Pressing leaves before crafting is optional but recommended. If you craft with fresh leaves as they are, there is a chance that they’ll curl up on your paper as time passes. All leaves are different so this can be tricky to predict.
- To press the leaves: grab a big stack of heavy books and a roll of paper towel. Lay a piece of paper towel on top of the first book and place leaves on top of it in a single layer. Place another piece of paper towel on top, followed by another book, sandwiching the leaves between paper towels and the weight of the books. Repeat this process, stacking more books, paper towels, and leaves, until all leaves are being pressed. The paper towels will help absorb moisture, speed drying, and prevent mold.
- Check on your leaves after a day – they are usually ready to use at this point, but this can vary depending on how wet they were, the type of leaf, etc. If the leaf starts to curl up a bit when not being pressed, you may want to leave them in the books a little bit longer.
How to Make Leaf Animals
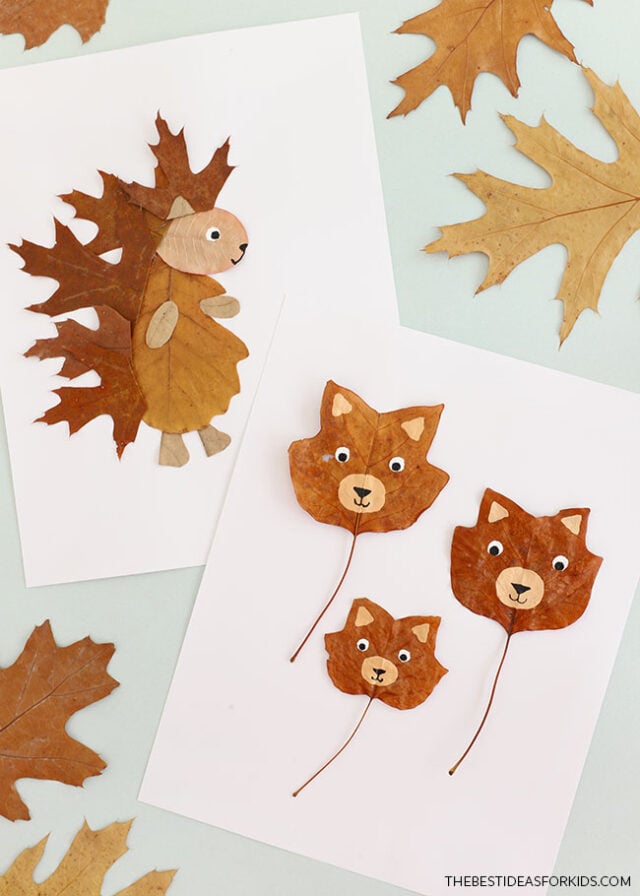
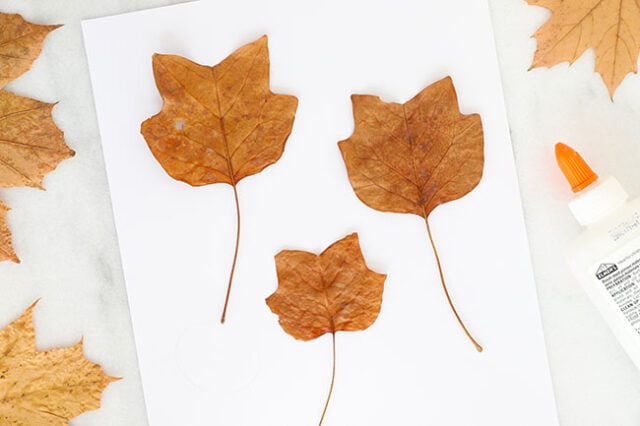
Leaf Cats or Bears
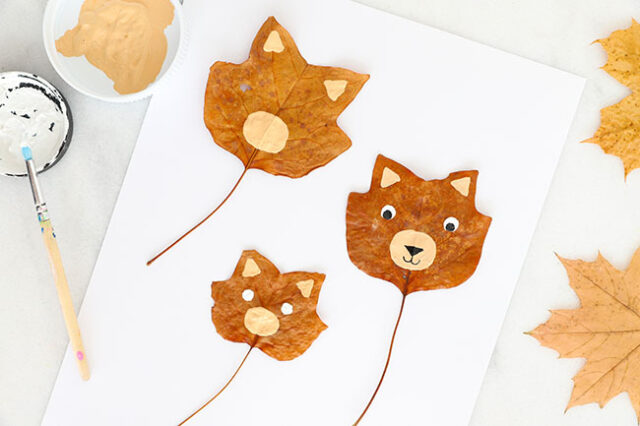
Arrange and glue your leaves onto a piece of cardstock. We used tulip tree leaves here as they’re the perfect cat shape (or bear!), but other leaves work, too! You can also use maple leaves and cut off the center point to just leave two ear points.
Use beige paint to add a round snout and inner ear details onto the leaves, along with white circles for the eyes.
Once this layer of paint has dried, add black dots onto the eyes and use a black marker or black paint to make the nose and mouth.
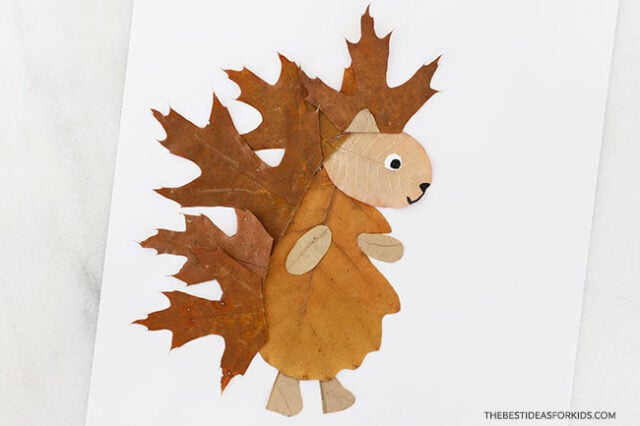
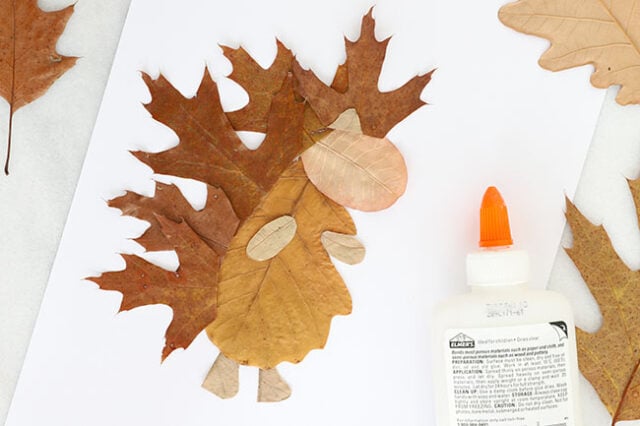
Leaf Hedgehog
Trim the stems off of a small oval-shaped leaf (for the head) and a larger leaf (for the body). We used a white oak leaf for the body, but any large oval-shaped leaf works well!
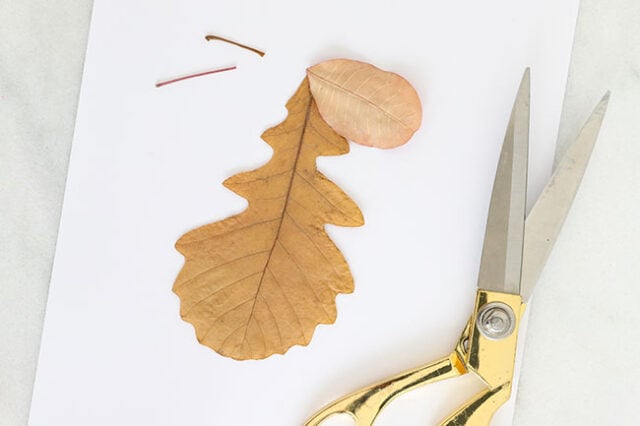
Next, cut red oak leaves in half and arrange the tips of the leaves along the side of the head and body, forming the hedgehog’s spiky back.
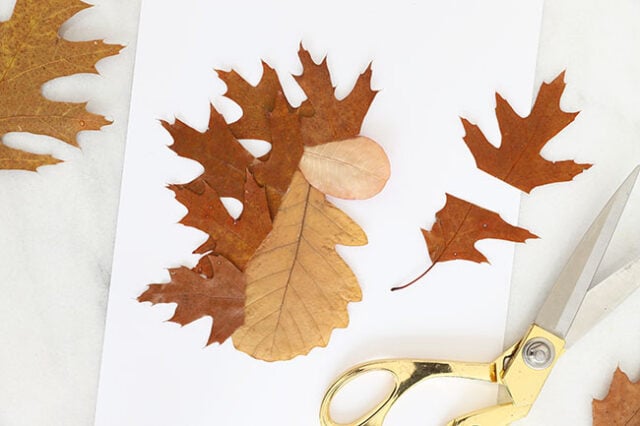
Cut small arms, legs, and 1 ear from another leaf and arrange them onto the hedgehog.
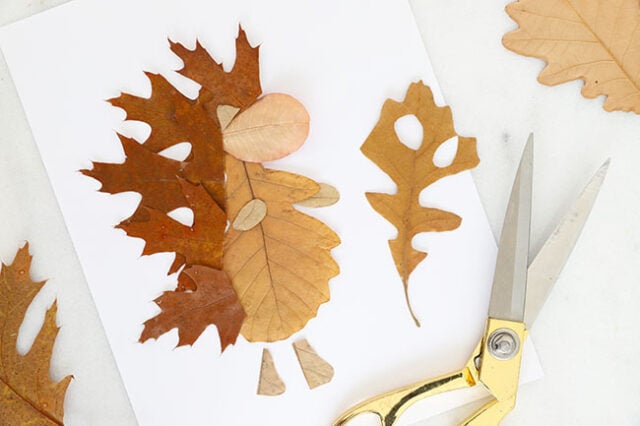
Use glue to secure everything in place.
Add the final painted details – first paint a white circle for the eye, let it dry, and then add the black pupil on top, along with the hedgehog’s nose and mouth.

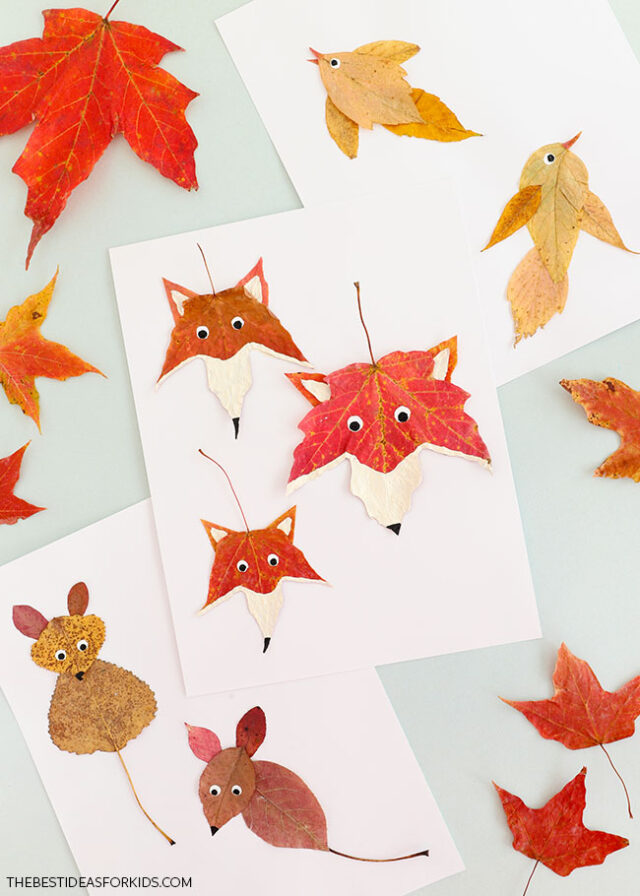
Leaf Mice
Arrange an oval-shaped leaf for the body (keep the stem attached to look like a tail) and a smaller oval-shaped leaf on top for the head. If your body leaf doesn’t have a nice long stem attached, you can cut a stem off of another leaf and use that instead.
Next, add 2 very small oval leaves behind the head to look like ears.
Glue everything down onto the cardstock.
Add the eyes and nose with white and black paint.
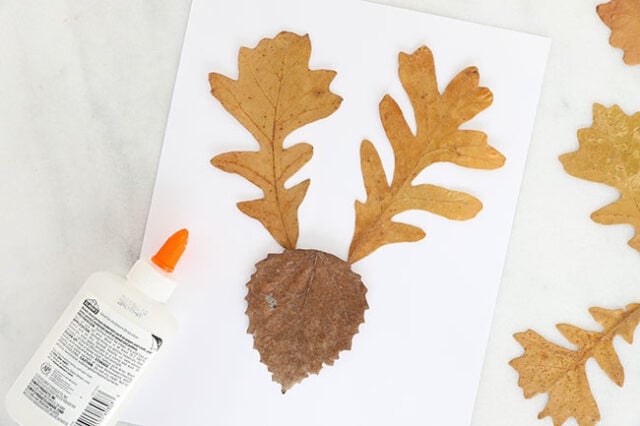
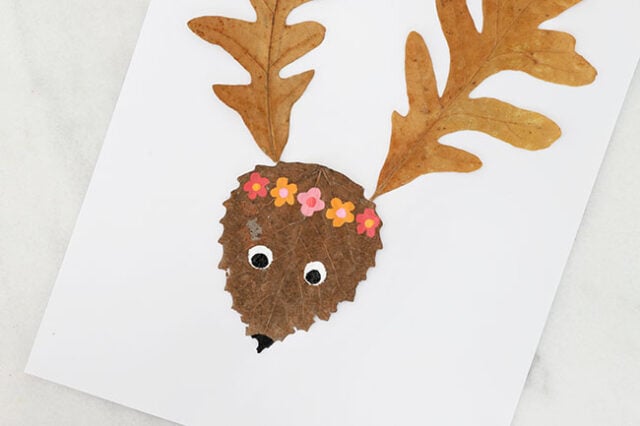
Leaf Deer
Cut the stems off of an oval-shaped leaf (we used an elm leaf) and 2 white oak leaves.
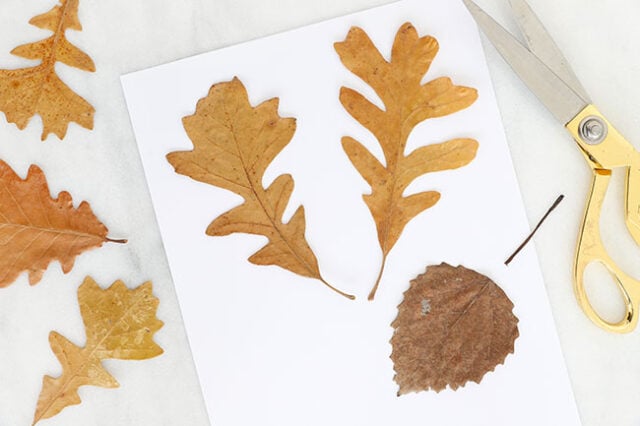
Arrange the two oak leaves as antlers behind the elm leaf head and glue in place.
Paint eyes, a nose, and a flower crown onto the deer’s face.
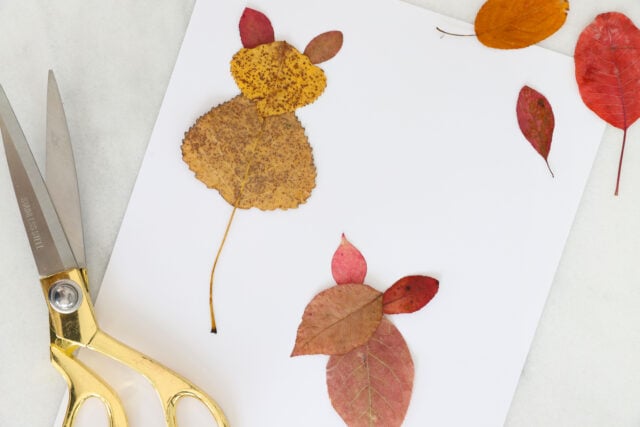
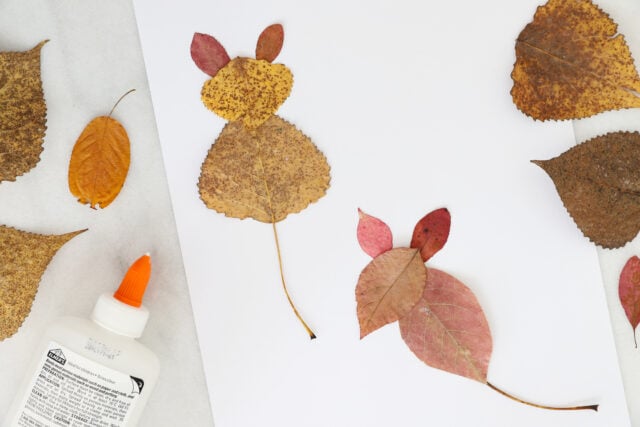
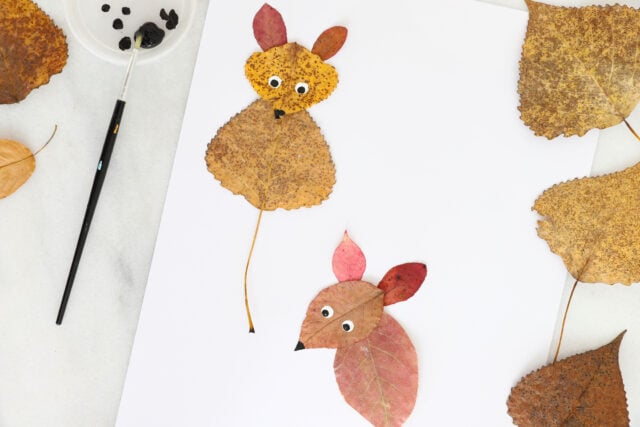
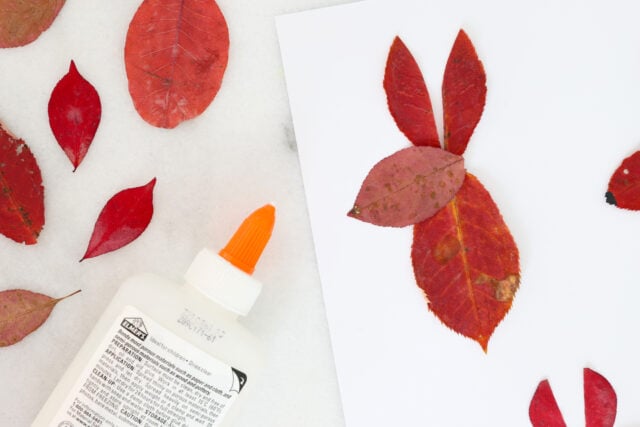
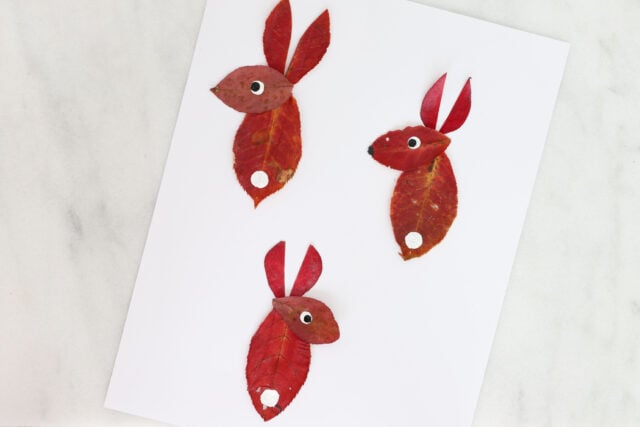
Leaf Bunny
Cut the stems off of oval-shaped leaves and arrange a larger leaf vertically as the bunny’s body and place a smaller leaf on top to form the bunny’s head.

Cut an oval-shaped leaf in half to create 2 bunny ears. Arrange them behind the bunny’s head.

Glue all the leaves down to secure.
Use paint to add eyes, a nose, and a white bunny tail.
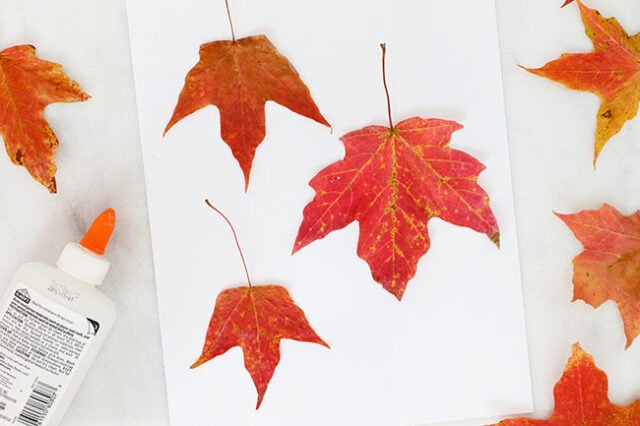
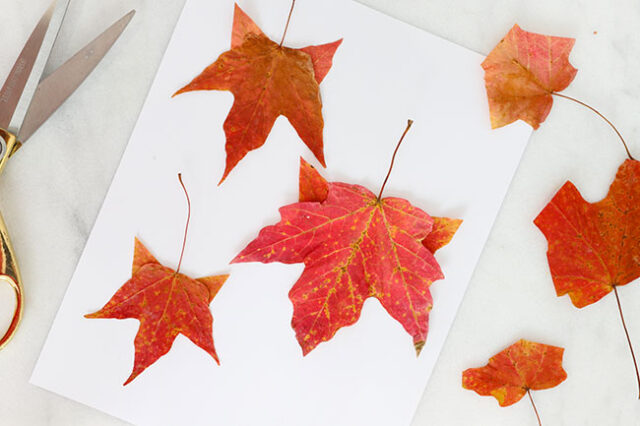
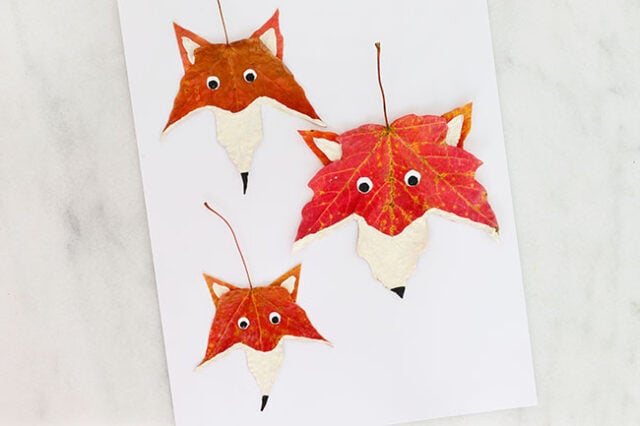
Leaf Fox
Arrange and glue down red maple leaves onto your page so that the center point is pointing down.
From a simiar colored maple leaf, cut triangles to look like fox ears and glue them down behind the fox’s head. Depending on the type of maple leaf you’re using, your leaf may already have points that look just like ears – if so, you can skip this step.
To add the painted details, start by painting a white snout and white inner ears. Then add eyes and a nose to finish off the foxes.
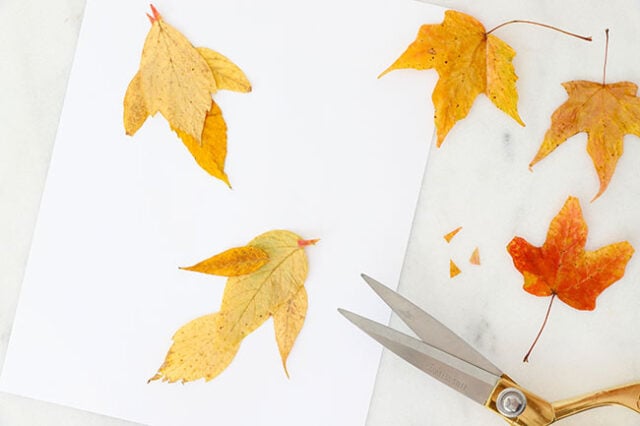
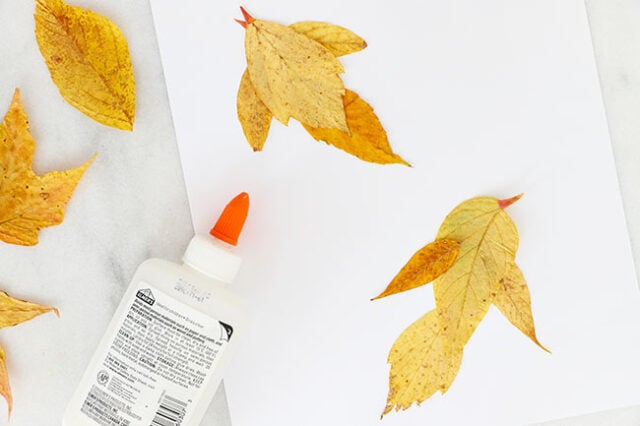
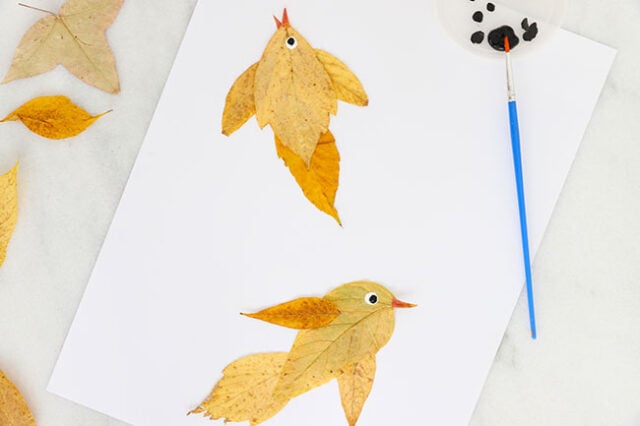
Leaf Bird
Arrange 2 leaves together to form the bird’s body and tail feathers. We used Manitoba maple leaves, but many oblong oval-shaped leaves would work here.

Add 2 smaller leaves onto the sides of the body to form wings.
Cut a tiny triangle from the end of a orange or red maple leaf to form the bird’s beak. You can use 1 triangle for a closed beak or 2 triangles to form an open beak.
Glue all the leaves down onto the cardstock.
Use paint to add the bird’s eye.
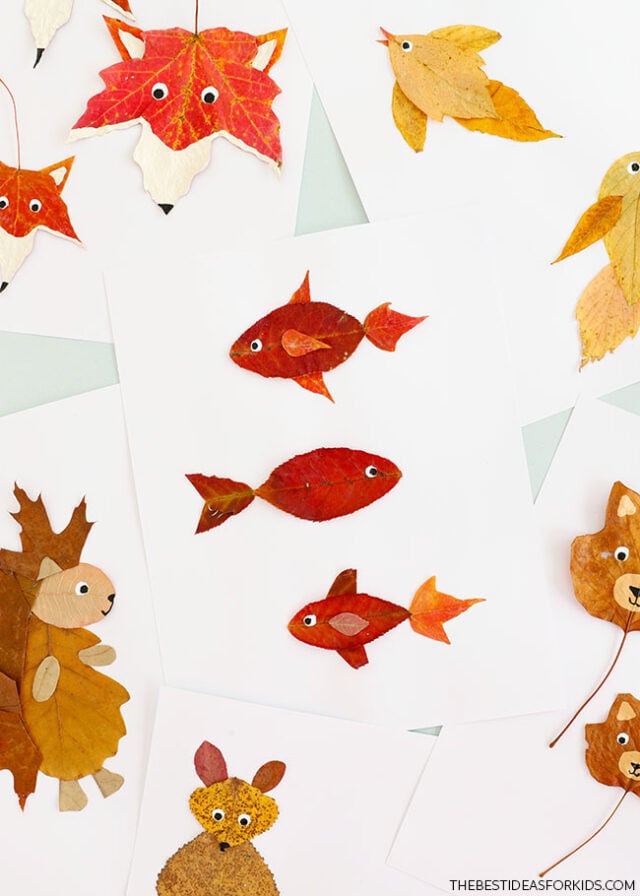
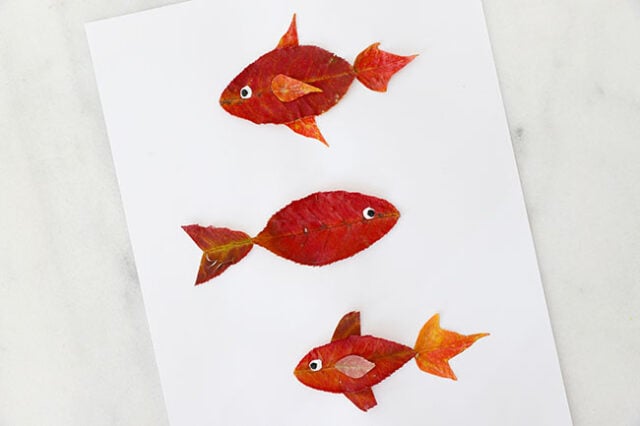
Leaf Fish
Cut the stems off of oval-shaped leaves for the fish’s body.
To make the tail, you can cut an oval-shaped leaf into a tail shape, or use a tiny maple leaf as the tail instead.
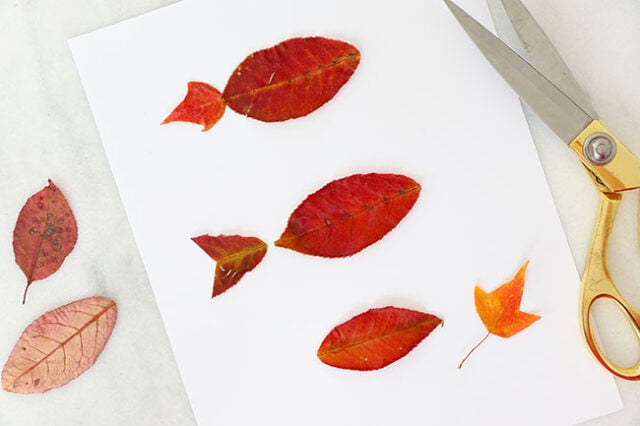
You can also choose to add fins if you’d like. To do this, cut off the tips of maple leaves, or cut mini ovals from other leaves, and arrange onto the tops, bottoms, and sides of the fish until you’re happy with how they look.
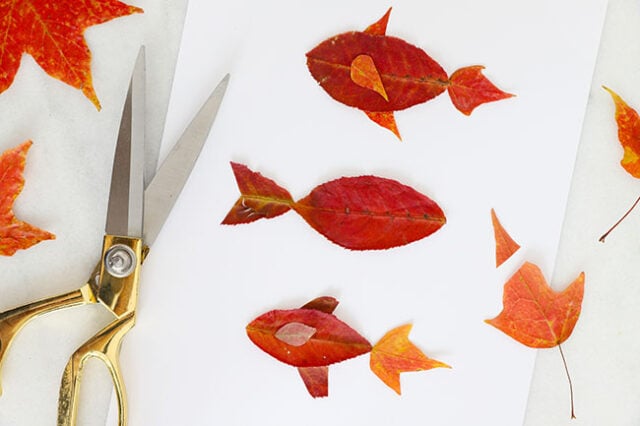
Glue all the leaves down onto the cardstock.
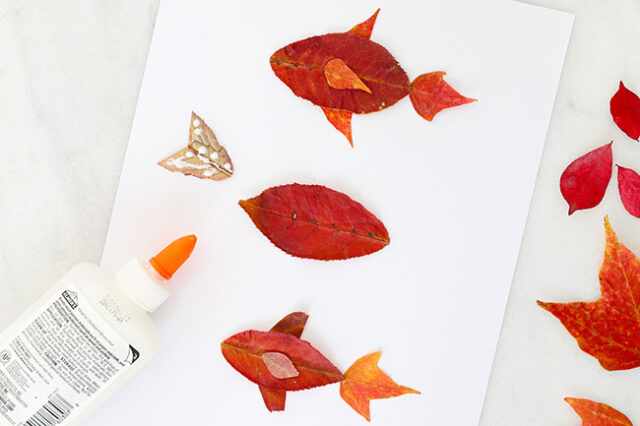
Paint on eyes and mouths for each fish.
There are so many different types of leaf art animals you can make. We hope these ideas inspire you to get outside in nature and create your very own leaf art this fall!


thank you for the ideas you share on here ideas
these are adorable! thanks for sharing