

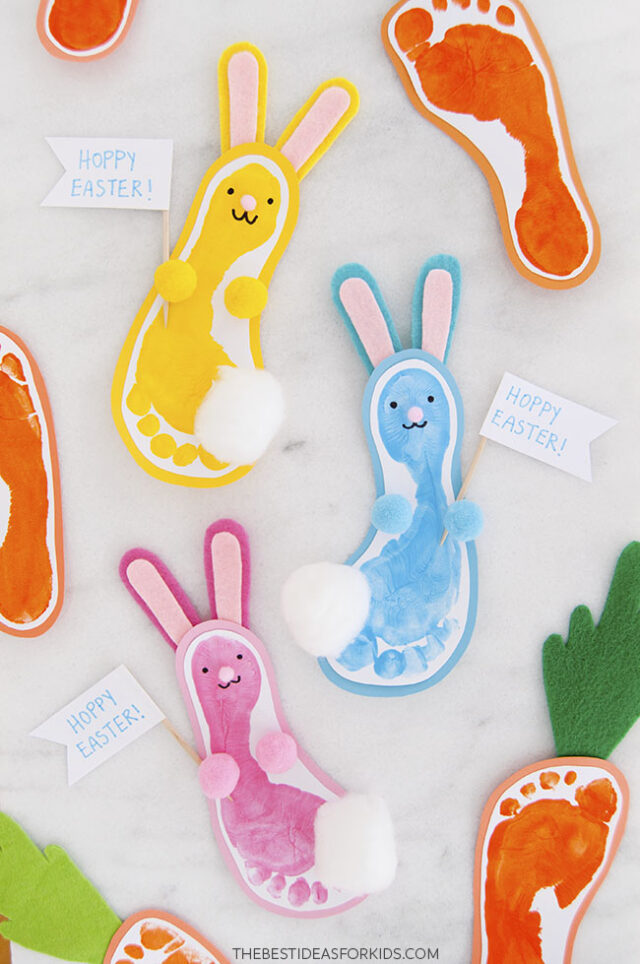
Celebrate Easter by making a footprint bunny and a footprint carrot with your kids this spring! Both the bunnies and carrots come together in a matter of minutes, and they make the cutest Easter decorations and keepsakes for years to come!
RELATED: Handprint Easter Cards
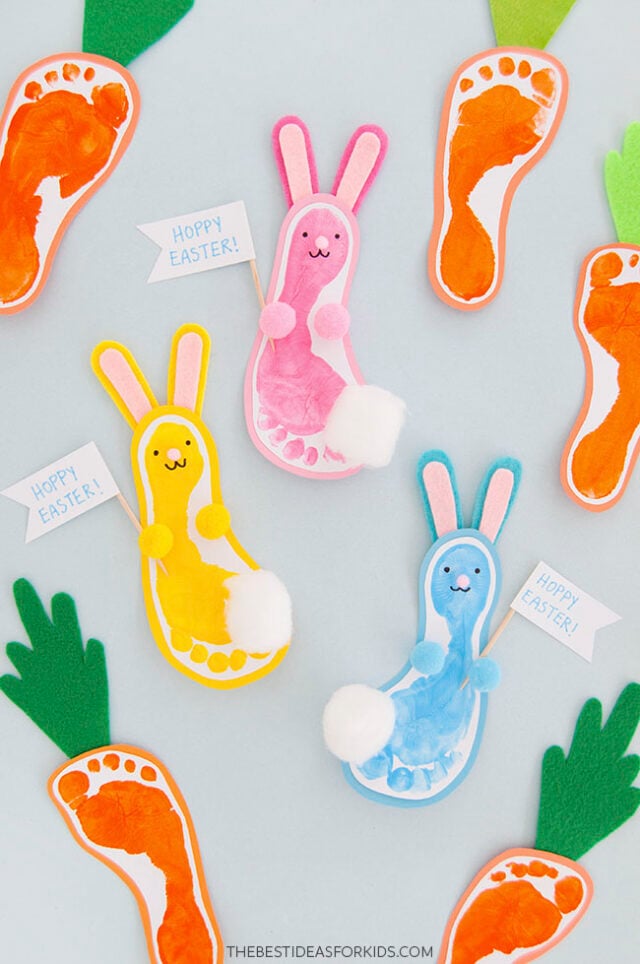
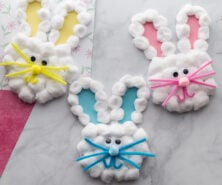
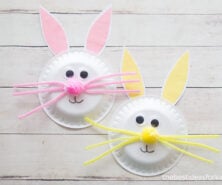
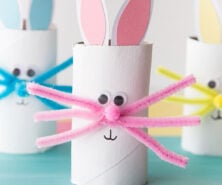
Footprint Bunny Craft
Stick them up on your fridge, on the wall, or even stick a piece of string to the backs of them to make a quick Easter garland!
You can also add them to cards or gifts this Easter.
We love that these double as both decorations and keepsakes.
Write your child’s name and date on the back of each, so that when you take them out of the Easter storage box in future years, you’ll know how old they were when they made them.
Supplies Needed
- Tempera paint – washable and non-toxic, we used orange, pink, blue, and yellow
- Paintbrushes – medium-sized, for brushing paint onto your child’s foot
- Cardstock – white for the footprints, orange, pink, blue, and yellow for the backing
- Glue stick – for attaching the cardstock layers
- Scissors
- Felt – green for carrot tops, pink, blue, and yellow for the bunny ears
- Chalk – to trace the printable templates onto felt. You can also use a chalk marker, or a marker.
- Tacky glue – for assembling everything
- Cotton balls – for the bunny tails
- Pom poms – mini ones for the bunny noses and 5/8″ ones for the bunny paws, in colors to match the bodies and ears.
- Markers – to draw the bunny’s face and write your Easter message.
- Toothpicks – for the sign
- Printable templates – for the carrot tops, bunny ears, and Easter flag. Get the free templates at the bottom of the post.
Painting Tips
- Don’t worry if when you press the footprint down it doesn’t transfer all of the paint on. You can touch up some spots with a paintbrush.
- Have kids sit in a chair while painting their foot. If doing a baby footprint, you may need an additional adult to help hold the baby while you paint the foot.
- Try to add as much paint onto the foot before pressing down. They can stand up from the chair to place their footprint onto the paper. For babies you can guide the foot down on the paper while holding the baby upright.
- Make sure the foot is flat when you press down on the paper and all toes are touching the paper.
Lift the foot up gently after pressing. - Wash feet immediately for easy clean-up. I like to keep a small bowl with dish soap and water in it nearby to wash off the feet with a washcloth or baby wipe when done.
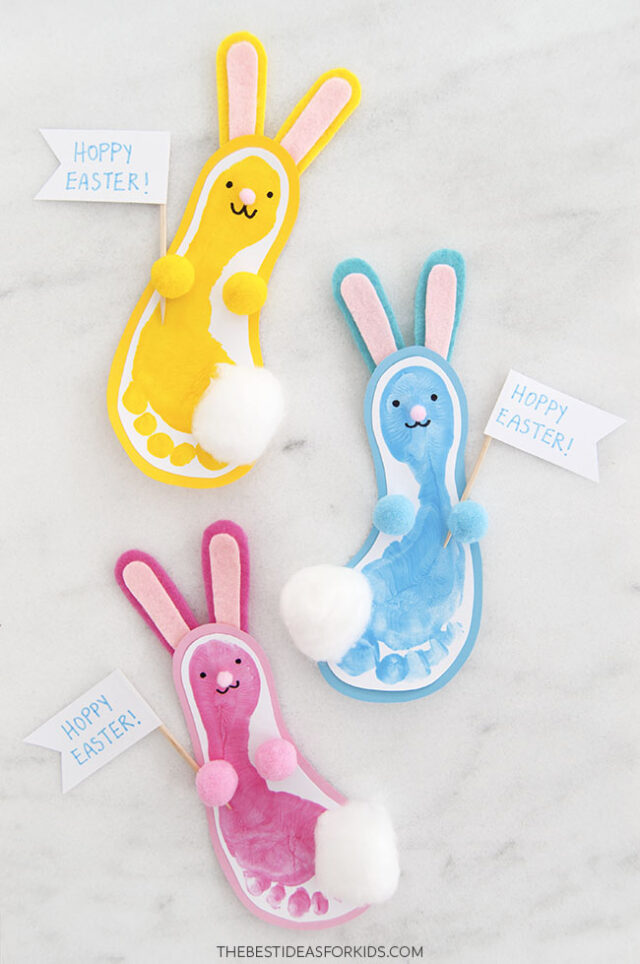
How to Make a Footprint Bunny
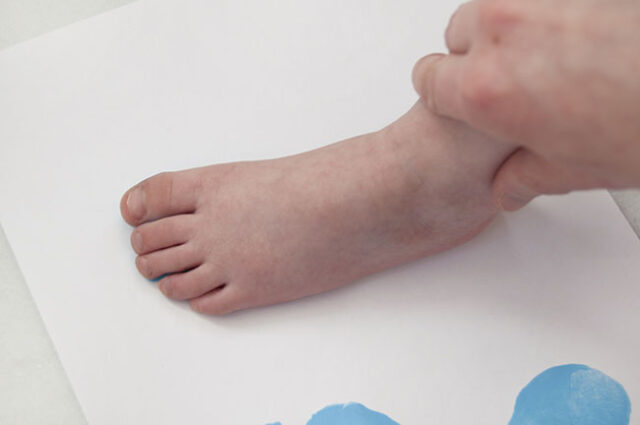
1. Make the footprint.
Prepare your space – have wet wipes and a few cloths or rags ready. Gather up white cardstock, tempera paint, and brushes.
Apply a coat of paint to the bottom of your child’s foot. We used pink, blue, and yellow, but you can use whatever colors you’d like.
Help your child place their foot onto the cardstock to make the footprint. We found that we could get 2 nice footprints from 1 coat of paint.
When switching paint colors, clean your child’s foot completely – wet wipes are a good start, but soapy water with a cloth work best for this. It’s easiest to have a small bowl with a little bit of soapy water and a cloth to wipe feet clean instead of trying to carry your child to the sink to clean their feet.
Set all the footprints aside to dry completely.
2. Make the bunny’s body.
Cut out the footprints, about 1/8″ away from the painted print.
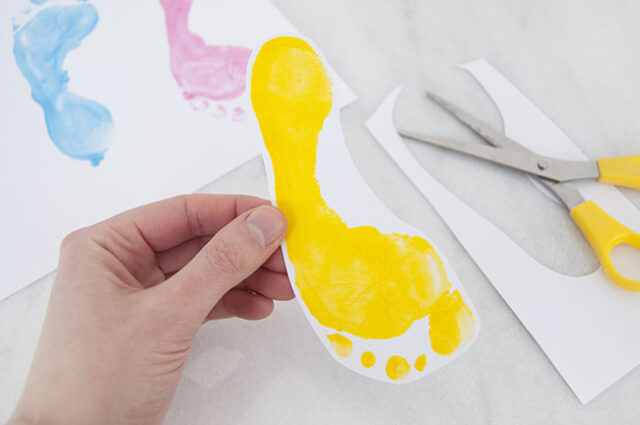
Glue the painted footprint onto matching cardstock.
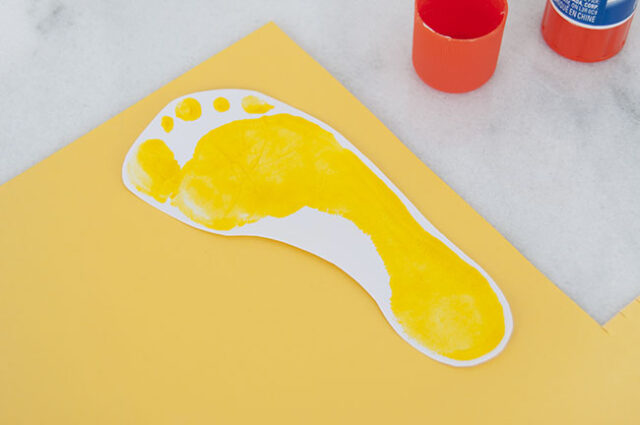
Cut out the footprints, about 1/4″ away from the edge of the white cardstock.
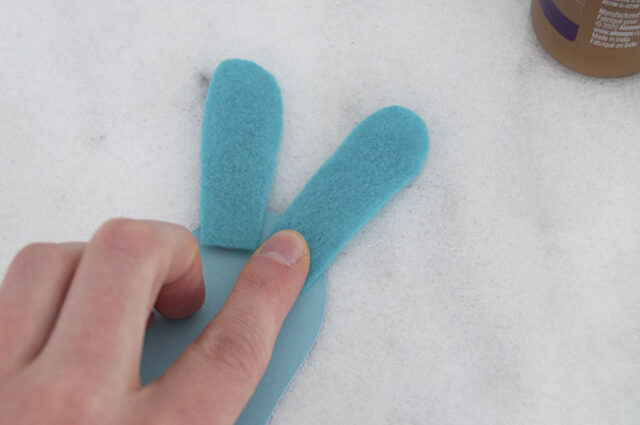
3. Make the bunny’s ears.
Print and cut out the bunny ear templates included in the printable templates at the bottom of the post.
Use chalk or a marker to trace the inner ears onto pale pink felt and the outer ears onto the color to match the bunny’s body. Cut them out.
Apply glue to the pink inner ears and attach them to the center of the outer ears.

Apply 2 dabs of tacky glue to the back of the cardstock footprint, on the heel end.
Place the ears into the glue and press to secure in place.
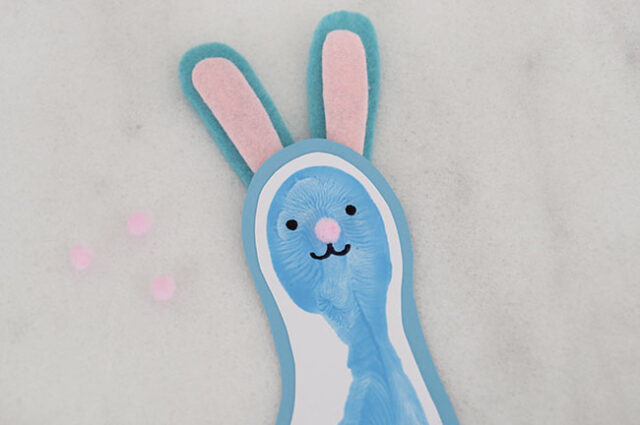
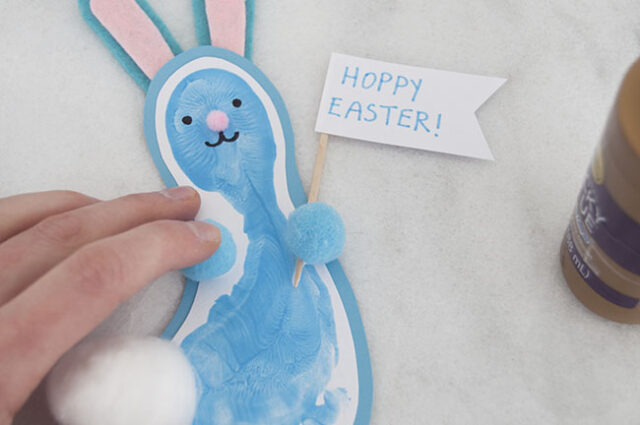
4. Make the bunny’s face.
Use a black marker to draw the bunny’s eyes and mouth.
Apply a tiny dab of tacky glue above the mouth and attach a tiny pom pom on top for the nose.
If you don’t have tiny pom poms, you can draw the nose on instead.
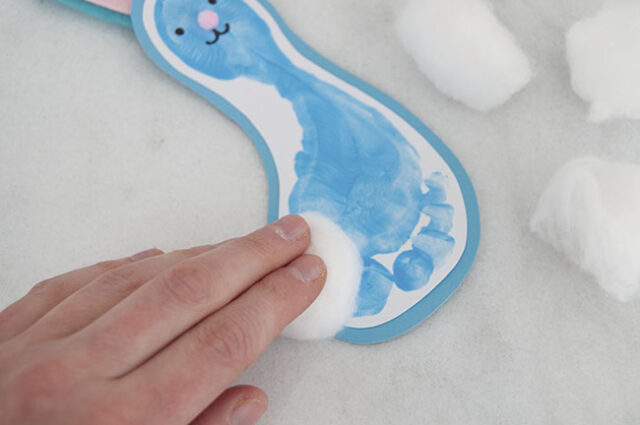
5. Add the tail.
Apply a dab of tacky glue to the bottom of the bunny’s body, right at the edge next to the big toe.
Press a cotton ball into the glue as the bunny’s tail. You can also add a large pom pom here instead.
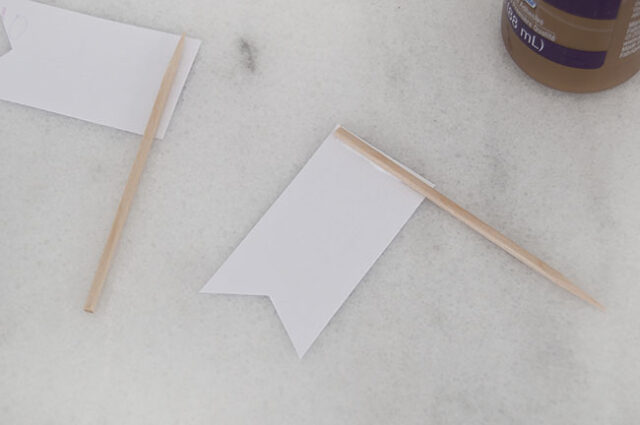
6. Make the Easter flag.
Print and cut out the flag template included in the free printable, included at the bottom of the post.
Trace it onto white cardstock as many times as needed, and cut out.
Use a marker to write a message onto the flag – we wrote “Hoppy Easter!”
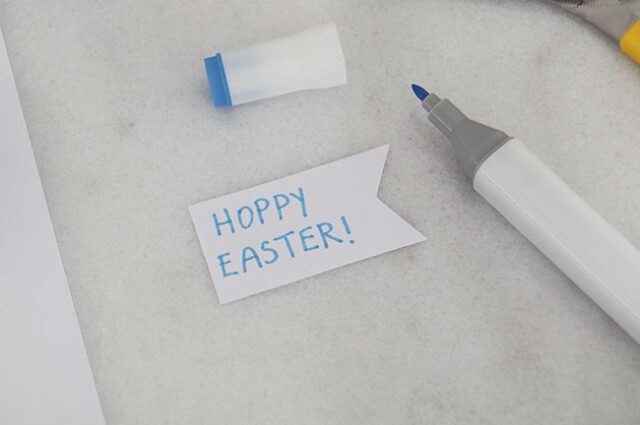
Apply a thin line of tacky glue to the edge of the flag and attach a toothpick.
7. Finish up the bunny.
Apply a small dab of tacky glue to the end of the toothpick and place it on the footprint body, around the arch of the foot.

Apply two small dabs of tacky glue, one on top of the toothpick and the other about 1″ away on the opposite side of the bunny.
Press a pom pom into each glue dab as the bunny’s paws. If the pom poms do not stay on their own, use some hot glue or a glue dot to secure in place.
Repeat to make as many bunnies as you’d like!
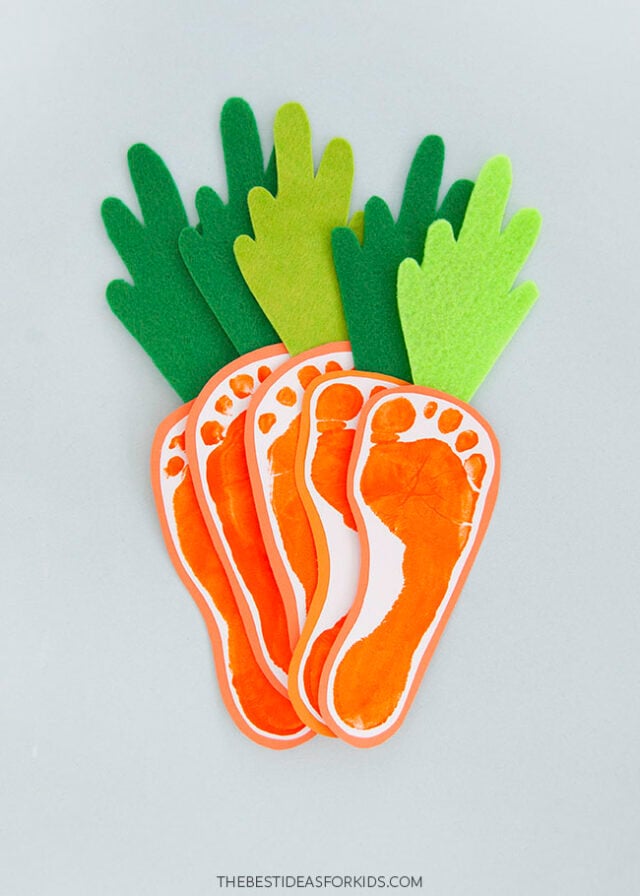
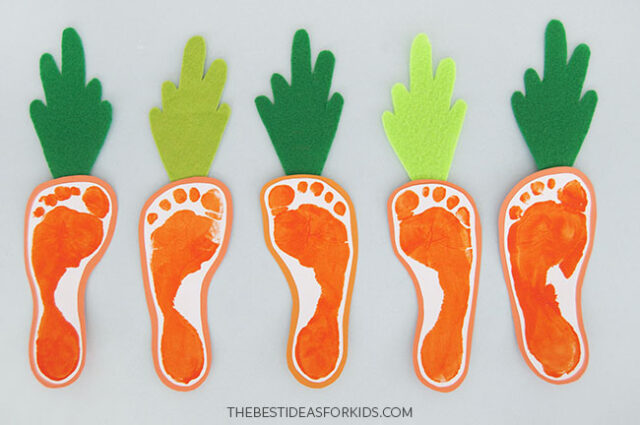
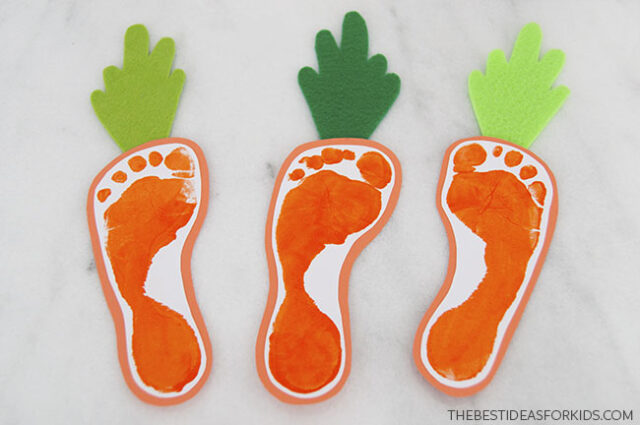
How to Make a Footprint Carrot
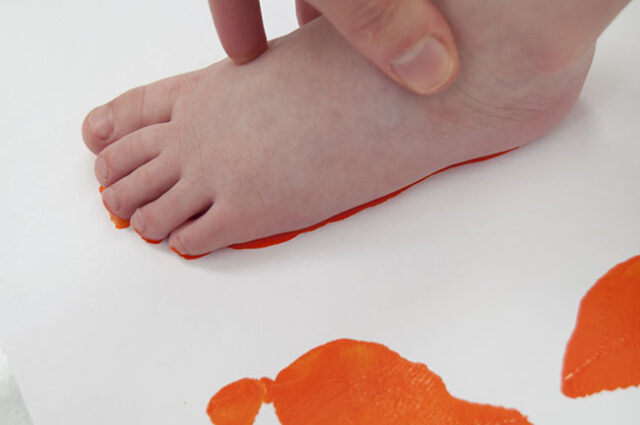
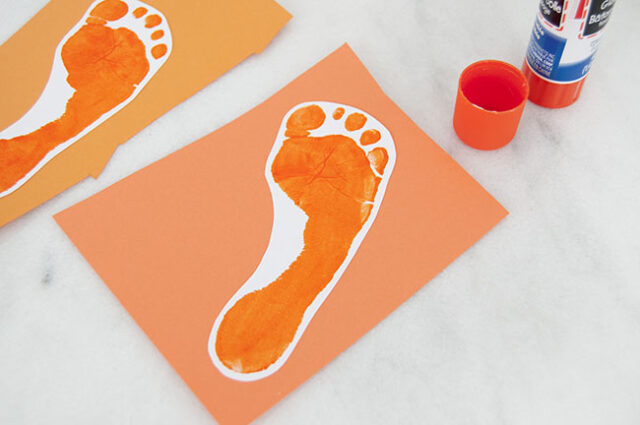
1. Make the footprints.
Prepare your space: have wet wipes and a few clothes or rags on hand, along with your white cardstock, orange paint, and paintbrush.
Apply orange tempera paint to the bottom of your child’s foot and guide them in stamping it onto the white cardstock. We found that you can make 2 nice footprints from 1 coat of paint.
Reapply paint to their foot to make as many footprints as you’d like. Set them aside to dry completely.
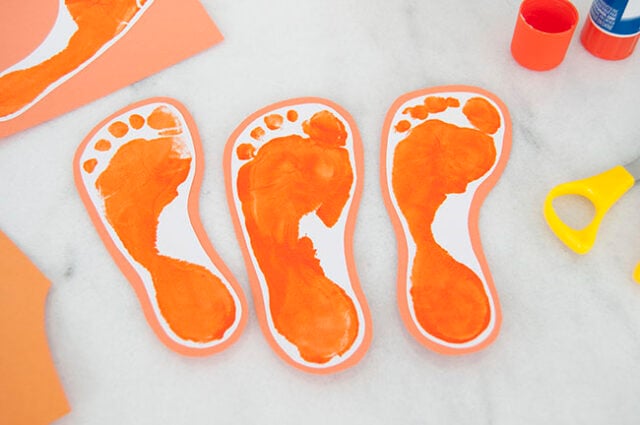
2. Make the carrot.
Use scissors to cut out the orange footprints, about 1/8″ away from the edge of the print itself.
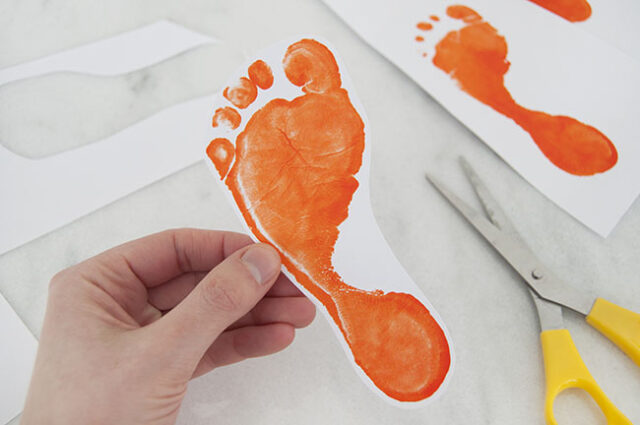
Glue the footprint onto orange cardstock.
Cut out the footprint again, about 1/4″ away from the white paper edge.
3. Make the carrot tops.
Print and cut out the carrot top template (provided at the bottom of the post).
Trace it onto green felt using a piece of chalk or marker.
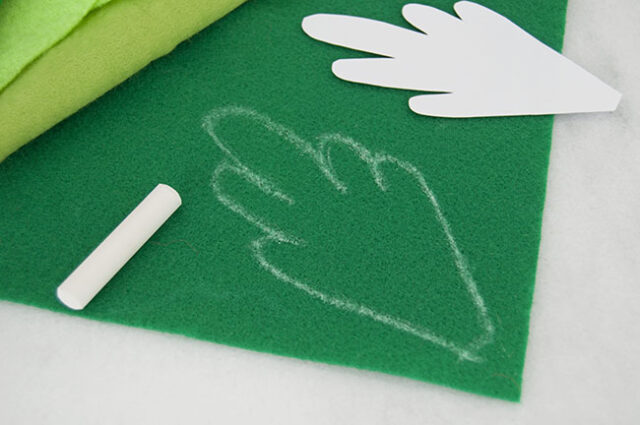
Cut out the felt carrot tops.

4. Assemble the carrots.
Apply a dot of tacky glue to the back of the orange cardstock, on the end where the toes are.
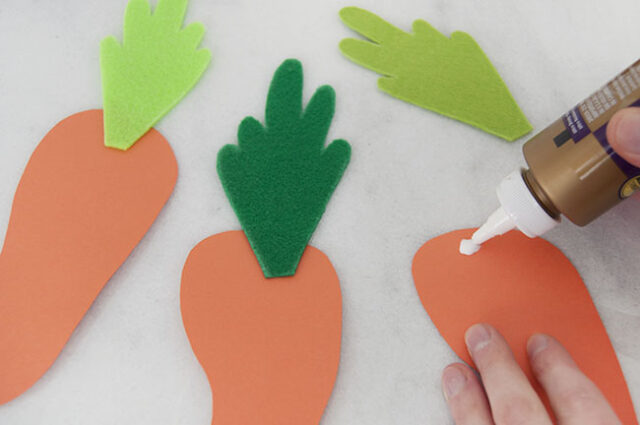
Press the felt carrot top into the glue to secure. Set it aside to dry completely.
These Easter bunny footprints turn out so cute and we love how easy the carrots are to make too!
Don’t forget to write your child’s name and the date on the back of each bunny and carrot!


Share a Comment!
We LOVE hearing from you! Submit your question or comment here.
Your email address will not be published.
Required fields are marked *