

This pressed flower suncatcher craft is a really pretty craft to make for someone! Or make it as a beautiful spring craft. This would make a lovely birthday or Mother’s Day gift too!
RELATED: Mother’s Day Crafts for Kids
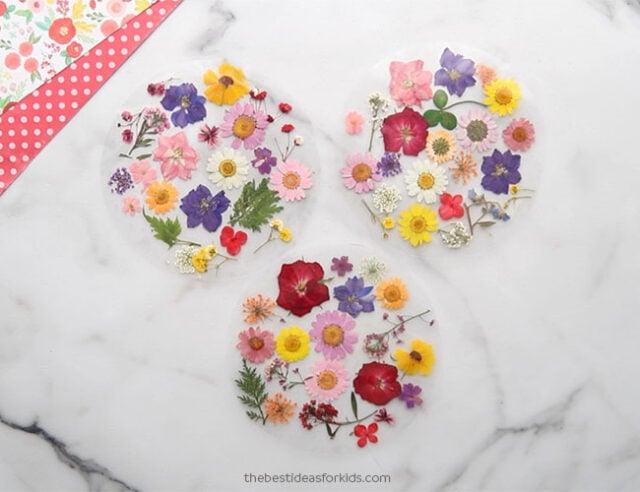
DIY Pressed Flower Suncatcher
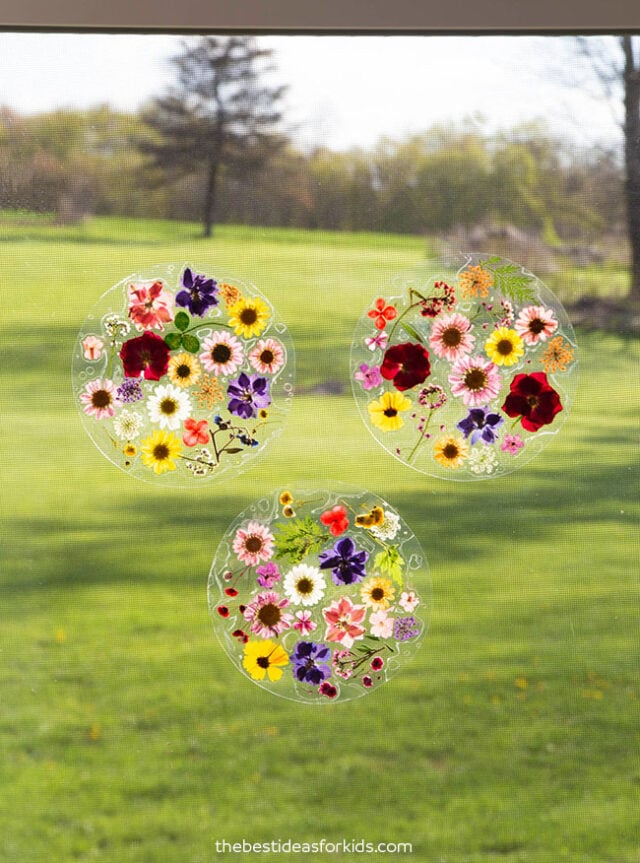
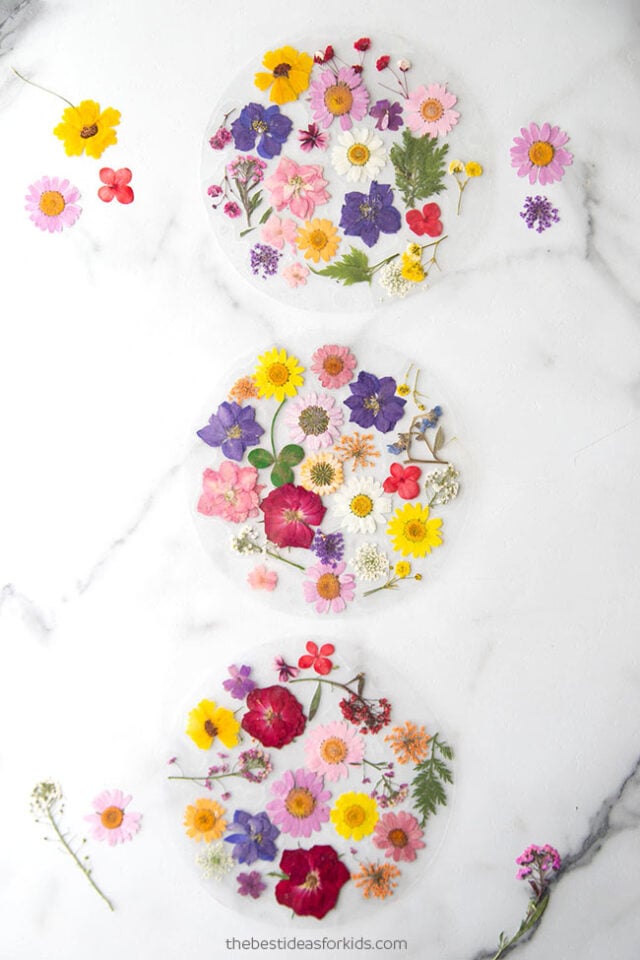
These suncatchers look so pretty on the window! You can make a collection of them, or just make one and place it in your favorite window spot. These would also look great on a classroom window!
You can make this a two-part activity, collecting and saving flowers and then creating the suncatcher. City park grasses around playgrounds often have lots of wildflowers that will get cut throughout the spring and summer. Picking some of those wildflowers before they are cut are perfect for this activity.
If you’ve never made your own pressed flowers, it is really easy! See our simple tutorial how to press flowers.
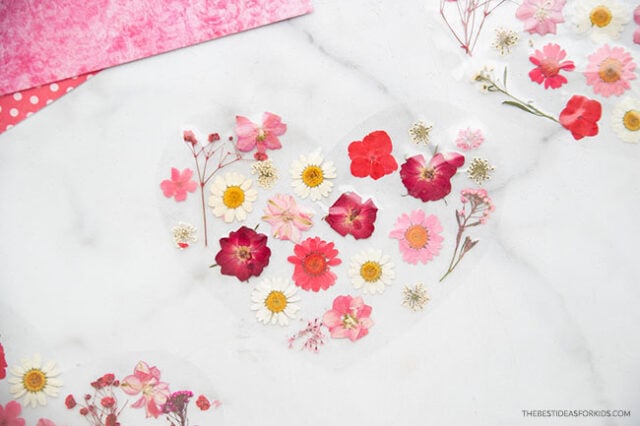
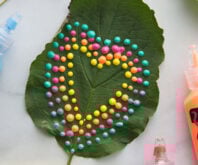
For another way to make these suncatchers, try making a heart shape. We used red, pink and white flowers and made these heart-shaped pressed flower suncatchers.
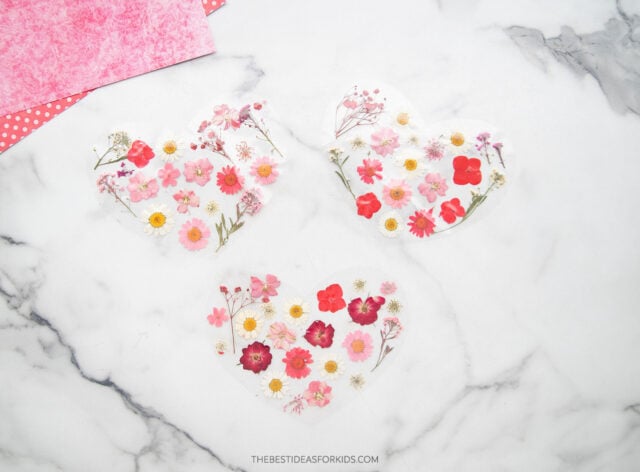
To make the heart version, we used this small heart template.
Watch the Video Tutorial!

Supplies Needed
- Pressed Flowers – you can make your own by collecting wildflowers or fallen flowers from your garden. See how to make your own pressed flowers. Or you can order some pressed flowers here.
- Small paper plate or bowl for tracing
- Self Laminating Sheets – you’ll need 1 sheet of self laminating paper or you can use contact paper
- Scissors
How to Make a Pressed Flower Suncatcher
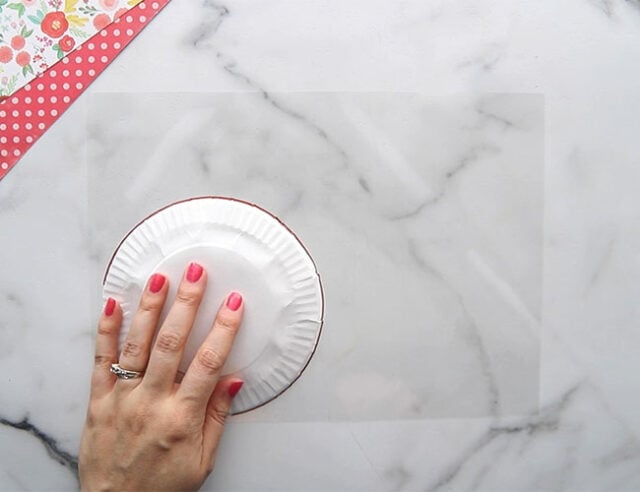
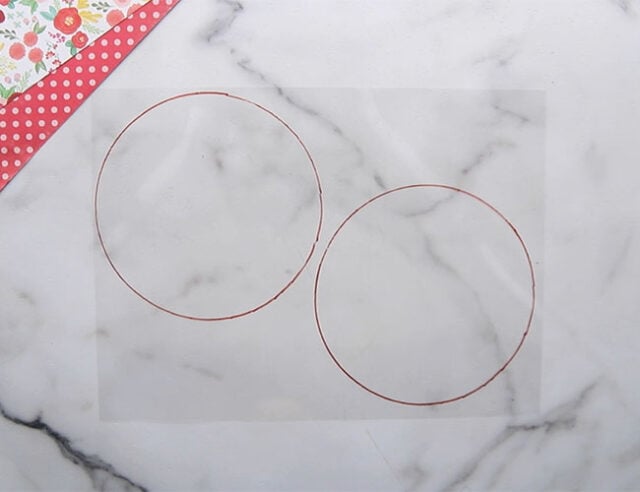
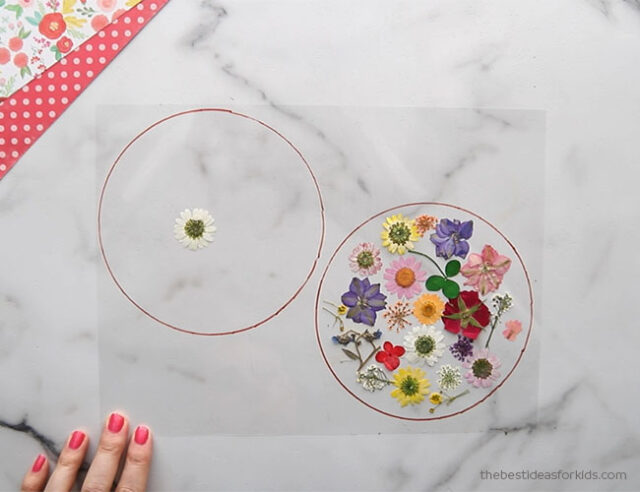
1. Start by tracing a small paper plate or bowl two times onto a self laminating sheet.
If you plan to make just 1 suncatcher, you can cut out the circles first. Then use one circle to add on top when you are done.
If you plan to make 2 suncatchers, follow the steps below.
If you’d like to make a heart shape, use our heart template here.
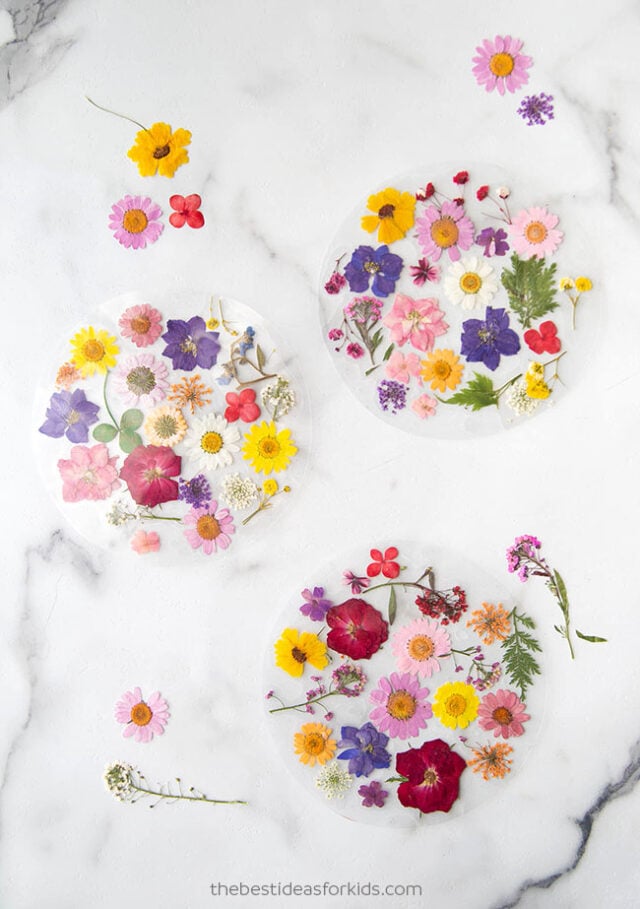
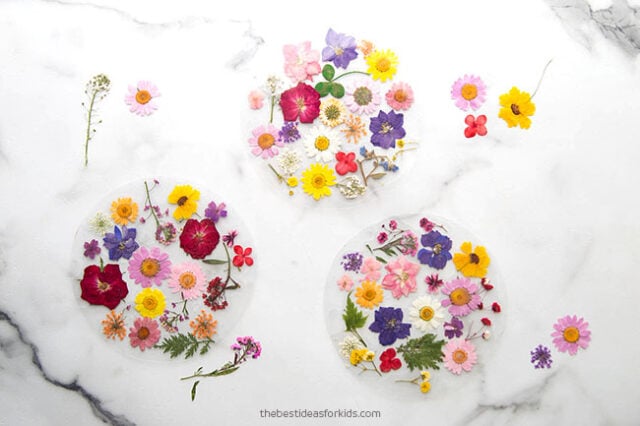
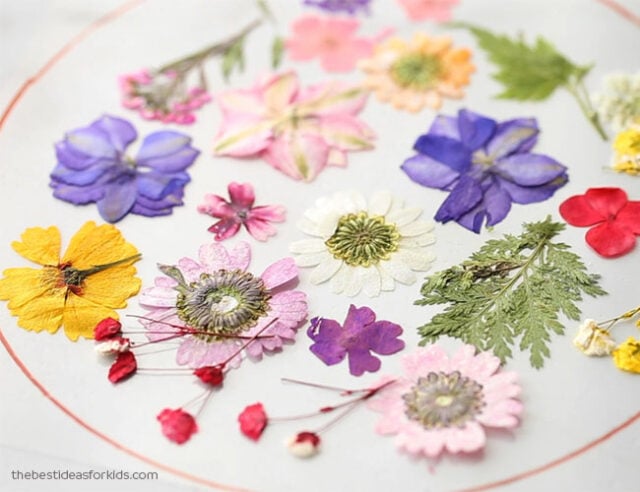
2. Add the pressed flowers to the sticky side of the self laminating sheet.
Keep adding flowers or leaves until you are happy with the way it looks. You can fill it in really well or leave a lot of space between the flowers, both methods look nice.
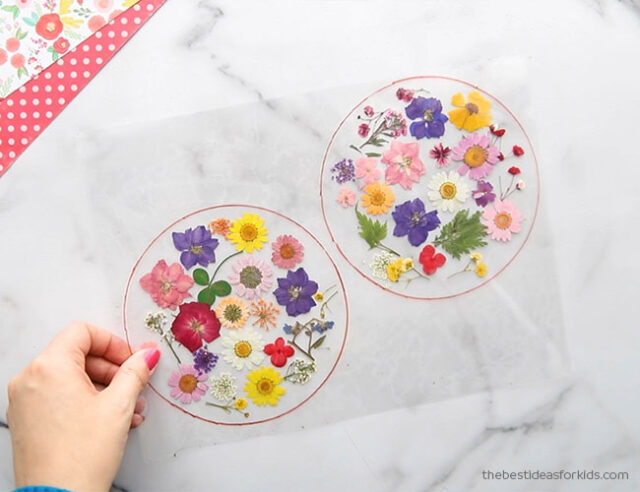
3. Add another self laminating sheet on top.
Press firmly down to seal the two sheets together.
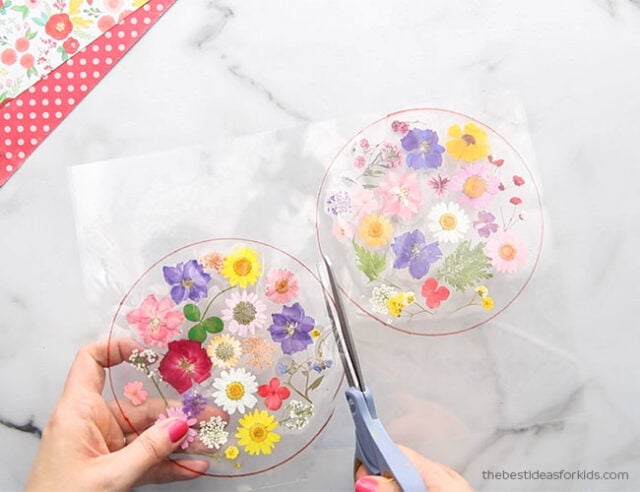
4. Cut out the suncatchers.
Cut slightly inside the traced line if you do not want the traced line to be on your suncatcher.
5. You can hang on your windows with some double sided tape or glue dots.
These make the prettiest suncatchers for your windows! And if you love suncatchers, see more fun suncatcher crafts below!


thankyou so much for sharing your god-given talent. many of us are not so blessed in this area.
We cut out cross shapes and put the dried flowers into them. They came out beautiful for Easter. ( We try to stay away from the secular aspects and stick to Resurrection Day) These were good for our 6-8 year olds, but our 4’s and 5’s did better with tissue paper in their crosses.
great
Such a cute idea
will this project eventually brown or yellow?
You must use pressed flowers or fresh flowers will go brown. Some pressed leaves or flowers may brown in direct sunlight so keep them placed out of direct sunlight.
Love your site and ideas! I may do the suncatchers with my students for a positive school climate activity and add some words to these!!!
Hi,
It is quite easy and suitable for young kids, specially for summer holidays.
Hi! I love this idea! I am a former preschool teacher and daycare owner, and now have great nieces and nephews as well as my grandbabies at home with me quite a bit. I am always looking for new craft ideas to surprise their parents with for special occasions. I think I am going to try this one, but with a twist…I am going to try to put a small photo in the center of flowers, and put the entire project in a 5×7 picture frame. I will try to remember post a pic.
I love that idea Char, thanks!
Can this be ok to hang outdoors, open to the elements?
Thank you❤️
Looooove this diy thank you for sharing
I don’t see why not – just don’t put in direct sunlight or the sun may fade the flowers really quickly.
Can I use a heat laminate?
Yes that should be fine as long as the flowers aren’t too thick.
wouldn’t a heat laminate brown the real flowers that are already pressed?
This is self laminating paper – so just sticky paper, no heat involved 🙂
Such a pretty project! What is self laminating sheets? Is this the same as contact paper
Yes – they are like sticky clear sheets, contact paper works too!
Love the sun catchers!
An you use artificial flowers, taking the flowers apart?
These are pressed real flowers. You can either buy them already pressed or press your own.
Can you put them through the laminator?
I haven’t tried that but I think as long as the flowers aren’t too thick it should work!
Agree, not too thick and you may need to run the circles through a couple of times to seal as many flowers as possible. My suggestion: Run a full sheet with the 2 circles marked (flowers inside), cut the circles then feed each circle through turning the circle each feed (into the laminator). Last, leave a little un-flower edge around the circles edge to seal the circle itself.