

Searching for a fun activity on a sunny day? Try making DIY Butterfly Wings! Kids will love how these wings create beautiful and colorful shadows on a bright day!
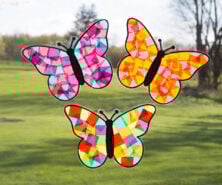
RELATED: Butterfly Suncatcher
You only need a handful of supplies create these DIY butterfly wings. Kids will love to tie on these wings and pretend like they are a butterfly. They will also enjoy seeing the interesting shadow design that the wings create. The sunnier it is outside, the more vibrant the colorful shadows will be!
Supplies Needed
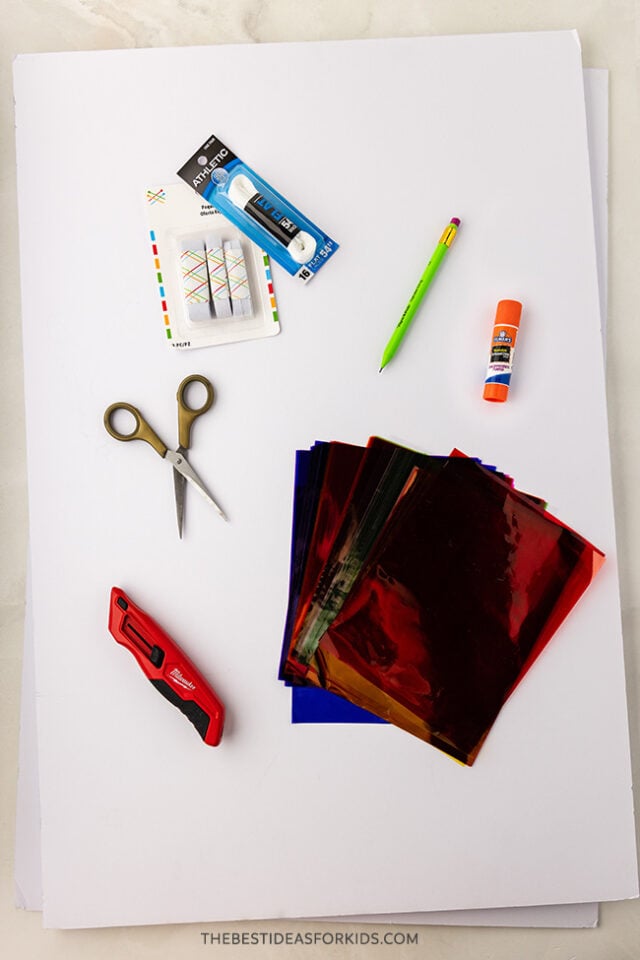
Here’s what you will need to make these DIY Butterfly Wings:
- 2 white foam core poster boards, 20 inches x 30 inches
- Cellophane sheets
- Flat shoe laces, 54 inch (or flat elastic)
- Pencil
- Glue stick
- Box cutter knife (adults only)
- Scissors
NOTE: A sharp box cutting knife is required, so adult assistance is required for this step.
How to Make DIY Butterfly Wings
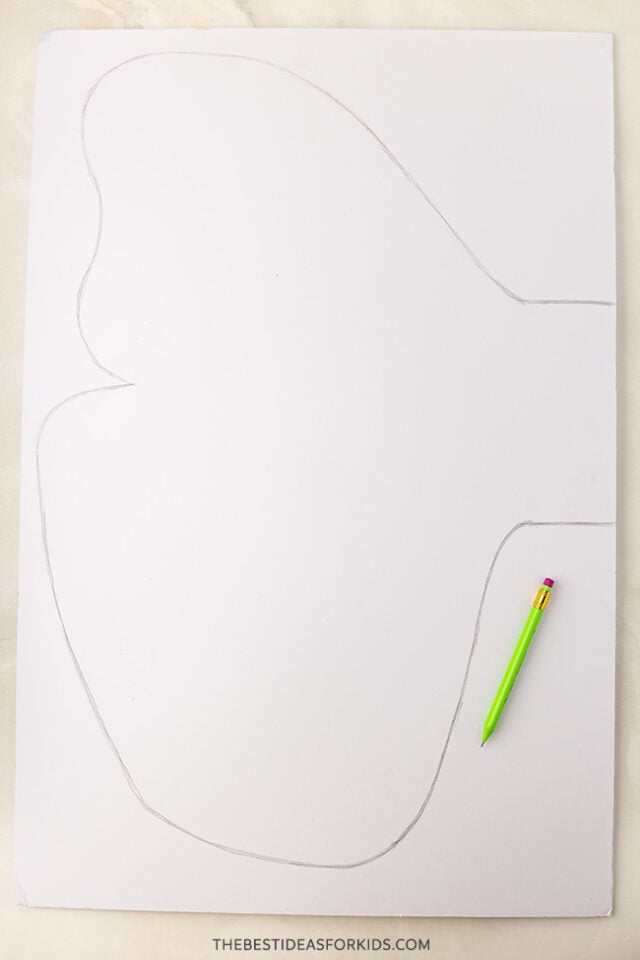
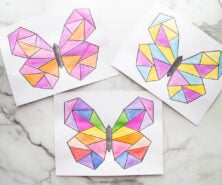
1. Begin by sketching a large butterfly wing on one of the foam core poster boards.
You will want to make this nice and large so that you are using as much of your poster board as possible.
Draw lightly with a pencil at first so you can erase easily if needed, then darken the lines once you’re happy with the shape.
Be sure to leave a flat area along the inner edge of the wing — this is where the two wings will overlap behind the child’s back (see Step 7).
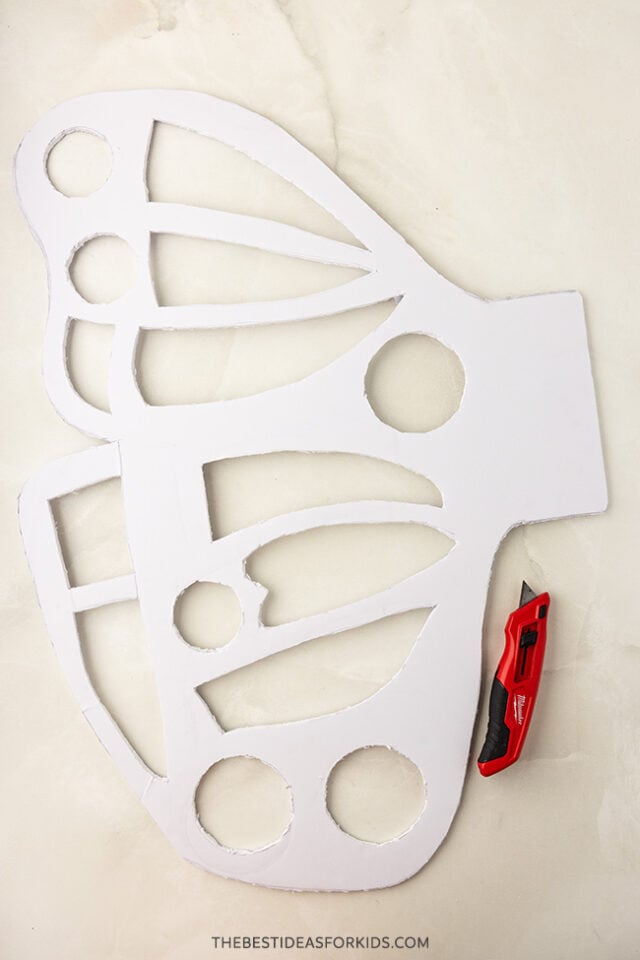
2. Inside the outline of your wing, draw large, simple shapes.
These shapes will be cut out, so make them large enough to handle and make sure they are spaced well apart.
Avoid placing designs too close to the edge or too close to each other to maintain the wing’s strength and prevent tearing.
Once you are happy with the design of your butterfly wing, use a box cutting knife (adults only) to cut around the wing and cut out each shape on the wing. The key here is taking your time and going slow. Use a sawing motion (back and forth/up and down) to cut the wing and shapes as cleanly as possible.
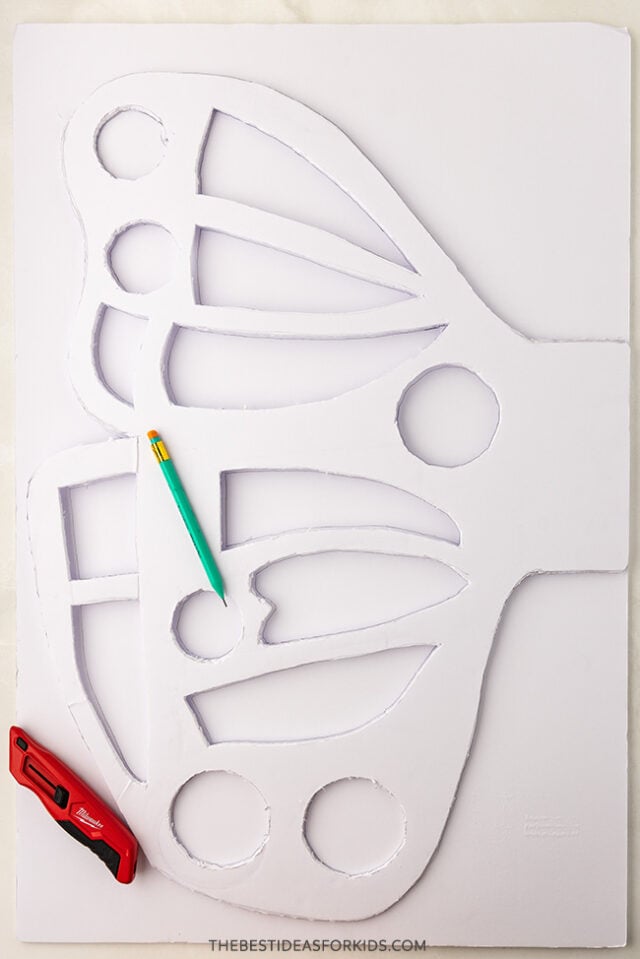
3. Use your finished wing as a stencil to trace another wing on the second poster board.
This ensures both sides match, and it offers a fun opportunity to teach kids about symmetry! Once traced, cut out the second wing in the same way.
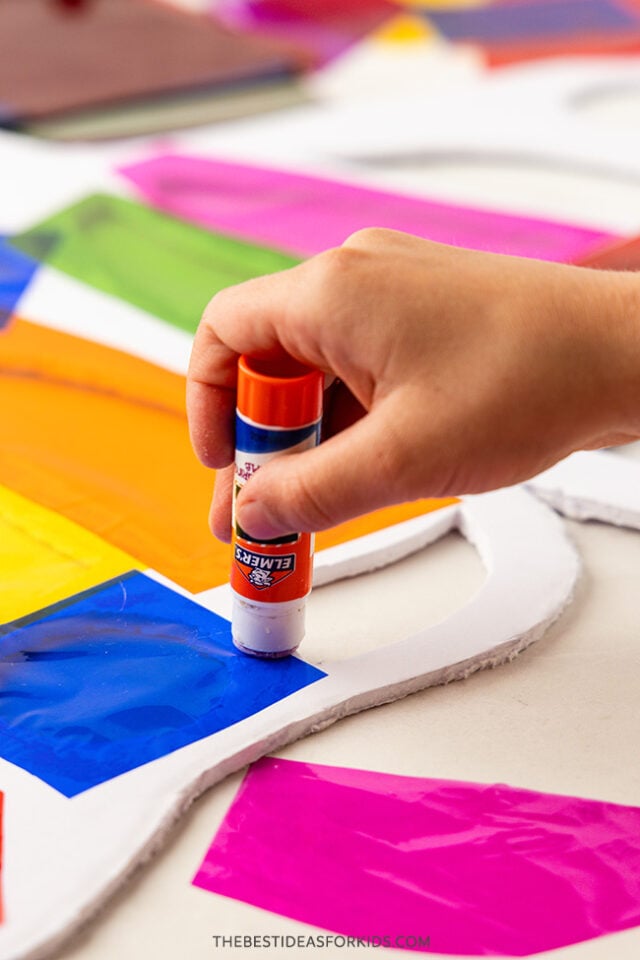
4. When your second butterfly wing is cut out, it is time to add some beautiful color with the cellophane sheets!
Cut the sheets so that they are a little larger than the shapes on your butterfly wings. We simply held each cellophane sheet up to the shape to get an idea of where to cut.
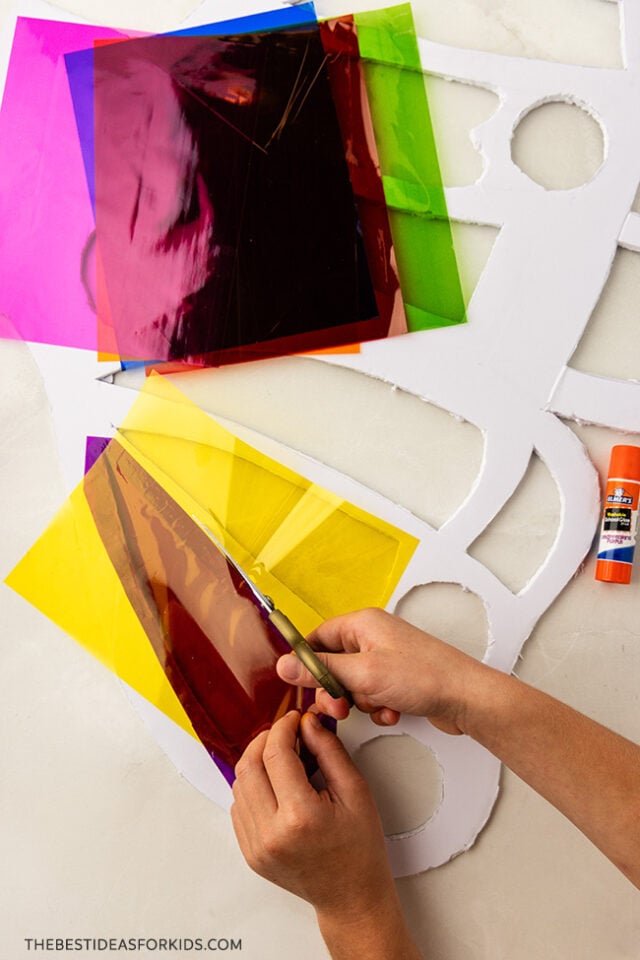
5. Use your glue stick to apply a generous amount of glue around the edges of each shape.
Only work on one shape at a time. Apply one cellophane sheet per shape.
TIP: Make sure you’re working on the correct sides of your butterfly wings. We glued the cellophane on the sides that would be facing the child so that the back looks nice and neat!
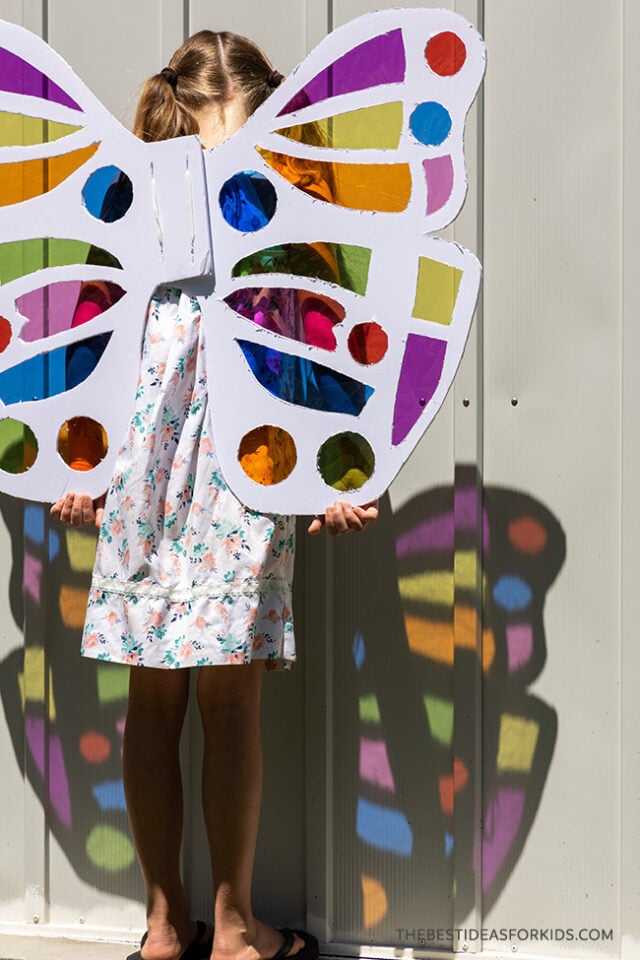
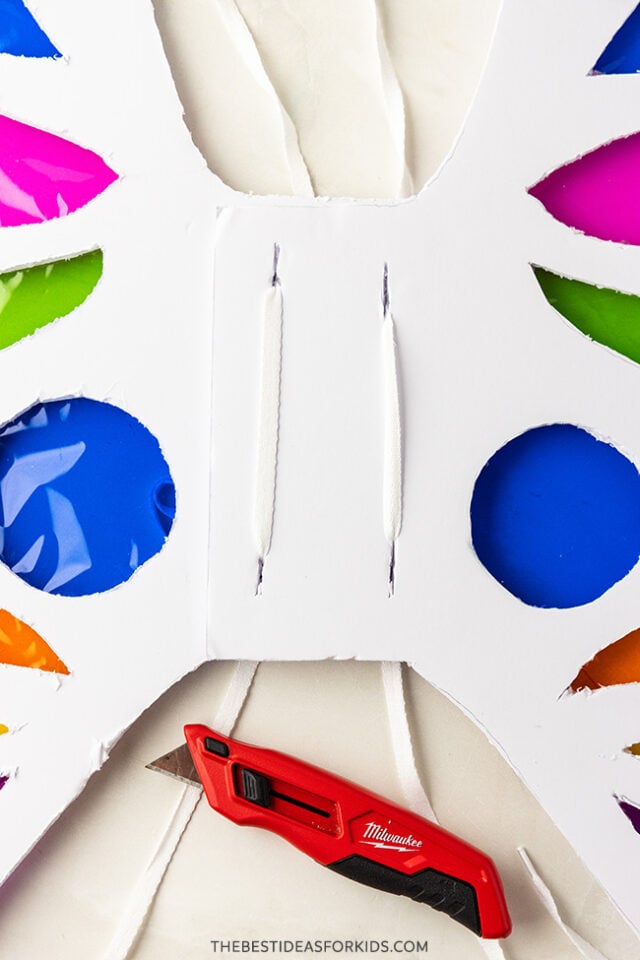
6. Attach the wings together.
Once all of your cellophane sheets are cut and applied to both wings, it’s time to overlap your butterfly wings and use the box cutter to poke slits for the shoe strings or elastic to run through.
Place one wing overlapping the other, poke two holes (top to bottom) for each shoe string. You will have 4 holes in total.
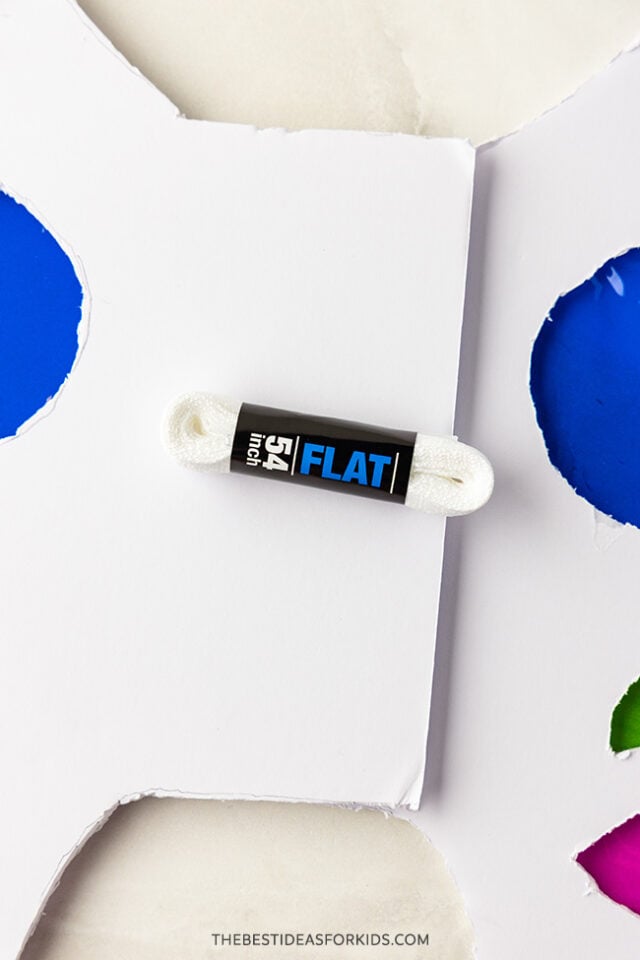
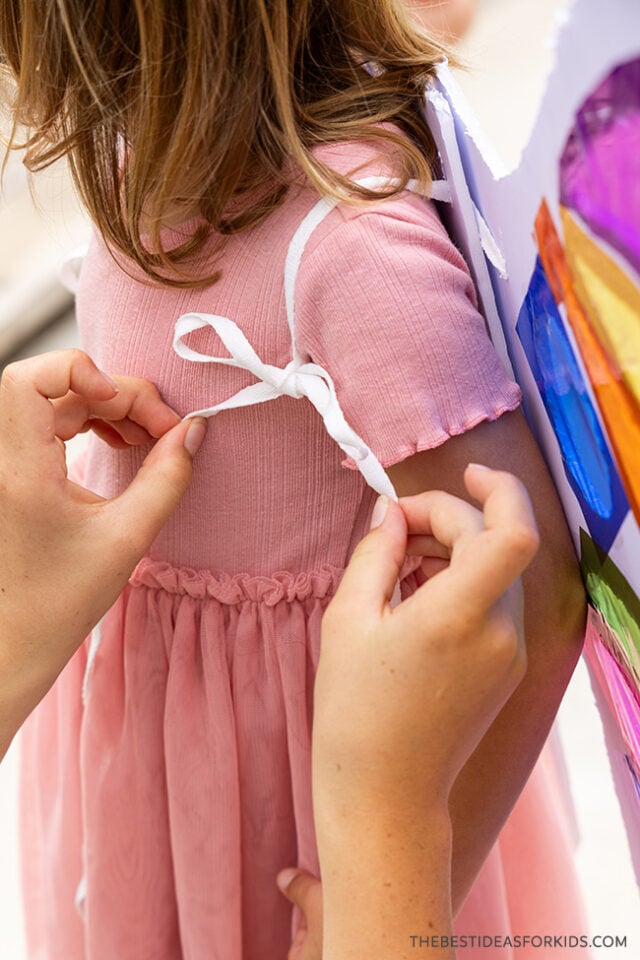
7. Slide the shoe strings (or elastic) through the holes, and then your butterfly wings are ready to wear!
We chose to use the shoe strings because of how easy they are to tie. Elastic would stretch with the child’s arms as they run, jump, and soar, so if your child finds that the shoe laces aren’t stretchy enough, try elastic! We didn’t notice any discomfort with the shoe laces.
8. Tie the shoe strings around the child’s shoulders, and watch imagination take flight!
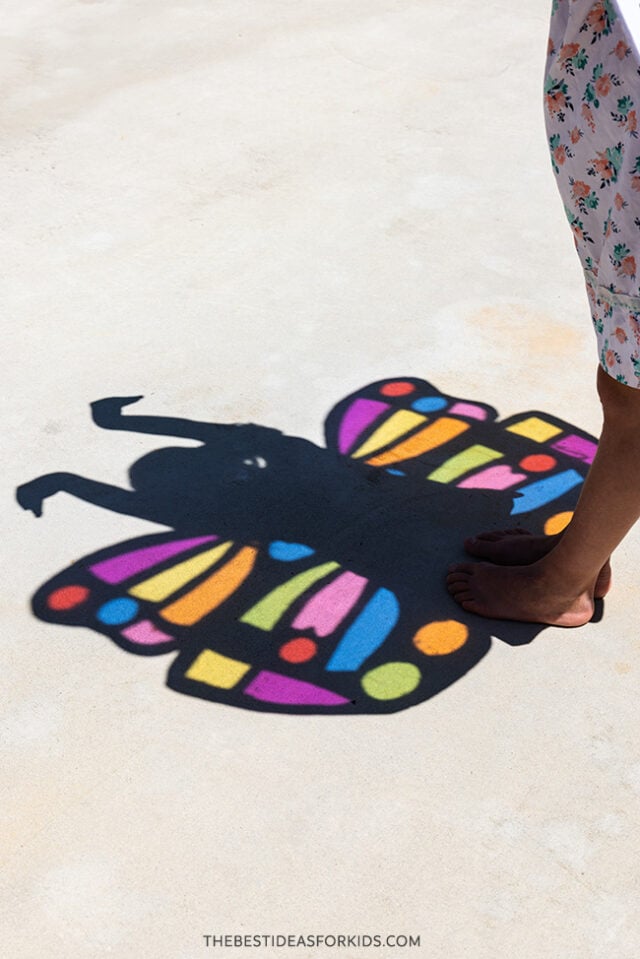
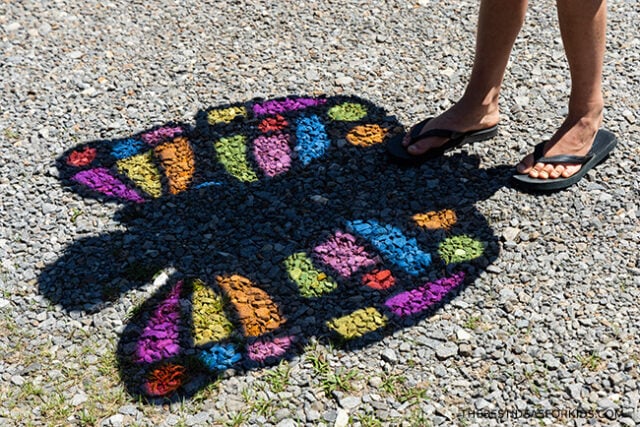
9. Take the wings outside!
The shadows work best on a beautiful, sunny day. Observe how the sunlight shining through the cellophane makes some really fun patterns!
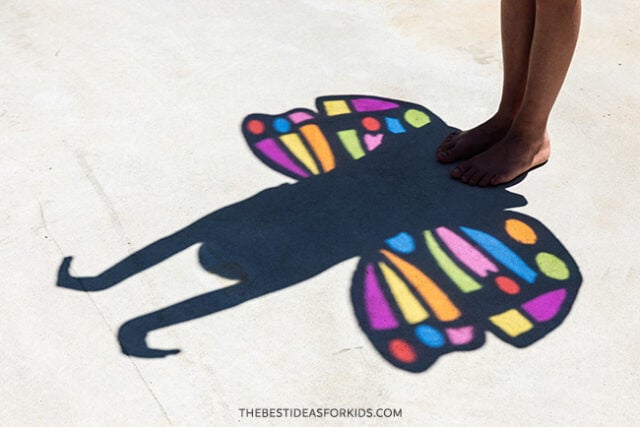
We love these DIY Butterfly Wings as an outdoor activity on a sunny day!
Kids will love to use their imaginations as they wear their wings and also discover the beautiful shadows that they create.
For another shadow activity, try making this shadow art.


Share a Comment!
We LOVE hearing from you! Submit your question or comment here.
Your email address will not be published.
Required fields are marked *