

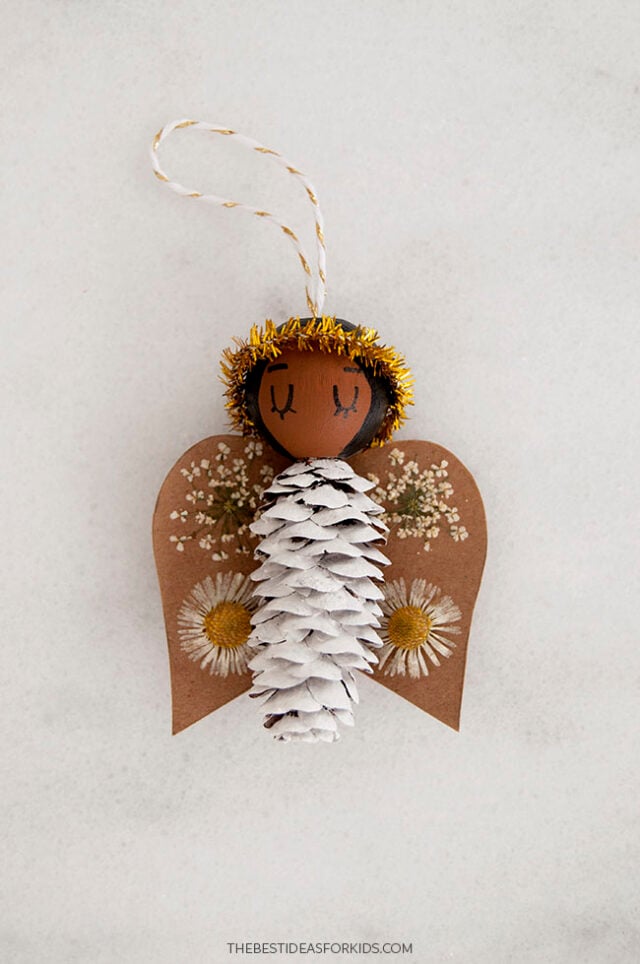
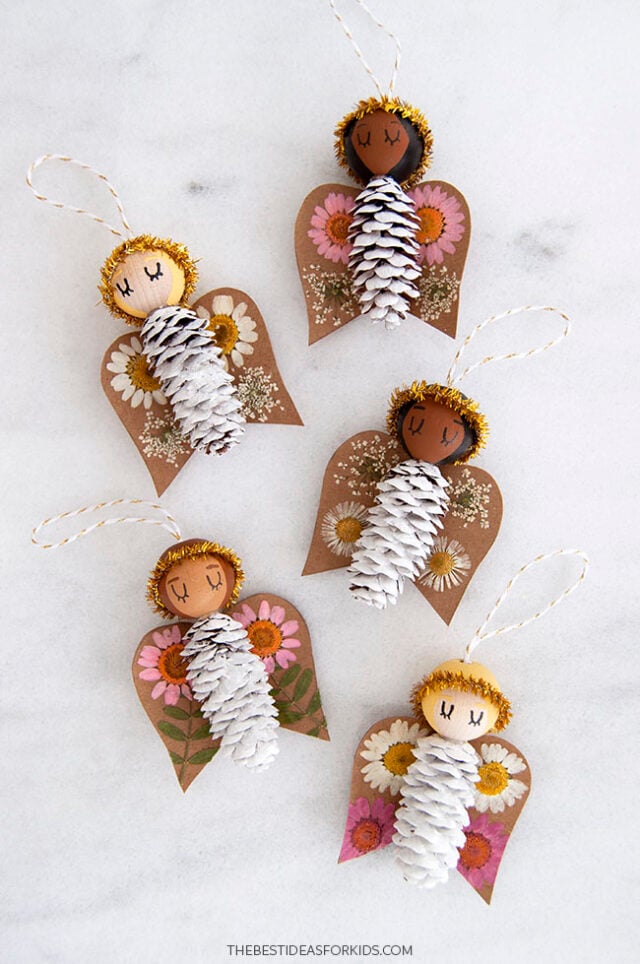
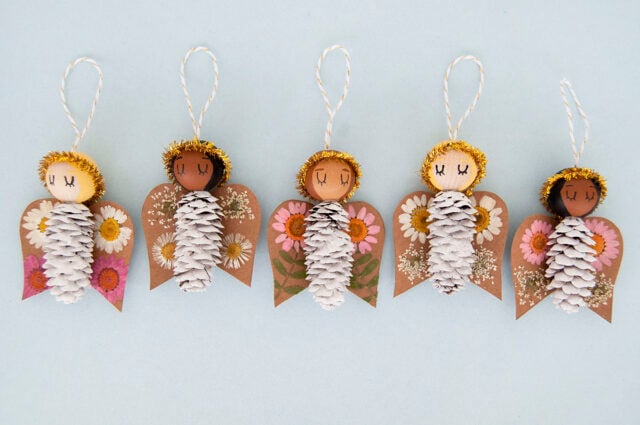
These pine cone angels are the perfect DIY ornaments to make for your Christmas tree this holiday season. Gather up small pine cones from your neighborhood and give them a festive makeover into these cute floral angels.
RELATED: Angel Craft
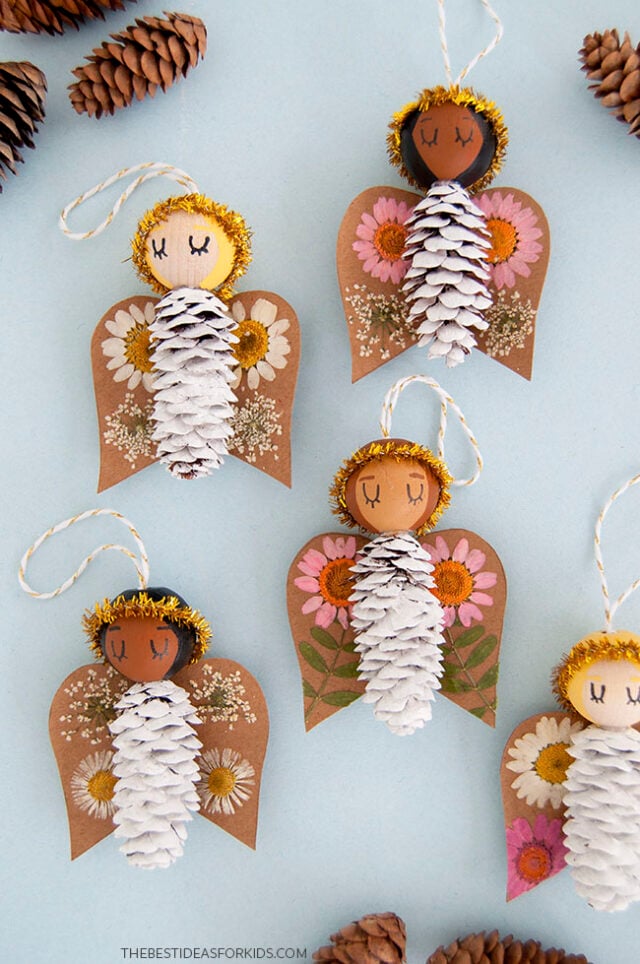
Pine Cone Angels Craft
We decorated the wings with pressed flowers. If you pressed any flowers from your garden over the summer, these pine cone angels are the perfect way to showcase them and turn them into keepsakes!
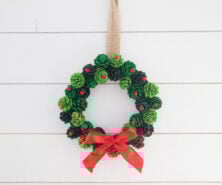
And if you love pine cone crafts, see our pine cone Christmas tree and pine cone wreath.
And not to worry if you don’t have a stash of pressed flowers – you can get a pack of pressed flowers that are ready-to-use with plenty of flowers left over for other crafts. Or, decorate the wings with stickers, sequins, glitter or paint instead!
Supplies Needed
- Pine cones – to make the angel’s body
- Wooden beads – these wooden beads are 1″ across
- Acrylic paint – white for the angel’s body and any color for the face and hair. An assortment of colors are available here.
- Paintbrushes – medium-sized ones will work nicely
- Hot glue gun – used with adult assistance
- Black marker – to draw on the face. Use either a quality gel pen or a fine point permanent fabric marker.
- Gold pipe cleaner – for the halo
- Brown craft cardstock – or recycled cereal box cardboard, to make the wings
- Scissors
- Pressed flowers – to decorate the wings
- Mod Podge – to securely attach the flowers to the wings
- String – to turn the angel into an ornament
- Angel wing template – get the template at the bottom of the post

Watch the Video Tutorial
How to Make a Pine Cone Angel
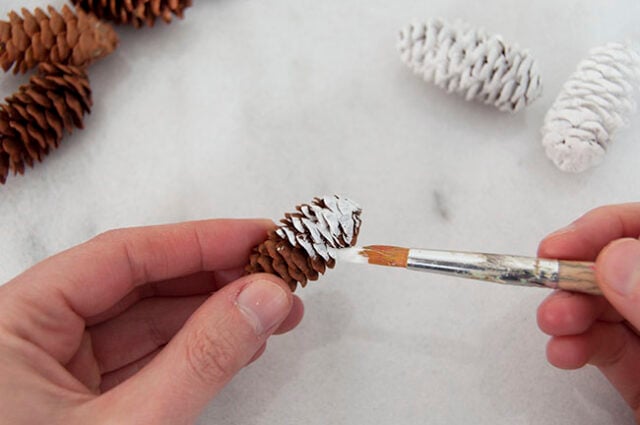
1. Paint the pine cones white.
Apply acrylic paint to the pine cone with a medium-sized brush.
Each angel needs 1 pine cone, so paint as many as you’d like. Set aside to dry completely.
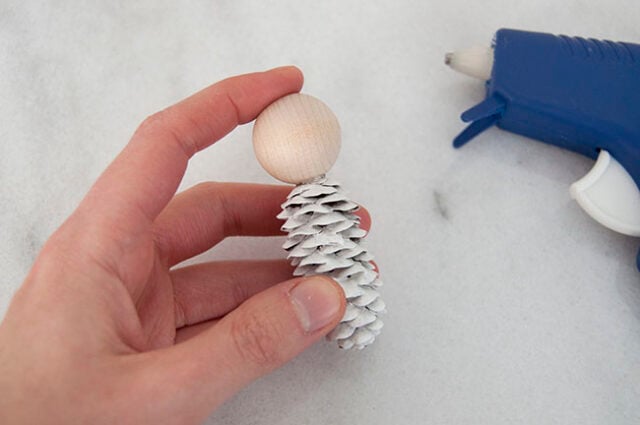
2. Hot glue the wooden bead to the pine cone.
With adult assistance, use hot glue to attach the wooden bead to the top of the painted pine cone. We used 1″ wooden beads here, but you can use whatever size looks best with the pine cones that you are using.
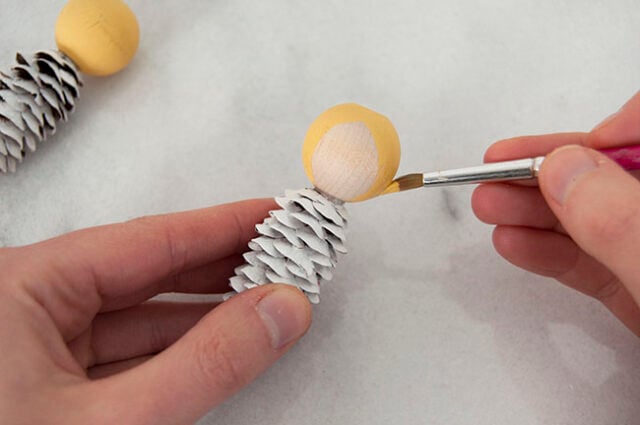
3. Paint the angel’s hair.
Choose a color for your angel’s hair and paint the wooden bead. Let dry completely.
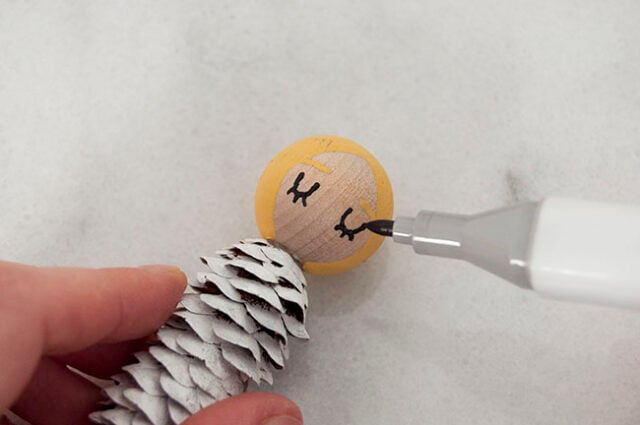
4. Draw the angel’s face.
Use a black fabric marker to draw closed eyes onto the angel’s face.
We also painted tiny eyebrows with paint to match the angel’s hair. A toothpick works well to do this tiny detail.
Note: Permanent markers or regular markers may bleed if used on unfinished wood beads. If possible, test your black marker on an extra wooden bead first to see if it bleeds. If it does, instead use black paint and a toothpick to draw on the eyes.
5. Make the halo.
Cut and twist a gold pipe cleaner into a small circle that just fits on the angel’s head.
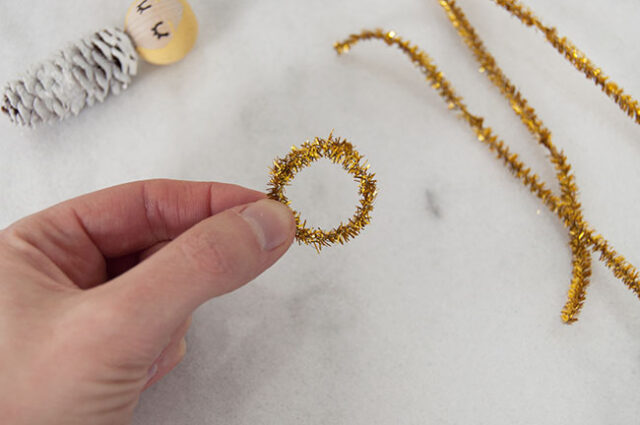
We just placed this snugly on the wooden bead, but you can add a dab of hot glue (with adult assistance) to the back to make it extra secure.

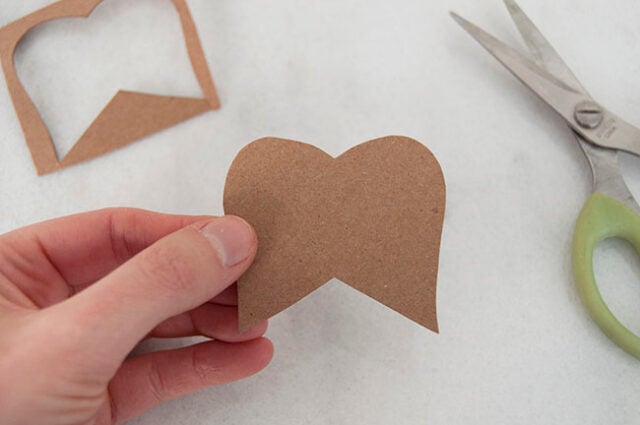
6. Cut out the wings.
Print off the angel wing template (you can get the template at the bottom of the post) and use it to trace on brown craft cardstock or recycled cardboard.
Draw and cut out angel wings on brown craft cardstock (or recycled cereal box cardboard).
Cut out the wings and fold them in half, forming a crease down the center.
Use the template you made to make more, if you are making more angels.
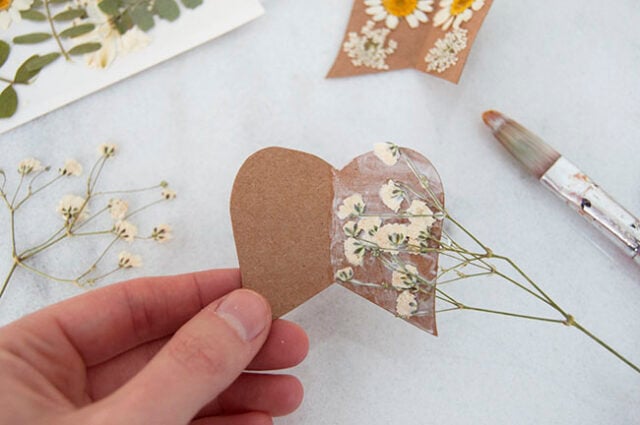
7. Apply pressed flowers to the wings.
Apply a coat of Mod Podge onto the wings. Place the flowers on top, and seal with another coat of Mod Podge. Once dry, this will allow you to trim away the excess flowers that hang over the edge of the wings so that the flowers on the wings remain intact.
8. Glue the wings to the pine cone.
Once the wings are completely dry, with adult help, apply a line of hot glue down the crease of the wings and attach the pine cone to the glue.

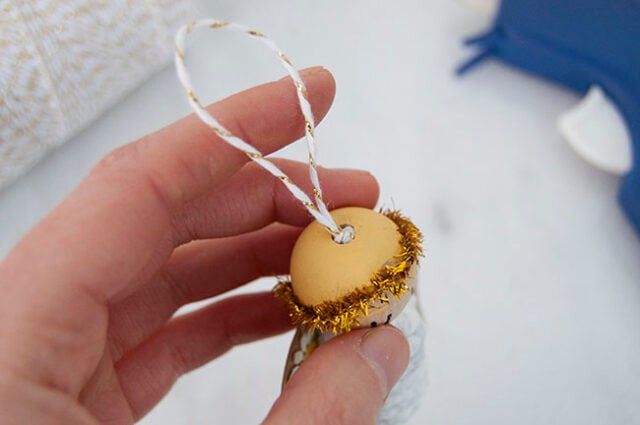
9. Attach the string.
Tie a piece of string into a loop and attach it into the hole of the wooden bead with hot glue (adult assistance).
Make as many angels as you’d like and hang them on your tree!
A set of these handmade angel ornaments makes a great gift for friends or family!


Share a Comment!
We LOVE hearing from you! Submit your question or comment here.
Your email address will not be published.
Required fields are marked *