

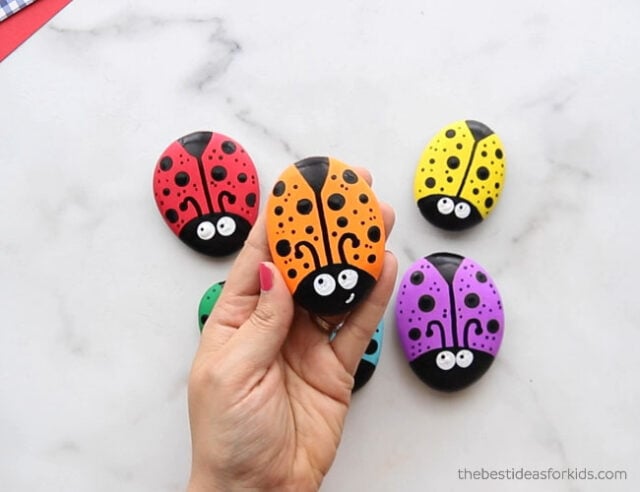
This ladybug rock painting craft is fun to make for kids and adults! This is a great activity to do with your kids or grandkids. This is also a fun art class activity!
RELATED: Pet Cactus Rocks
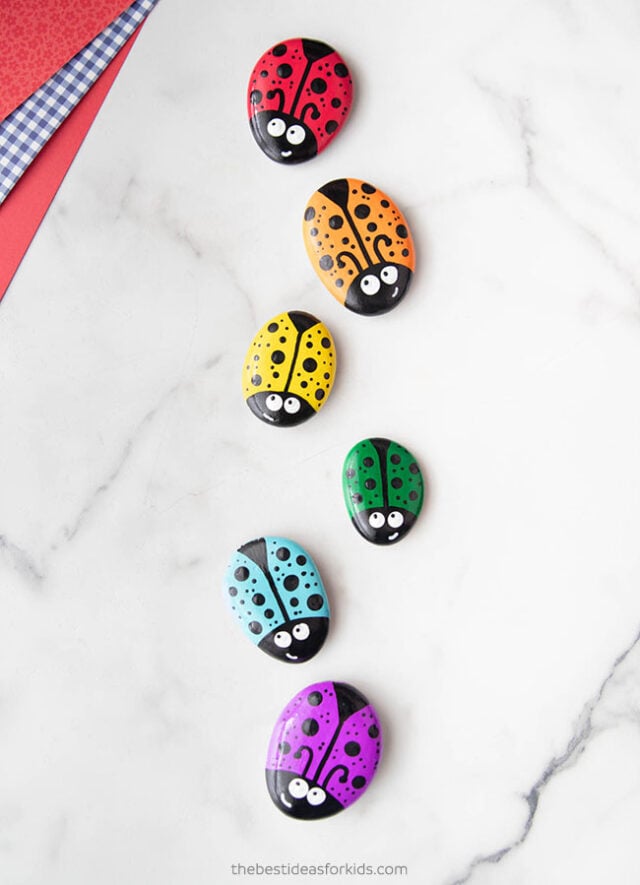
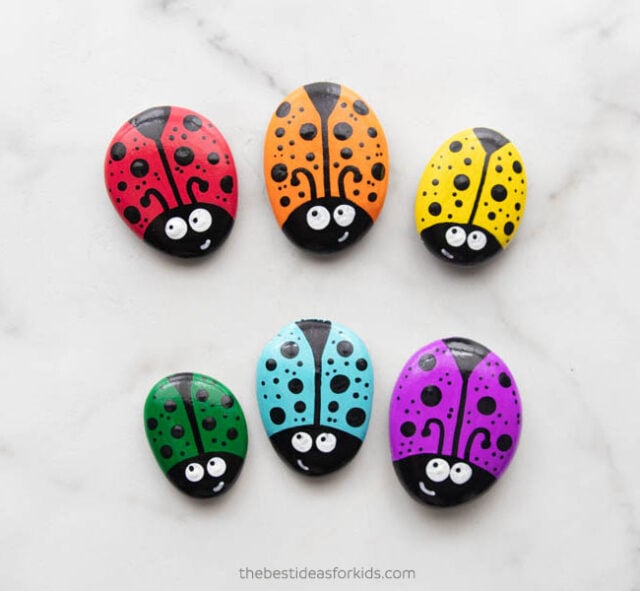
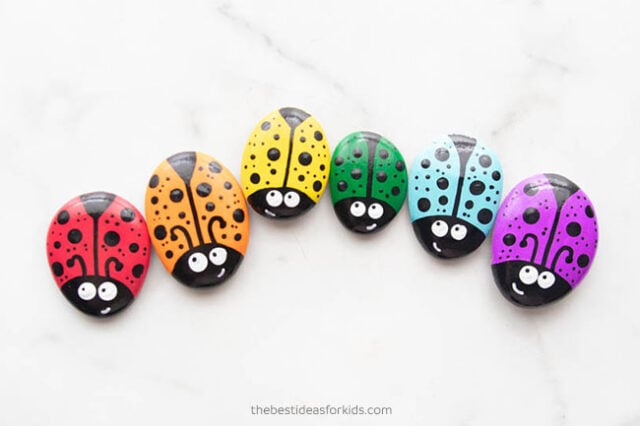
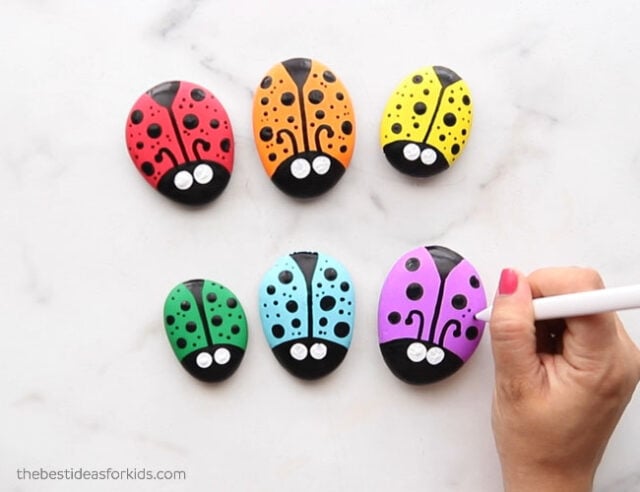
Ladybug Painted Rocks
Making these painted ladybug rocks is really easy! You only need a few supplies. Younger kids can easily make these using paint pens too.

Kids can add their own personal touch to the ladybugs or follow our steps below.
Watch the Video Tutorial!
Supplies Needed
- Smooth Rocks for Painting – you can find your own rocks or Amazon sells rocks for painting
- Acrylic Paint Pens – we like this non-toxic brand. You can also paint with regular acrylic paint however, the paint pens make it really easy for kids.
- White and Black Acrylic Paint
- Dotting Tools – we used this set, but you can also use the back of a pencil or paintbrushes
- Spray Sealer – spray with an acrylic spray sealer (adults to do this part) to give it a shiny finished appearance and to protect the paint. Or for outdoors, use an outdoor sealer. You can also use mod podge to seal.
Note
We used acrylic paint pens for most of the steps, but you can also paint with regular acrylic paint and a paint brush. The pens make it easy to do the line on the back of the ladybug, the mouth and the antennae.
How to Paint Ladybugs on Rocks
1. Use a white acrylic paint pen to paint a white base.
You can paint the whole rock or just paint the part of the rock where the color will go.

2. Paint the color on top of the white.
You may need to do a few coats depending on the color (lighter colors may need more).
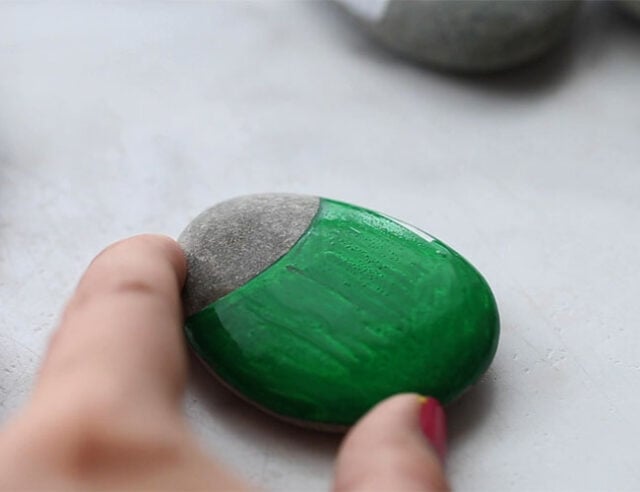
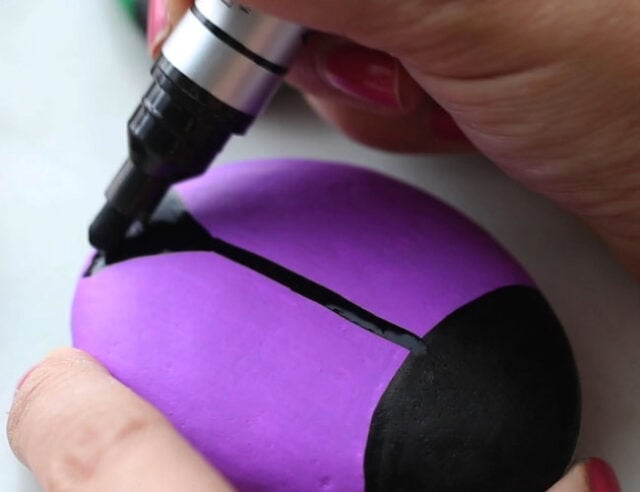
3. Add black to the front of the rock.
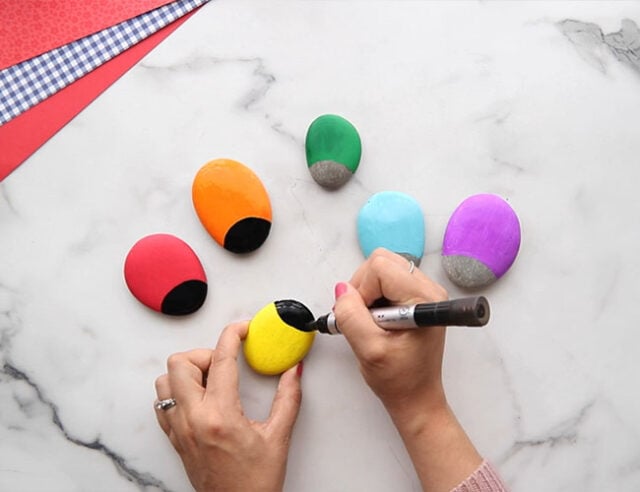
4. Add a line down the middle of the color on the rock.
Then you can flare out the bottom with more black or leave the line as is.
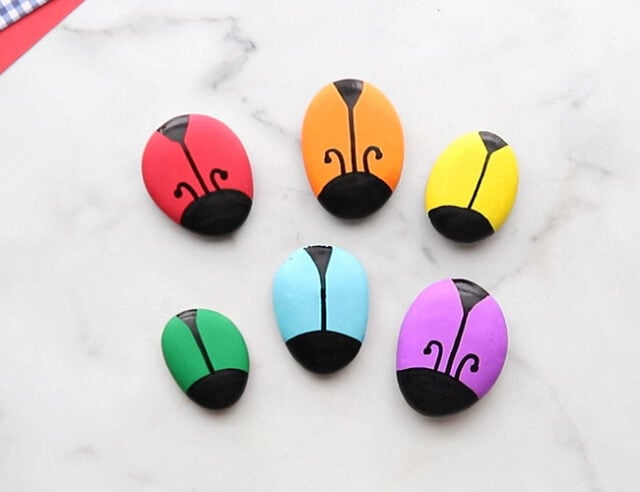
5. Draw the antennae on.
For the smaller rocks we left the antennae off for space reasons.
Draw the lines for the antennae and then add small dots to the end with the black paint pen.
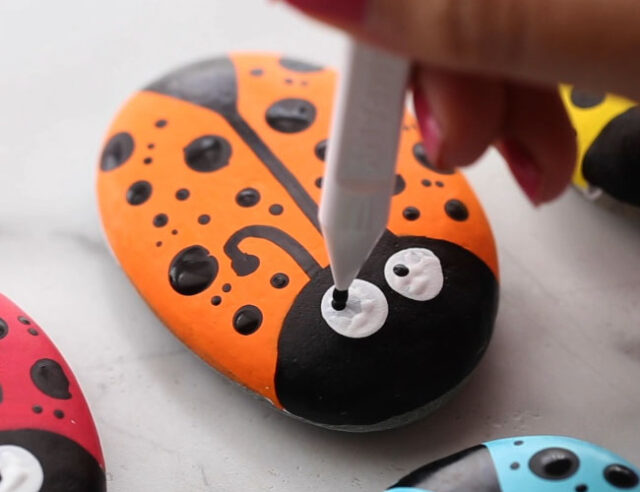
6. Make the eyes.
Using one of the larger dotting tools, or the back of a pencil, dip the tool into white acrylic paint. Then dab onto the face to make two eyes.

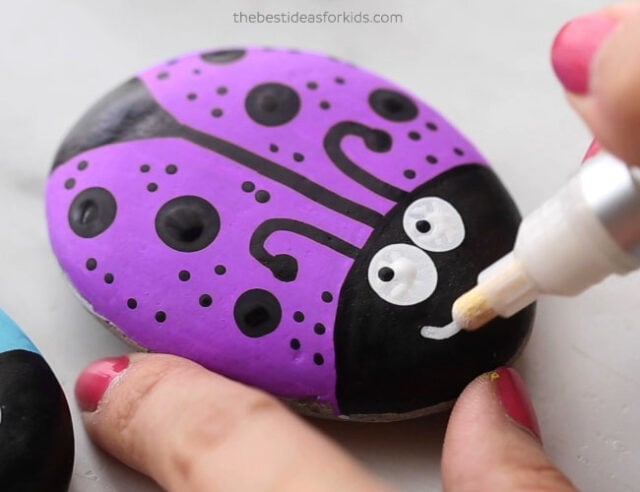
7. Make the black dots.
Dip different sizes of the dotting tools into black acrylic paint. Then dab onto the wings of the ladybug. You can also use the backs of pencils or paintbrushes.
We used different sizes to give the dots some variety.
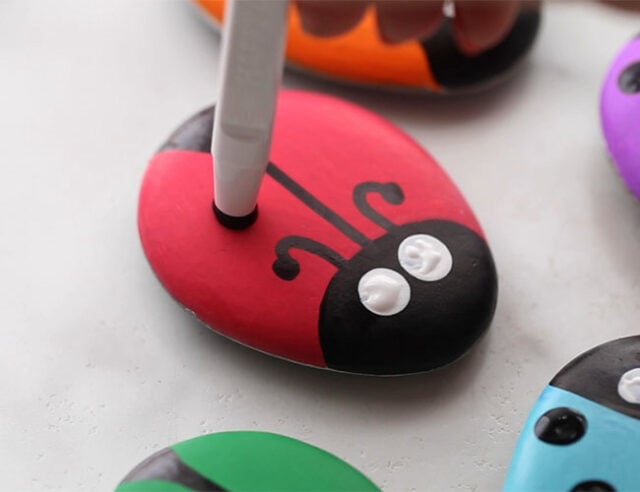
8. Add a small black dot to the eye.
Let the white paint dry on the eye and then dip a small dotting tool into black paint. You can also use the back of a paintbrush that has a small end.
Carefully dab onto the eye.
9. Add a mouth.
Use the white acrylic paint pen and add a mouth.
If you make a mistake, use the black pen to paint over, let it dry, then you can try again.
10. Seal the rocks.
See our recommendations for sealers above.
This will give it a final glossy finish, or protect the paint if you plan on placing it outdoors.
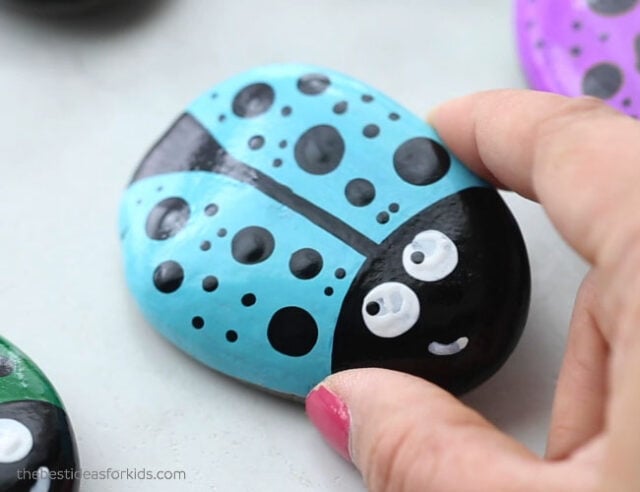
This ladybug rock painting project is fun for kids and adults to make together! The finished ladybugs turn out so cute and would even make great gifts!


Share a Comment!
We LOVE hearing from you! Submit your question or comment here.
Your email address will not be published.
Required fields are marked *