

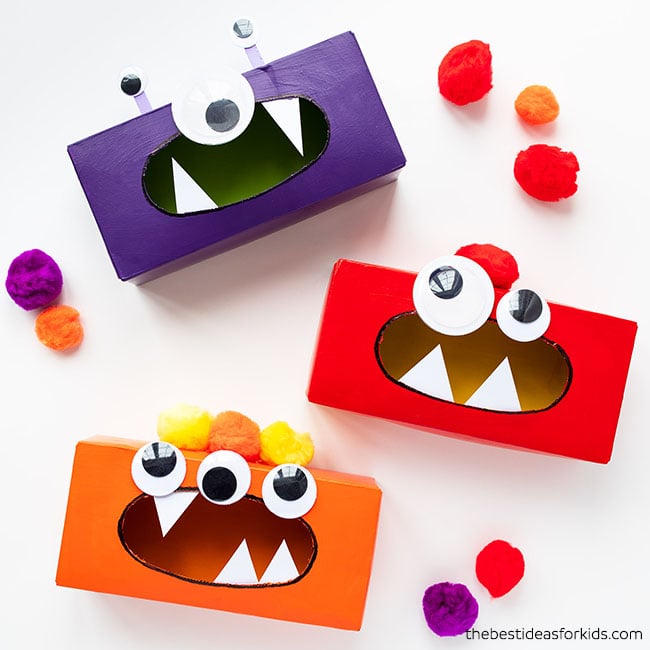
These cute tissue box monsters are a great way to recycle an old tissue paper box! Kids will love designing their own monster. And we love that every tissue box monster can be unique!
RELATED: Halloween Crafts for Kids
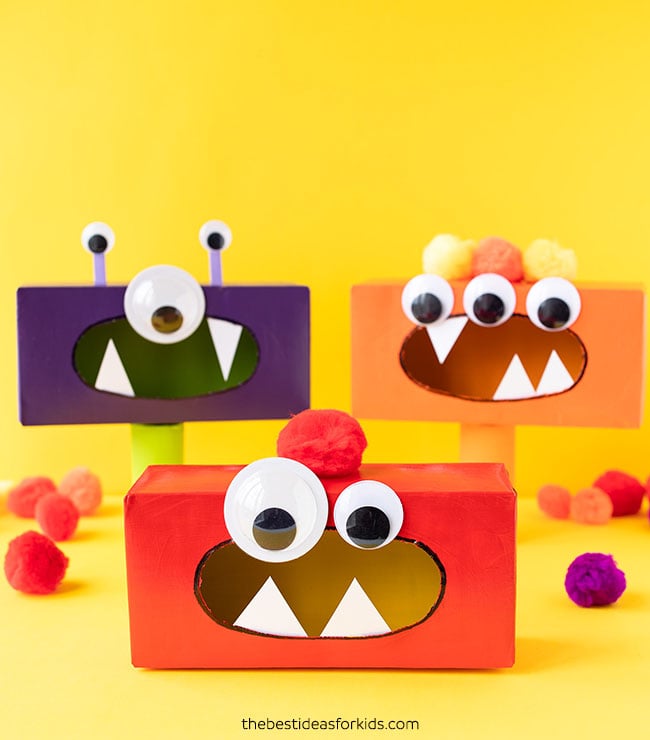
This craft is from my book – Fun and Easy Crafting with Recycled Materials. If you’re looking for a fun Halloween craft, monster craft or just an easy recycling craft for kids – you have to try to make these tissue box monsters! Kids can paint them and easily glue on the googly eyes, teeth and pom poms.
Supplies Needed
- Tissue Box – preferably one with a round opening so that it looks more like a mouth but a square opening could work too!
- Acrylic paint – we used two different colors, one for the outside of the box and one for the inside. You’ll also want white to prime the box before painting with a color.
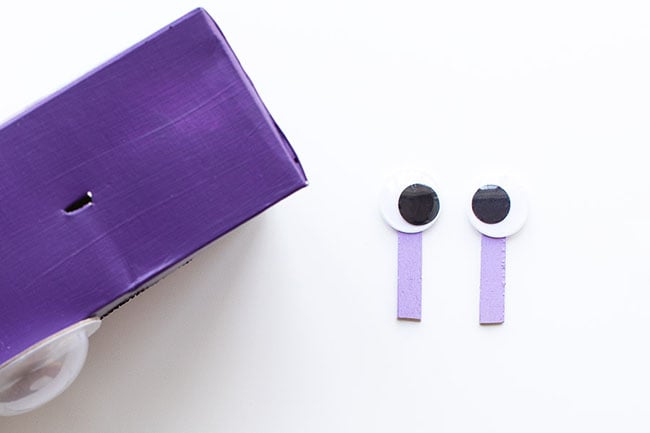
- Googly eyes – large ones work well. Check the dollar store for different sizes.
- Large pom poms
- Black sharpie or marker
- 1 craft stick (optional for the purple monster)
- Craft knife (optional – adults only)
- Glue – hot glue (adult assistance) is always going to work best when working with large googly eyes and pom poms, but you can also use tacky glue. Just make sure to let it thoroughly dry and press and hold for the glue to take.
Check out our book which has this craft in it! Fun and Easy Crafting with Recycled Materials is bursting with easy cardboard crafts for kids like this one. But not only that, it is all recycled crafts for kids too – paper rolls, egg cartons, cardboard, popsicle sticks, jars and more!
Watch the Video Tutorial
How to Make Tissue Box Monsters
1. Pull out any plastic inner lining inside the tissue box before you start.
2. Paint the outside of the tissue box with white to prime the box. Adding white will make sure the design of the tissue box doesn’t show through the paint.
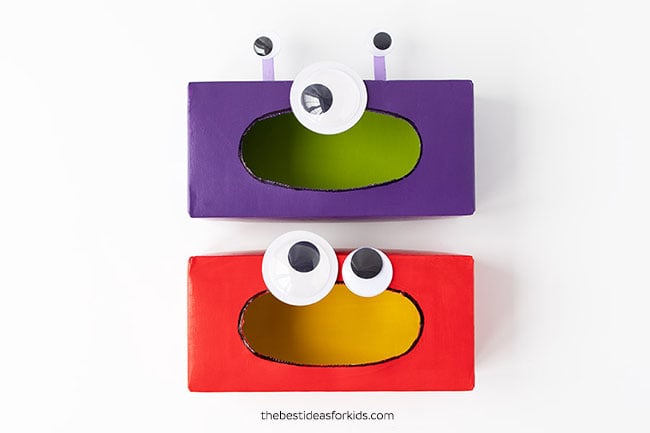
3. Once dry, paint the outside of the tissue box a color of your choice, and paint the inside a different color.
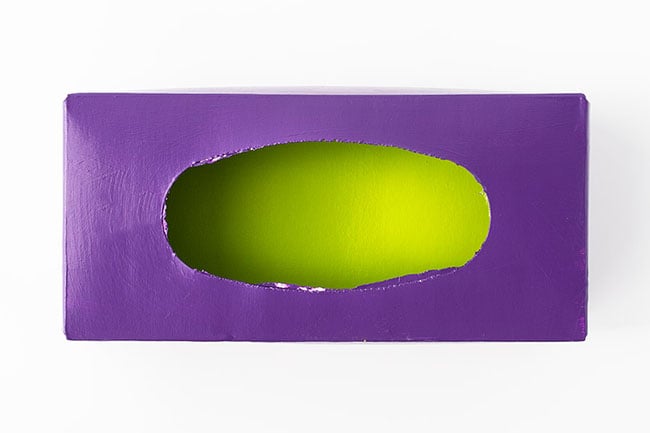
4. Outline around the “mouth” of the monster (the opening of the tissue box) with a black marker. This will make the mouth pop more.

5. For the purple box, cut 1 popsicle stick in half. Paint the pieces purple and let them dry. Glue 2 small googly eyes to the sticks. Make a small slit mark at the top of the box with the craft knife (adults should help with this part) to push the sticks in.
6. Glue large googly eyes to the top of the tissue box. You can add one, two, three or more eyes!
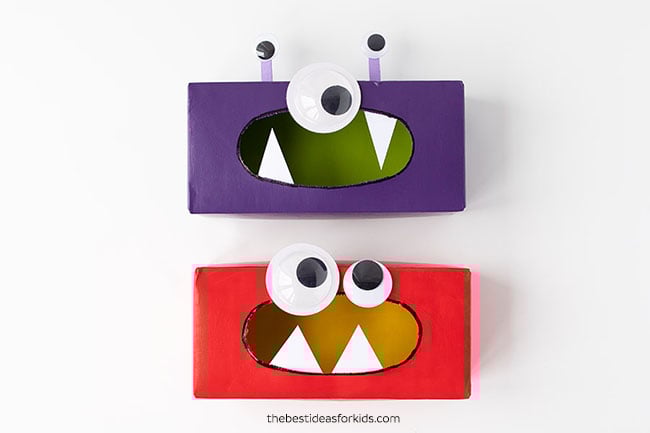
7. Cut out large teeth from paper or white cardstock. Glue the teeth to the inside of the tissue box mouth.
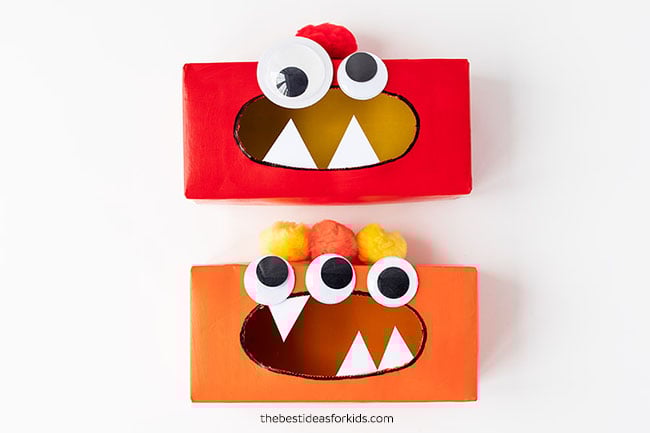
8. Give your monsters a little more character by gluing some large pom-poms to the top of the tissue boxes.
Aren’t these monsters just so cute? We love how easy they are AND the fact that you can recycle a tissue box to make them! You could even use granola box and to make similar ones.
This is one of the 60 crafts in our book – Fun and Easy Crafting with Recycled Materials – see more of the projects in our book here.
More Monster Crafts
See more of our favorite monster crafts!
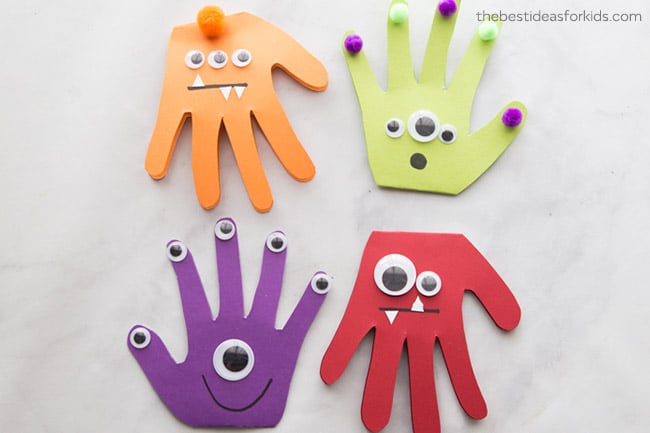
Monster handprint cards – cute to give for Father’s Day/Mother’s Day or to make as a Halloween invitation card!
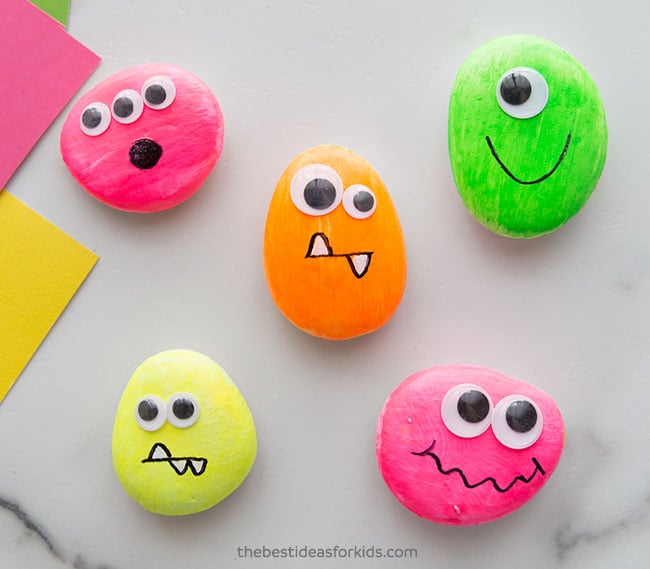
Monster Rocks – these rocks glow in the dark! They would be a lot of fun to place around as décor for a spooky Halloween party.
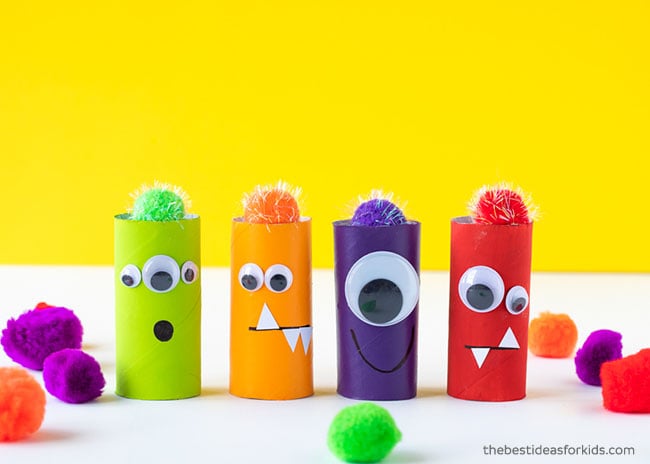
These toilet paper roll monsters are another really fun way to use recycled materials!


Share a Comment!
We LOVE hearing from you! Submit your question or comment here.
Your email address will not be published.
Required fields are marked *