

Learn how to make your own salt dough for handprints or ornaments with this easy salt dough recipe. You only need a few ingredients from your kitchen to make this salt dough! We cover all of the necessary tips and tricks to make these handprint ornaments.
One of our favorite things to do with this salt dough recipe is to make handprint ornaments. But you can also use this same salt dough recipe and use cookie cutters and paint shapes instead!
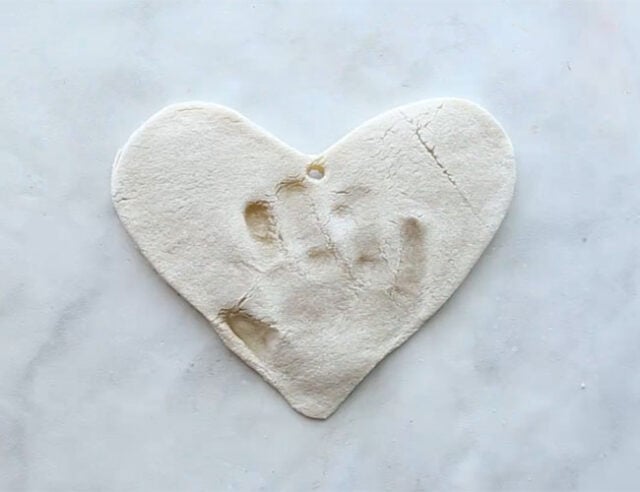
Don’t forget to add the year on the back of the salt dough ornament to keep track of the different years.
Note: reminder to keep out of reach of pets.
Ingredients
- 4 cups all purpose flour (Note: you want regular all purpose flour, not self-rising)
- 1 cup salt
- 1.5 cups warm water
Watch the Video Tutorial
How to Make Salt Dough
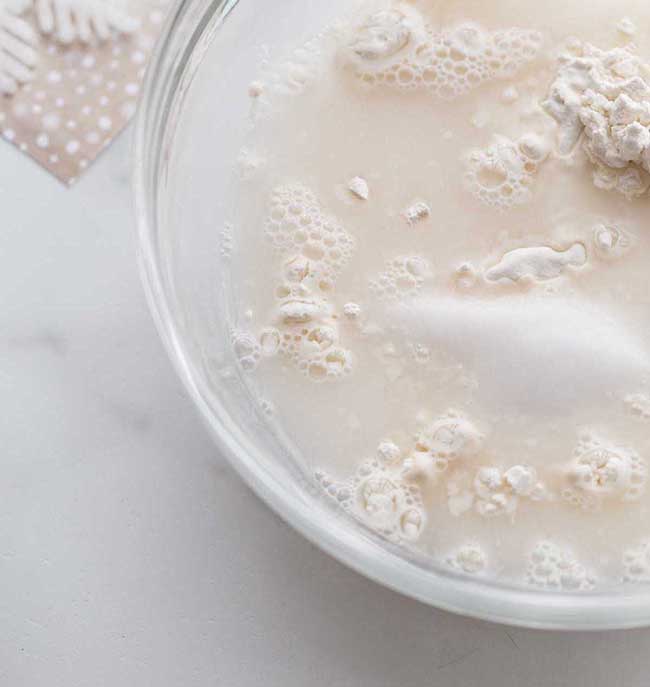
1. Combine all of your ingredients (flour, salt, warm water) and mix well until it starts to form a dough.
2. Take the dough out of the bowl and knead for at least 10 minutes.
The dough will likely be a bit on the dry side to start. If it is, add a little more water in (about 1 tablespoon at a time). Then continue to knead.
The dough should be smooth and roll out with not too many bumps. It should also be easy to press a handprint into it. If you’re finding it’s too hard or not smooth enough, continue to knead some more. If it’s still too dry, add a little bit more water (about a few tablespoons at a time -but not too much or it may get too wet).
Roll out the dough to between 1/4 to 1/2 inch thickness. If the dough is too thick it will take too long to dry.
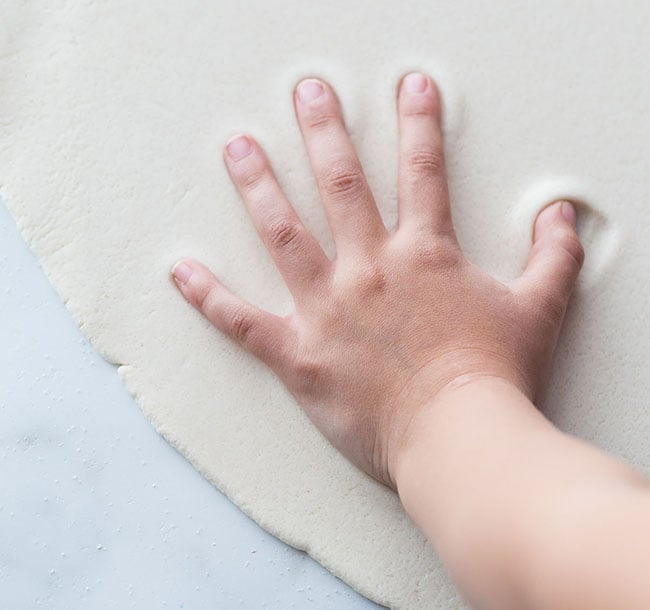
Press the hand into the dough.
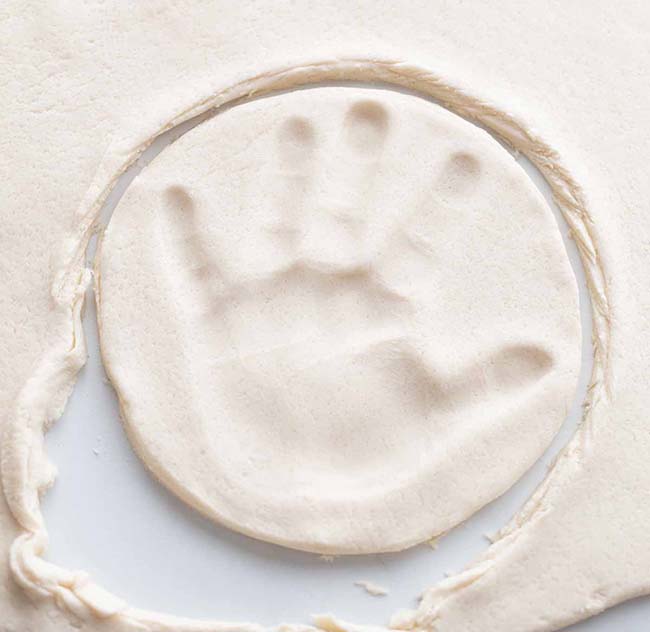
3. Use a circle shaped bowl to trace around your handprint.
Cut out the handprint with a knife (adults to do this part).
You can also print off a circle shape or heart shape to trace around with a knife (adults to do this part).
If you have a smaller handprint you can use a circle or large heart cookie cutter.
TIP: It’s easier to press the handprint first, and then trace around it. If you have dough left over you can roll it out again and do another handprint.
4. Using a straw, make a hole in the top of the ornament.

5. Let the ornaments air dry for a day.
If you have time, let the ornaments air dry for a day. This will cut down on the baking time required and help to prevent puffing. If you do not have time, you can bake right away instead.
Bake at 250 degrees Fahrenheit for 1-2 hours. Once the top of the ornaments look dry and solid, flip over and bake on the other side.
NOTE: It’s important that you check that your oven temperature is set to Fahrenheit. One of the most common reasons the ornaments burn and puff up is that the oven temperature is Celsius. If you have a Celsius setting then you’ll want to use the lowest oven temperature, closer to 120 degrees Celsius.
If your ornaments are still doughy, put them back in for another hour. It will depend on your thickness how long you need to bake for. The thinner ornaments will take less time but thicker may take more. If it’s taking too long in the oven, let them finish drying by air drying them for a few more days. Make sure to flip them over so the bottoms also get exposed to air.
6. Once your ornaments are fully dry you can paint them.
Paint the handprint and leave the remaining ornament plain. Or you can paint the whole ornament white and then paint the center handprint once the base coat has dried.
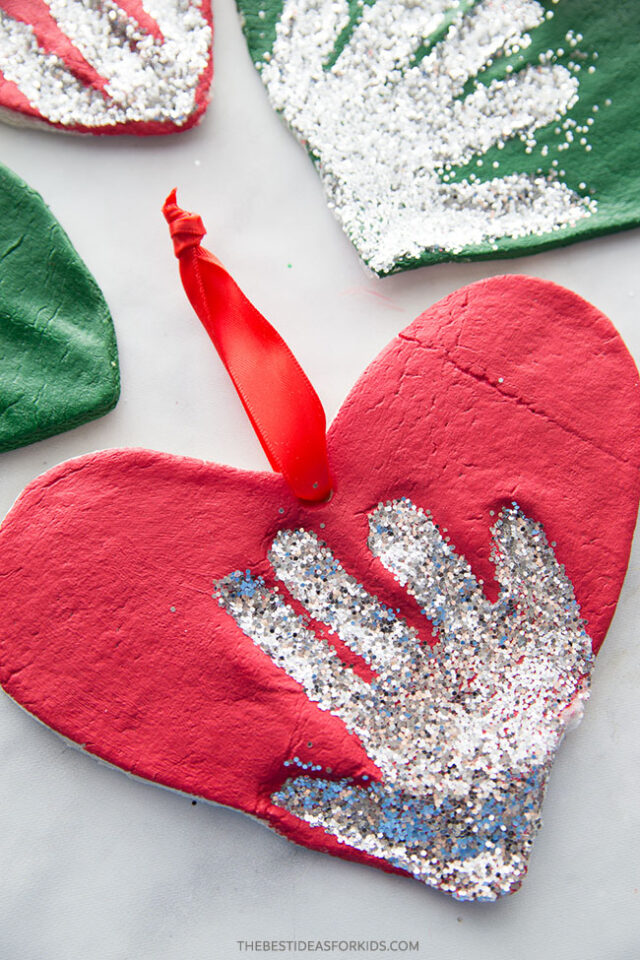
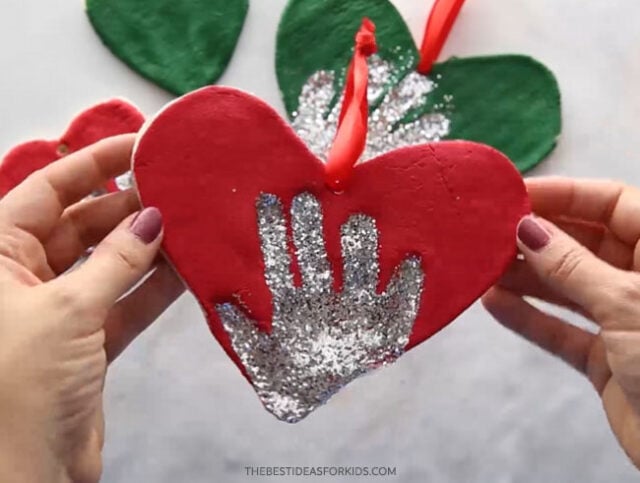
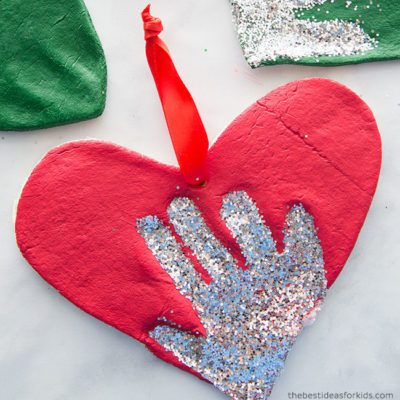
If you want to add glitter into the handprint, decorate the whole ornament with paint first, then fill the handprint with glue. Shake glitter onto the glue.
After the paint has dried, make sure to seal with with either mod podge or a clear glaze spray. Seal the ornaments after you paint them and the paint has fully dried.
7. Tie ribbon or twine through the hole for hanging on the Christmas tree.
Why Is My Salt Dough Puffing Up?
The number one reason salt dough is puffing is due to the oven temperature. If the temperature is too high the salt dough will puff up. It is better to let your ornaments air dry for a day and then bake them. This will prevent the puffing. If you need to bake right away, bake at the lowest temperature (200-250 degrees Fahrenheit).
Note: Make sure to check your oven temperature is Fahrenheit and not Celsius.
You also want to make sure you are using regular, all purpose flour and not self-rising flour.
How Do I Seal?
Once you are done, don’t forget to seal with either mod podge or a clear glaze spray. We like this spray for a durable finish. Adults should do the spraying and always follow directions of the product chosen.
Sealing the final ornaments will help stop them from cracking in a few years and prevent moisture from getting in.
What Kind of Paint Should I Use?
I like to use non-toxic acrylic paint for salt dough ornaments. The color will go on much thicker and more vibrant than kids paint. We like this brand of acrylic paint.
How to Decorate
You can use a heart for the shape around the handprints or you can use a circle.
For this one, we used a large heart cookie cutter as the handprints were small (baby handprints):

If you have larger handprints, you can trace around a heart print-out or use a knife (adults only) to draw a heart shape around the handprint.
How Many Ornaments Does this Make?
Depending on the handprint size and thickness of the salt dough – you can get approximately 8 handprints. If you’re using the dough to make small cookie cutter ornaments you’ll get approximately 15.
If you’re hoping to make this for a classroom or with a larger group of kids, I would recommend bringing an extra batch just in case. The quantity can vary depending on size of cookie cutters, handprints and thickness of the dough. I like to roll out the dough and continue to knead together the scraps to use as much as I can.
Tips
- Knead well to make the dough smooth – I like to knead at least 10 minutes.
- Let the ornaments air dry for a day first, if possible. This cuts back on the oven baking time and helps to prevent puffing.
- Don’t forget to flip the ornaments when baking or air drying so that the bottoms will be exposed to air.
- Seal with our recommended sealers mentioned above so that the ornaments will last for many years.
- Store the ornaments in a cool, dry place and keep away from moisture. Sealing the ornaments also prevents moisture from getting in.
- Keep out of reach of pets.
Salt Dough Recipe – for Handprints & Ornaments
Video
Equipment
- Rolling Pin (for rolling out the dough)
- Twine (to create the ornament!)
- Non-Toxic Acrylic Paint (we prefer this brand)
Ingredients
- 4 cups all purpose flour
- 1 cup salt
- 1.5 cups warm water
- Clear Glaze Finish or Mod Podge
Instructions
- Combine all of your dry ingredients and knead for 10 minutes. If your dough is too dry add a little bit more water in (a few table spoons at a time) and continue to knead. The dough should be smooth and roll out with not too many bumps. It should also be easy to press a handprint into it. If it's too hard or dry, then add a little bit more water and continue to knead.
- Roll out the dough to a thickness that you'd like your salt dough ornament to be. We like between 1/4 to 1/2 inch thickness.
- Using a large cookie cutter, cut out different shapes for your salt dough ornaments. If making handprints, place the handprints first and then trace around them.
- Have your child place their hand into the salt dough ornament. If the dough is too hard to get an imprint it may be too dry. Continue to knead until smooth. You can also add in a little bit more water.
- Using a straw, make a hole in the top for where you want to hang your salt dough ornament.
- If possible, let the ornaments air dry for a day.
- Preheat your oven to 250 degrees Fahrenheit. Bake for 1-2 hours. If your ornaments are still doughy, put back in for another hour. (It will depend on your thickness how long you need to bake for. The thinner ornaments will take less time but thicker may take more).
- If you encounter too much puffing, roll out thinner ornaments and this will help reduce the puffing. If the ornament is still a bit doughy, bake for longer or let sit out a few days to harden before decorating. The thickness of the dough will determine how long you have to bake them for. We prefer to bake them at 250 degrees Fahreneheit for longer and let them air dry for a few days to prevent puffing.
- Once cool, you can decorate by painting with non-toxic acrylic paint.
- Spray with a clear glaze finish or finish with mod podge. Do this before adding the glitter.
- To make the hand glittery, fill the handprint with glue then sprinkle glitter on top of the glue, shake off the excess and let it dry.
Kids will love helping to make this salt dough recipe. They will also have fun decorating the salt dough ornaments by painting them.
Finally, just a friendly reminder to keep these out of reach of pets (they can be toxic to dogs due to the salt content).


Hi, what would happen if I sealed them before they were completely dried through? Baked them for a few hours Thursday, and have been sitting out till Sunday; didn’t want to bake them longer because the tops werw starting to crack.
Elizabeth I would wait until they are completely dry before sealing. You can leave them for a week and then seal if you need to.
Hi! I tried making these with my kids and the dough was so sticky we couldn’t get the dough to hold shape. When we pulled the cookie cutter off all the dough with it. Any tips? I tried adding more water and that made it stickier. What did I do wrong?
Hi Decon – you need to add more flour to your surfaces, cookie cutter, hands etc if it is too sticky. If the dough is too sticky then add more flour.
Hi! Procrastinator here! Wanting to make these for a relative for Christmas! Would have to mail out at least before Christmas Eve! Can you bake them on low heat extra long so that they don’t have to sit out for days?! Would love to make, bake, decorate and send them out as soon as possible! Thank you!
Yes you can actually raise the temperature and that should speed the process up but just keep an eye on if they start to puff up because then you’ll want to lower it again if they are puffing. They should be hardened even after 1 day.
Pro tip: if your kiddo will likely not be able to get their hand centered in the shape you cut out, just have them press it down anywhere on the rolled-out dough and cut out the shape around it!
Brilliant suggestion! Much appreciated!
What kind of glue should I use for the glitter handprint?
Just regular white glue is great!
Is it normal for the back to look lighter and still be all dry? Or does it mean it needs more time to try. It doesn’t feel doughy
Yes that’s normal 🙂
How soon does it need to be sealed before any chipping or cracking of paint ??
We recommend you seal within a week. 🙂
Hi! I am a kindergarten teacher and would love to make these as parent gifts. I was wondering if I could make the dough and cut them out ahead of time. Then, I would take them to school the next day to let the kids put their hand prints in them. Would they be sitting out too long before the hand print?
You could make the dough in advance but don’t precut them as they’ll start to harden once exposed to air. So if you can cut before you take the handprints that would work.
I tried making the double handprint snowman ornament. Let it air dry for a few days still doughy so I put in the oven on 200 for 2.5 hrs and cracked everywhere and still doughy. What am I doing wrong.
That one isn’t ours but my guess is it’s too thick and big. I’d recommend making it thinner and smaller if you can. Put in oven first and then let it air dry for a few days.
Oh ok. Thanks. I’m trying it again today and following your salt dough recipe for Just the handprint. How thick should I make it and do I need to flip it over during cooking process?
Less than a cm and no need to flip. At a low temp you can keep in longer if needed. And then let sit out a few days. 🙂
So I just used mod podge super gloss and I spread it evenly and it kinda looks like I ruined it is that normal with mod podge?
Hi Thomas – the mod podge will dry clear. Take a look tomorrow and it should be fine. 🙂
Hello, This maybe a silly question… What do you bake the ornaments on? Non stick baking sheet? Thanks, Susan
Yes just a non stick pan is fine and dust a little flour on the pan and you should be good! 🙂
I followed the instructions when placing my daughters hand it was so hard to get her print . Any suggestions
You probably need to make the dough a bit softer by adding in more water. Hope that helps!
How many ornaments does each batch of dough make?
If you are making the large handprint ornaments you could definitely get 6 and possibly more from one batch. For small cookie cutter ornaments it should make at least 12-15.
I got 29. With my granddaughters. Makes a very nice personalized Christmas gift.
My plan is to have each of the kids make a pair of mittens with their handprints attached with a ribbon for hanging purposes. What would you suggest I use to string the ribbon through vs putting a hole through the dough? Paperclip? Also, what is the ideal thickness of the rolled dough?
Ideal thickness is 1/2 cm. I’m not sure there is a better way than doing a hole. You could hot glue ribbon to the back once painted?
Everything is perfect so far!!! Mittens are painted, handprints look great! You suggested using a glaze spray. Could I use a clear acrylic sealer spray?
Yes 🙂
Add more flour
If the children I’m working with are 8-10 years old. How many hand prints do you think I can get out of one batch?
Best guess would be 5 per batch.
Just wondering if you use plain flour?
Yes just regular all purpose flour.
Can a person mix it this and store then can you bake it like 2 hours later?
Yes you do not need to bake right away. You can even let it sit for a day or two before baking.
How do I store kneaded dough for Sunday school project so need to do several batches before hand.? Would overnight be OK? Need to refrigerate?
We haven’t tried refrigerating overnight but assume it would be OK. The dough would get very hard so you’ll need to let it rest at room temperature for a few hours before trying to work with it. If you have time in the morning to make the dough that would probably be better.
I put mine in a ziplock bag and left out on the counter. I had two of my granddaughters one weekend and my baby granddaughter came to visit a few days later. The dough was still perfect to make her tiny handprint. ?
Hey can you an alternative to the mod Podge. I have something similar to that, but wanted to check first because I don’t want to ruin them!
We link above to a spray sealer we recommend. You can also use diluted pva glue. What do you have?
Hi Kim, can you add coloring to the dough? What would you suggest?
You can dye them with food colouring when making the dough but the color won’t be as bright as painting them. 🙂
We added food coloring right to the water before mixing into the mixture
Hi. How many ornaments approx can you get from one batch. I want to make about 10 hand print ones
You could definitely get 4 from one batch so if you’re doing 10 to be on the safe side make 3 batches.
I am trying to make this currently and kneaded for 10 minutes still too sticky and added more flour. I followed the ingredients perfectly. What is going on?
It sounds like maybe too much water if too sticky. Just keep adding a bit more flour in slowly until it’s not too sticky. Put flour down on your surface and hands when kneading.
This recipe is perfect, not sticky at all to work with. Thank you!