

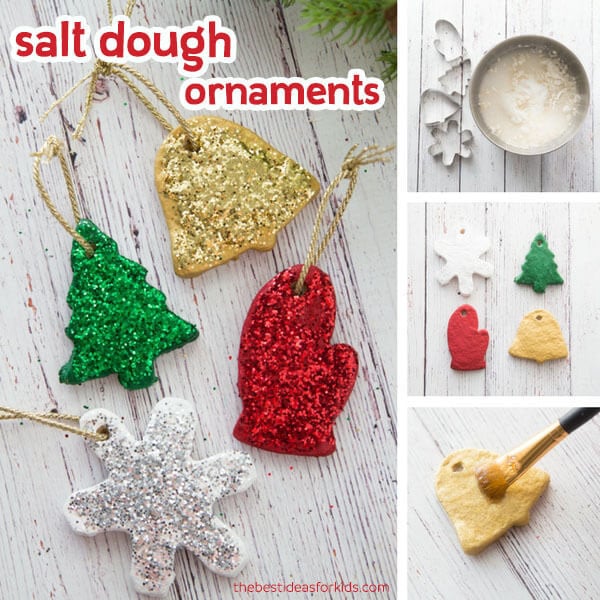
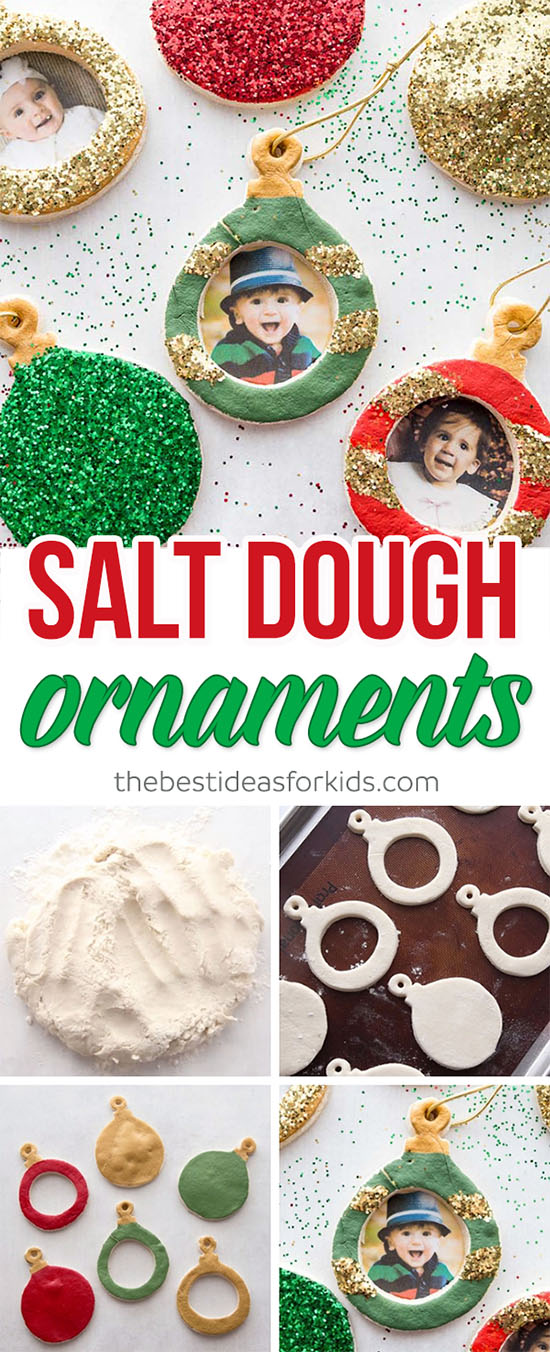
Making salt dough ornaments are the perfect Christmas craft activity for kids. Not only can kids help to make the dough, they can also paint and decorate the ornaments too. Kids will love making their very own photo salt dough ornaments to give as gifts for Christmas. They can also be great keepsake ornaments to hang on your Christmas tree! We love that you only need a few ingredients from your kitchen to make them too – flour, salt and water! We’ll show you our favorite way to decorate them and make sure you read the tips on how to seal them. Sealing will help preserve your salt dough ornaments for many years to come!
RELATED: 25+ Salt Dough Ornament Ideas

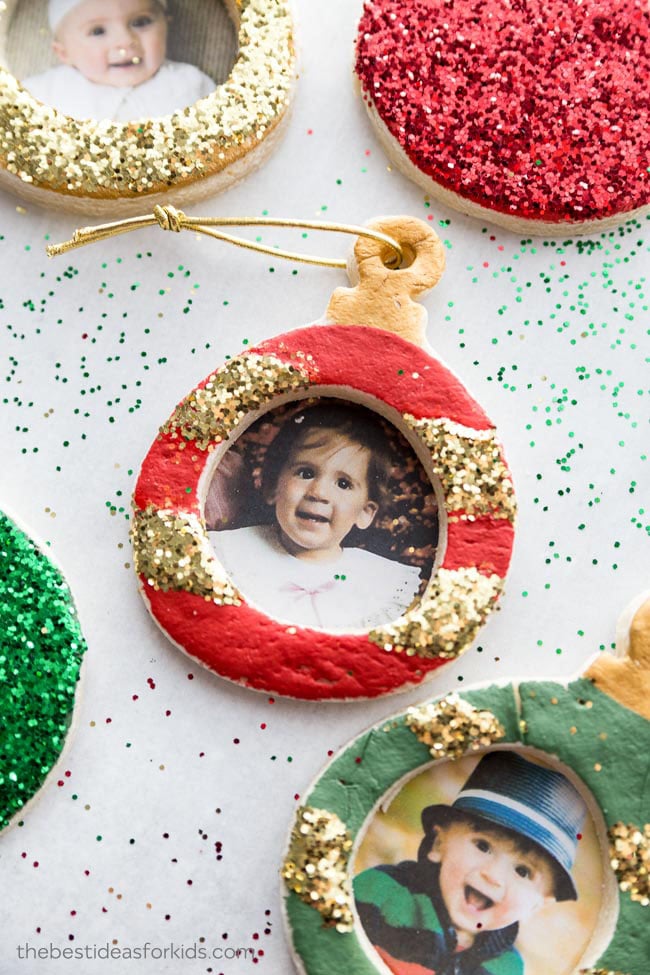
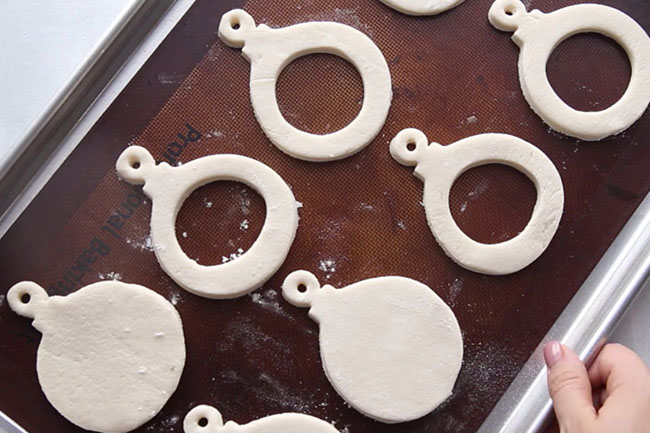
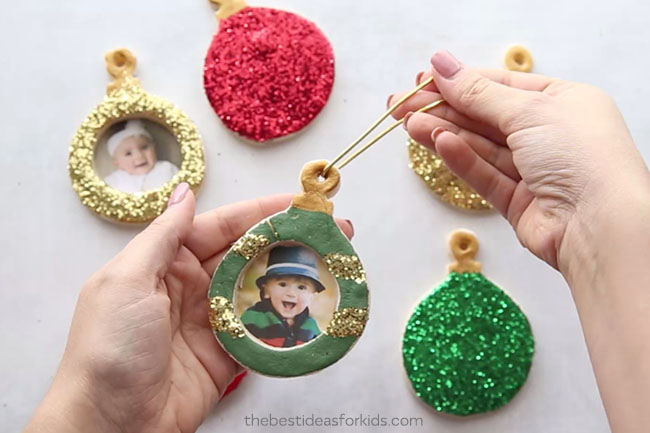
These salt dough ornaments are similar to these which we did last year. The main difference with these ornaments is that we are using a cookie cutter that is shaped like an ornament! So you’re going to get the look of a real bauble and then you can even add a circle cut-out in the center to add a photo (which we love!).
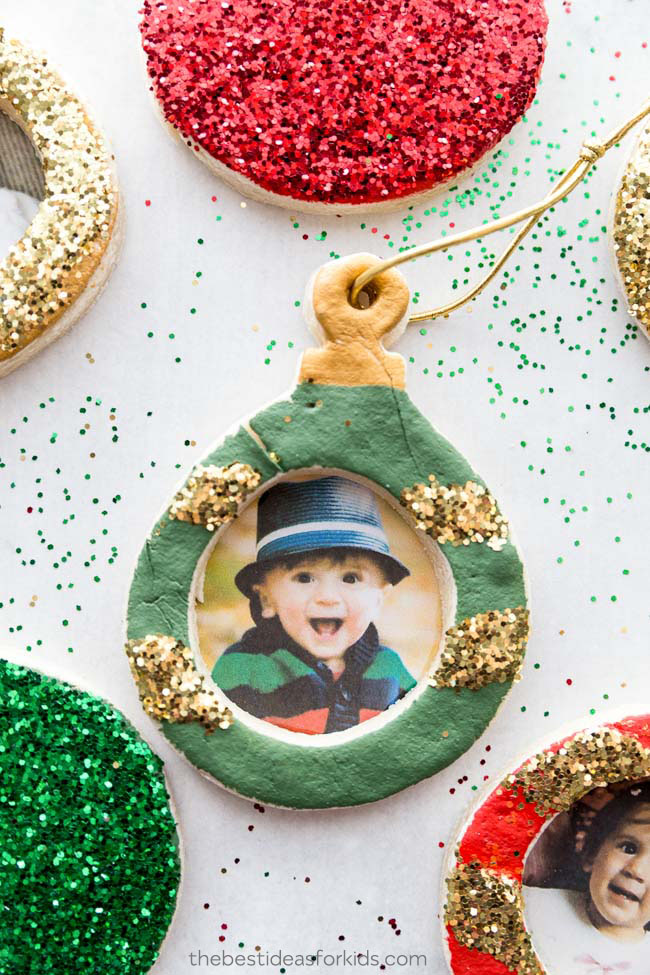
The photo version adds a special personalized touch to the ornament. Parents and grandparents will love to receive this salt dough photo ornament. It will be an ornament they treasure every year as they place it on their Christmas tree!
Ingredients for Salt Dough Ornaments
You’ll only need flour, salt and water to make your ornaments. We do recommend sealing them when they are finished painting. You can seal with either a mod podge or a clear glaze spray.
How Long to Knead Salt Dough
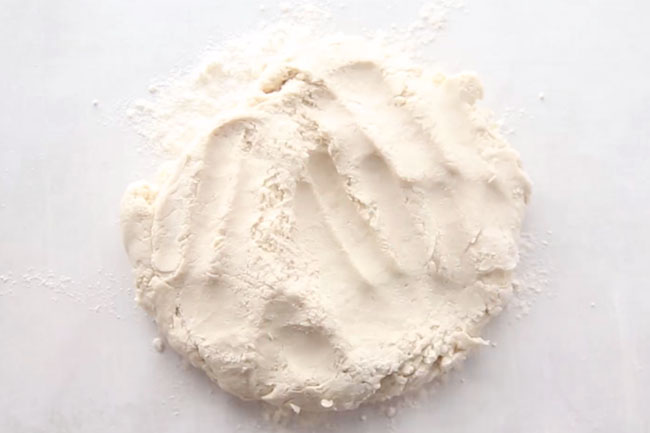
You will definitely need some elbow grease to knead your salt dough. We like to knead for at least 10 minutes to thoroughly mix the dough. Once you start mixing the dough it will be very dry and flaky. Just keep kneading until it turns into a dough-like consistency. If you find it too dry, add a little more water. If it’s still a little sticky, add a little more flour.
Baking Temperature for Salt Dough
We like to bake our salt dough ornaments at a very low temperature. This helps to reduce any puffing you may encounter when baking. If you raise the temperature and notice puffing simply dial back the temperature again.
You’ll need to bake for a long duration when baking at a low temperature. You can also air dry for 24 hours and then bake which helps reduce the baking time required. We do recommend some baking in the oven to ensure all moisture is removed from the ornaments.
What Paint to Use for Salt Dough Ornaments?
We prefer to paint with acrylic paint. For an even brighter ornament, find a glossy acrylic paint. This will give the ornament a little bit of sheen.
How to Seal Salt Dough Ornaments
Once you are done, don’t forget to seal with either mod podge or a clear glaze spray. We like this spray for a durable finish. Adults should do the spraying and always follow directions of the product chosen. Sealing the final ornaments will help stop them from cracking in a few years.
Are Salt Dough Ornaments Safe for Pets?
No. Please keep all salt dough ornaments away from pets. If you plan on hanging on your Christmas tree, place high enough that any pets will not be able to reach them. Due to the salt content in the dough, the ornaments can be toxic to pets if they consume them. They are not toxic if touched so if you want to get a paw print ornament done that is fine.
Ingredients for Salt Dough Ornaments
– 4 cups flour
– 1 cup salt
– 1.5 cups warm water (maybe a little more)
– Ornament Cookie Cutter – we used this one
– Glitter
– Clear glaze spray or mod podge
Watch the full tutorial video here before you get started!
How to Make Salt Dough Ornaments
1. Preheat your oven to 250 degrees Fahrenheit. Adults will need to do the baking part, but kids can help decorate!
2. Combine your flour, salt and water and mix. Knead for 5-10 minutes or until your dough is soft. If your dough is too dry, add a tablespoon of water at a time. If your dough is too sticky, add a little bit of flour back in.
Tip: Add extra flour to your kneading surface, rolling pin and cookie cutters to help stop the ornaments and dough from sticking.
3. Once you’re done kneading, roll out the dough to about 1/2 cm thickness. If you make your ornaments thicker, they will take much longer to bake. We recommend thinner ornaments to reduce baking time.
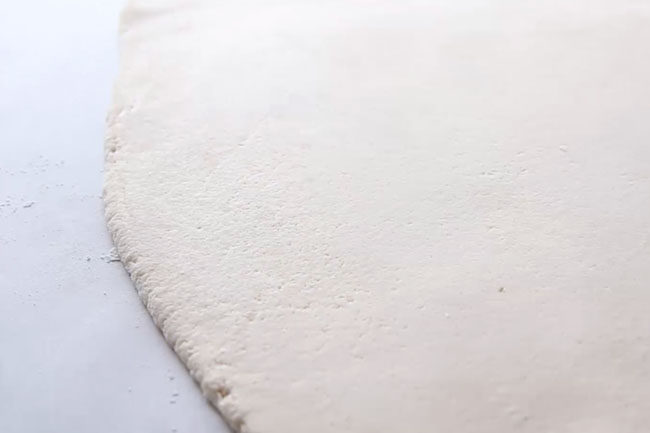
4. Using your ornament cookie cutter, cut out your shapes from your dough. Use a smaller circle cookie cutter to cut out the center of some of your ornaments. To make a hole for adding twine in, use a straw.
5. Bake for 2 hours at 250 degrees Fahrenheit.
If you find your ornaments are still a little doughy on the bottom, put them back in for another hour. If they are still not dried through after this you can leave them to air dry overnight on a cookie drying rack. Check them in the morning and if they need to still dry out more, you can place them back in the oven for another hour.
The baking time will vary greatly depending on the size and thickness of your ornaments. Larger ornaments will take longer whereas smaller ornaments will take less time. To reduce baking time, you can also let them air dry for a day before baking.
Tip: To avoid puffing, make sure your ornaments are not too thick and your temperature is low (250 degrees Fahrenheit)
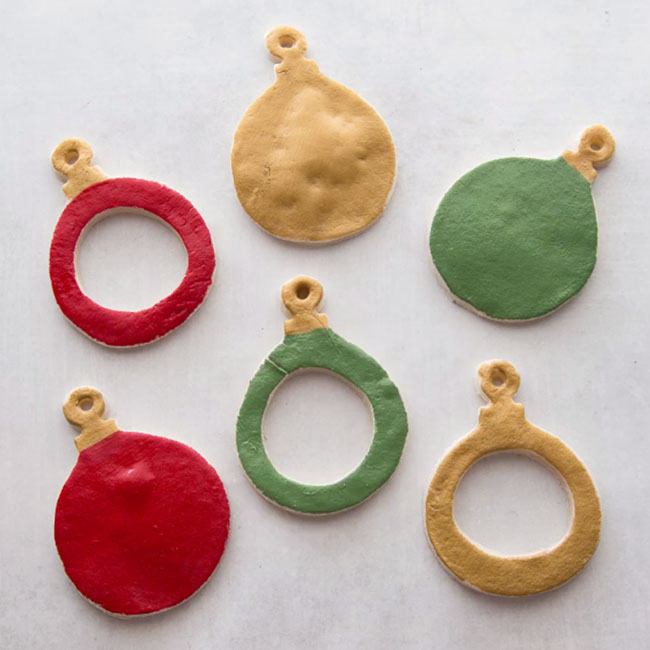
6. Once cool and completely dried, paint with acrylic paint. We used gold acrylic paint for the tops of the ornaments.
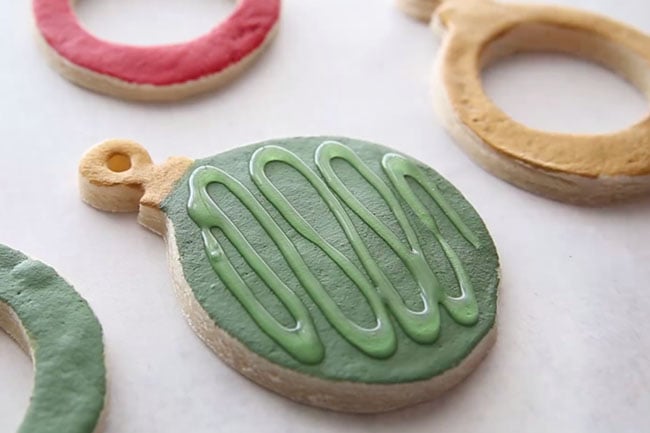
7. You’ll want to seal your ornaments before adding your glitter. Make sure your ornaments are completely dried through before sealing. Spray with a clear glaze spray (adults only) or finish with mod podge.
8. Now add clear glue on top of your ornament and shake glitter on top until you fill the ornament with glitter. For the photo versions we just put a few lines of glitter across the ornament.
9. Glue a photo to the back of the ornament. We would recommend hot glue (adults should do this part) to ensure the photo stays if using a laminated or a real photo. If printing photos from your computer you can use regular glue.
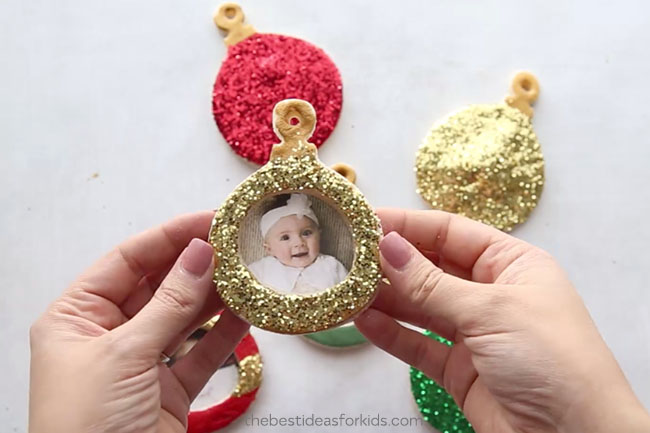
10. Once you’re done, add your gold twine for hanging them on the tree.
Salt dough ornaments are some of our favorite ornaments to make for Christmas! Not only is this a great gift idea for kids to make for Christmas, they will also enjoy making them!
More Salt Dough Ornament Ideas
See how we made these Christmas salt dough ornaments but with different Christmas cookie cutters!
Looking for more fun Salt Dough Ideas?
See over 25+ Salt Dough Ornament Ideas – these are such cute keepsakes!
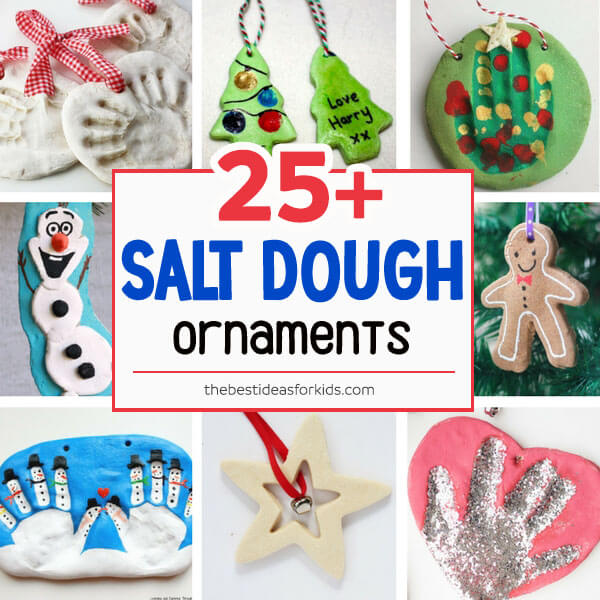
These Salt Dough Handprint ornaments are our most popular salt dough ornament.

We love these salt dough star ornaments. They are easy to make and have a natural-look to them without any paint!

Pin this for later!


Hi, I made a couple ornaments and 2 large ones have cracks around the centre, 1 large broke in half because of the crack. However 3 small ornaments are totally fine. Any idea why? Please do let me know.
Thanks a bunch!
Sometimes if they are too thick or big I think they may crack. I try to keep mine about 1/4 inch thickness and haven’t had any issues with cracking in half. Hope that helps!
Hi
How many baubles does one batch of salt dough make? I’m looking to make them at school so trying to estimate how much I would need.
Many thanks
Sarah
Depending on your size of cookie cutters and thickness it should yield 12-15 small size ornaments (about 3 inches tall).
when making the salt dough photo ornament how did you secure the solid piece behind the photo (the back) of the ornament. did you use glue or hot glue?
Yes if it’s a laminated photo use hot glue. If it’s a printed photo you can use regular glue.