

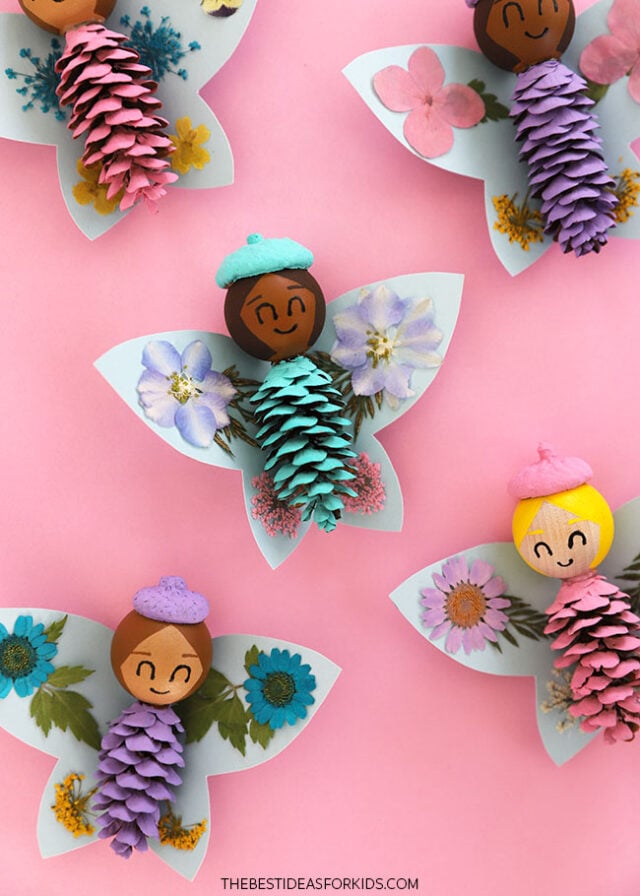
This colorful pine cone fairy is a fun spring or summer craft. Kids can get creative with items from nature to make this cute fairy craft.
RELATED: Pine Cone Angel
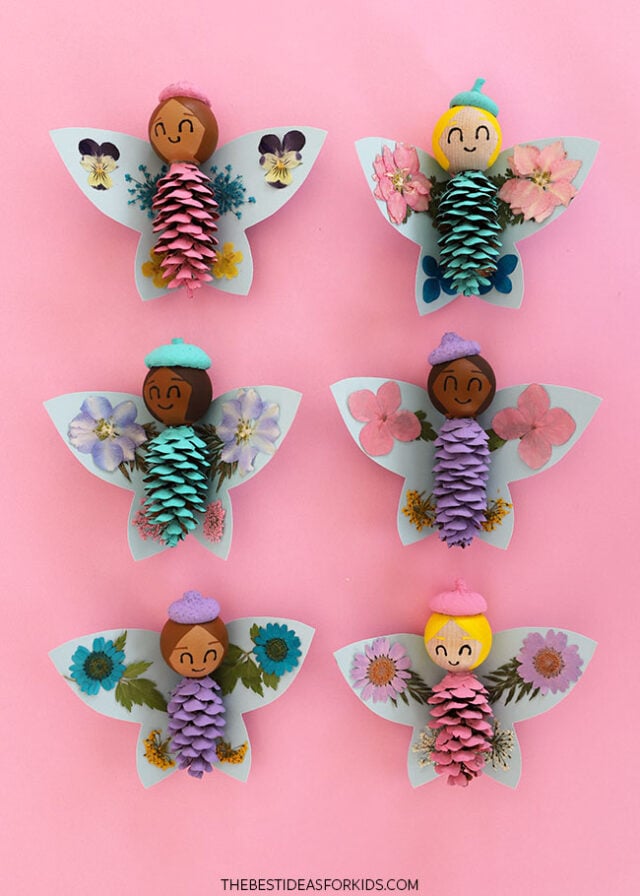
Pine Cone Fairy Craft
This fairy nature craft features pine cones, pressed flowers, and acorn tops. We love how the little acorn tops make perfect berets!
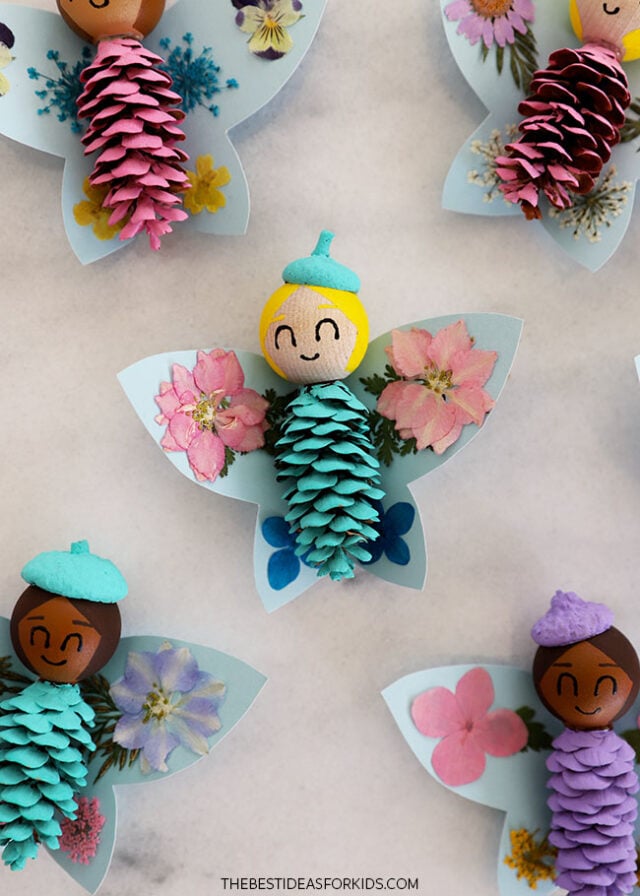
For these fairies, we purchased pressed flowers, but you can also collect your own from your yard or nearby park. Press them yourself, and then use them for this craft!
See our post on how to press flowers.
Try this: Turn them into puppets! Glue a stick or wooden skewer to the back of the wings and kids can use them to put on a magical fairy puppet show!
Supplies Needed
- Pine cones – 1 per fairy. These are approx 2 inches in size. Collect some outside or you can get some here.
- Acorn tops – for the fairies’ hats, 1 per fairy. Collect some outside or you can get some here.
- Wooden beads – for the fairies’ heads, we used 1″ beads
- Pressed flowers – in various shades and sizes. You can press your own flowers or get some here.
- Cardstock – pale blue for the fairies’ wings
- Paintbrushes – medium and fine
- Scissors
- Hot glue gun – used with adult assistance
- White glue – or Mod Podge to attach the pressed flowers
- Toothpick or bamboo skewer – for drawing on the faces
- Wing template – get the free printable at the bottom of this post
Watch the Video Tutorial
How to Make Pine Cone Fairies
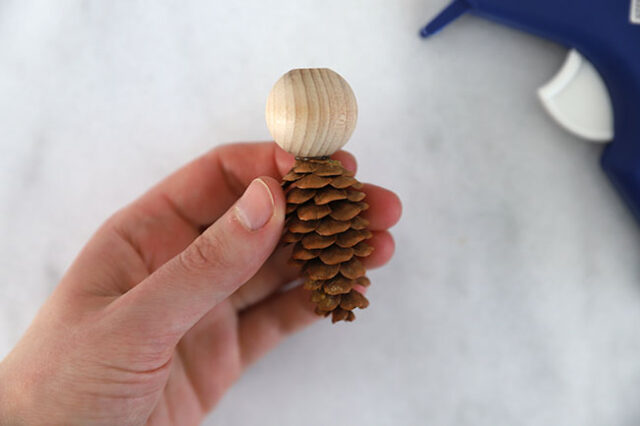
1. Glue the bead to the pine cone.
With adult assistance, hot glue the wooden bead to the top of the pine cone.
Note About Pine Cones
When collecting pine cones outside, let them dry completely before using them for this craft. You may also choose to bake the pine cones in the oven at 250F for 10-20 mins – this will help speed the drying process and make sure there aren’t any bugs in them.
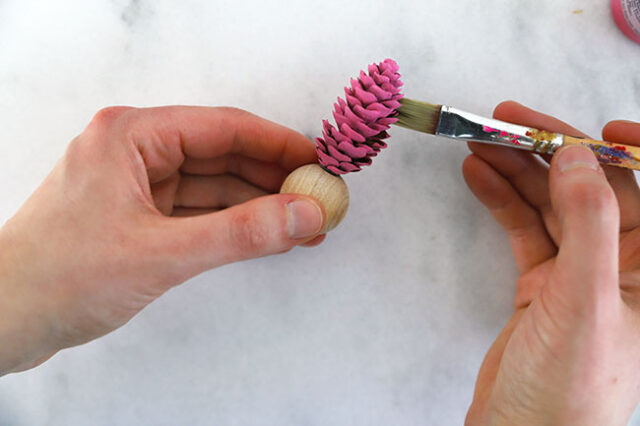
2. Paint the pine cones.
Holding the bead head in one hand, use your other hand to paint the pine cone a bright color. Take care to paint only the pine cone and not get paint on the bead. Let the paint dry completely. You can also paint the pine cone before gluing the bead on.
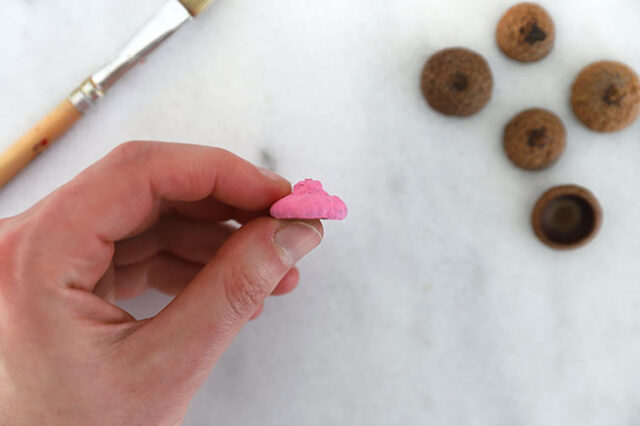
3. Paint the acorn top.
Use the same paint (or mix it up if you’d like!) to paint the outside of the acorn top. This will be a little beret-style hat for the fairy. Let the paint dry.
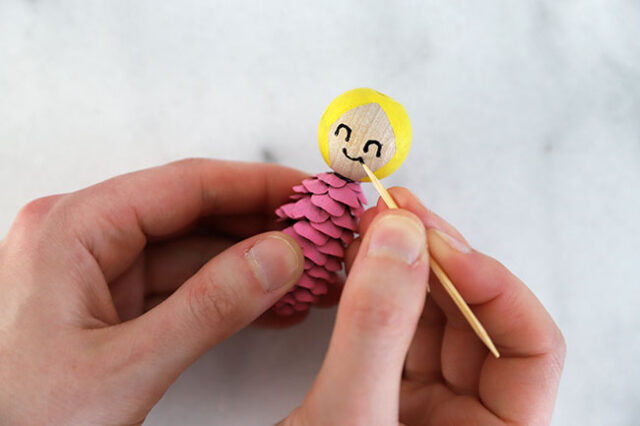
4. Paint the face details.
Start by painting the wooden bead the color you would like the fairy’s face to be, or leave the wood unpainted.
Then paint around the edge of the bead to make the fairy’s hair.

Using a toothpick, carefully draw two eyes and a mouth onto the fairy’s face. Draw the eyebrows using paint to match the hair color.
Note
Using a marker the the ink may bleed so this method is the best method for making the face. If you would like to use a marker, use either a quality gel pen or a fine point permanent fabric marker. Do a test first on a spare bead to make sure it doesn’t bleed.
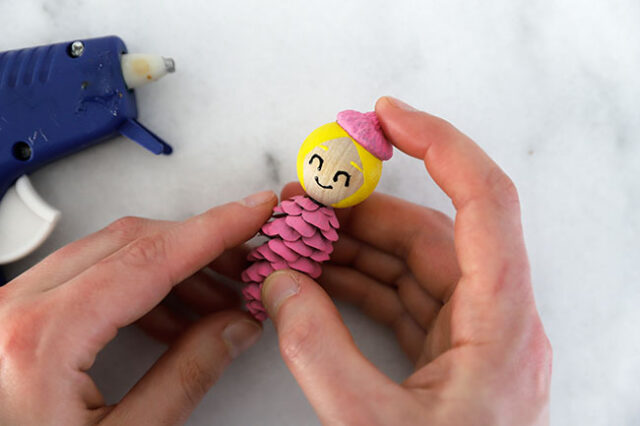
5. Glue the hat on.
With adult assistance, hot glue the acorn top onto the fairy’s head.
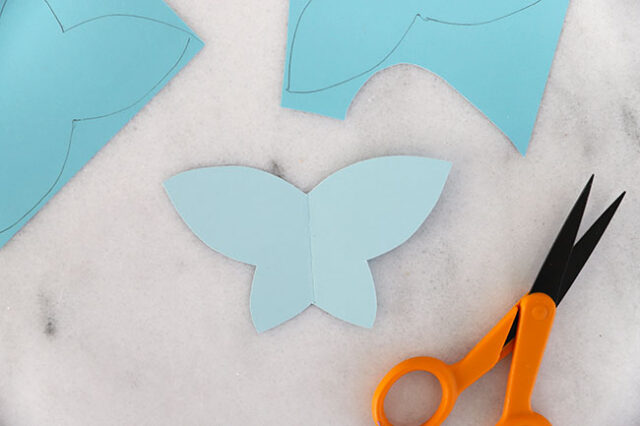
6. Make the wings.
Print and cut out the wing template and trace it onto pale blue cardstock. Cut out 1 piece per fairy and fold each in half to form a crease down the center.
You can get the free printable wing template at the bottom of the post.
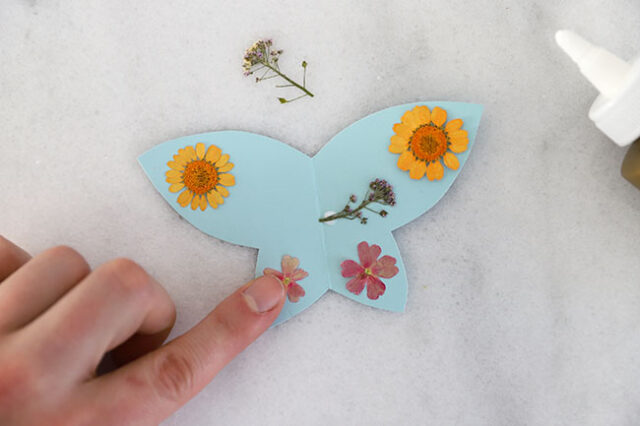
Very gently arrange your pressed flowers onto the wings.
Use white glue or Mod Podge to glue the pressed flowers to the paper wings. To protect the flowers, apply an extra coat of Mod Podge over them.
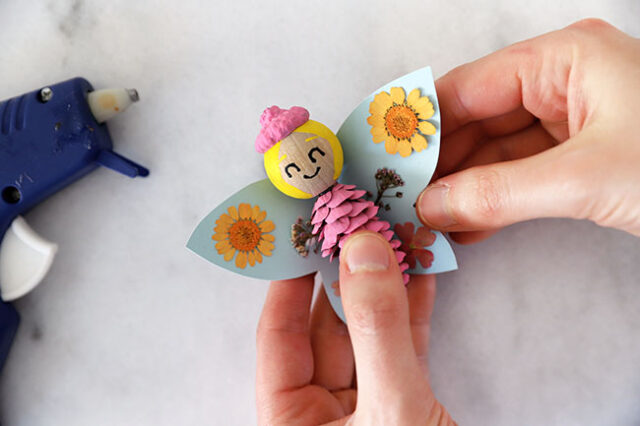
7. Assemble the fairy.
Hot glue the wing to the back of the painted pine cone (with adult help). Press it to the crease on the paper wings and hold in place until secure.
You can make as many fairies as you’d like! You can even add a string to them and hang them on a tree or branches for decoration.


Share a Comment!
We LOVE hearing from you! Submit your question or comment here.
Your email address will not be published.
Required fields are marked *