

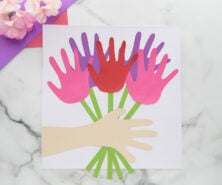
Handprint keepsakes are fun crafts for any time of the year, but they’re especially great for Mother’s Day. Make this handprint flower craft as a thoughtful handmade gift this Mother’s Day or for a gift for a loved ones birthday!
RELATED: Mother’s Day Crafts for Kids
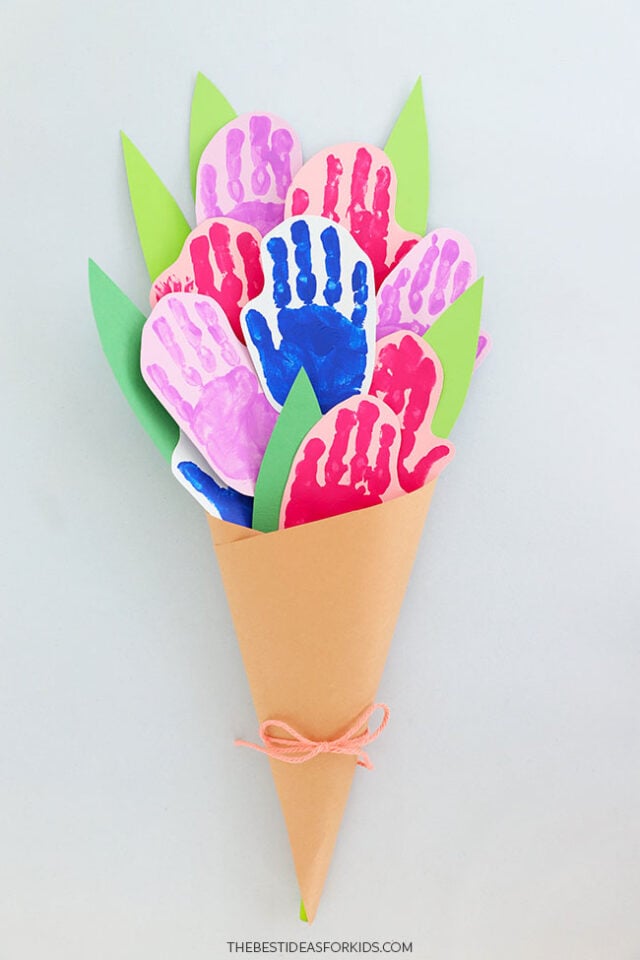
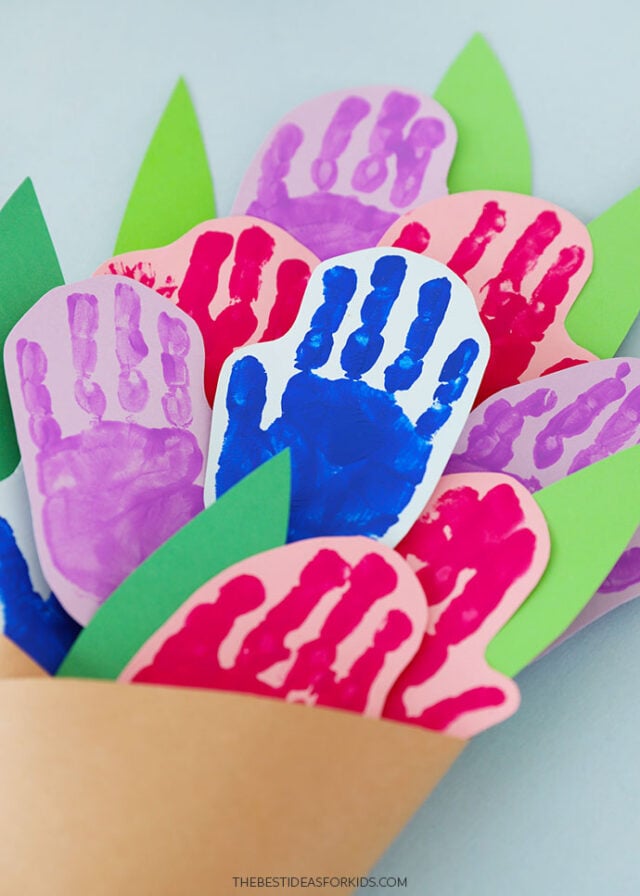
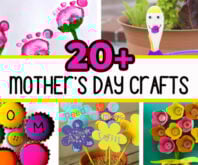
Handprint Flower Craft for Kids
You probably already have everything you need to make this simple bouquet. The flowers are simple to do and come together quickly, and when arranged all together they make such a special gift for Mothers, Grandmothers, or Aunts.
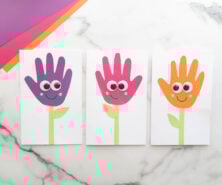
For a non-painted handprint craft, try this handprint flower bouquet craft.
The great thing about using so many handprints in one craft is that you can use handprints from one child or several, depending on who the gift is from. You can even include Mom’s handprint and give it to Grandma! And for a card to go with the bouquet, see our butterfly handprints.
And don’t forget to write your kids’ names and the date on the back of the bouquet so you’ll remember how old they were when this was made!
Supplies Needed
- Non-toxic tempera paint – in bright colors, for the flowers
- Paintbrush – for painting the straws
- Cardstock – bright green for the leaves and pale shades to correspond with your paint colors
- Scissors
- Paper straws – green, or white and paint them green
- Brown craft paper – to make the bouquet wrap
- Tape – to attach the straws to the flowers and to secure the stems together
- Glue stick – or tacky glue, to secure the leaves and flowers
- Yarn or string – to tie the bow
- Elastic band – to arrange the flowers
Watch the Video Tutorial
How to Make a Handprint Flower Craft
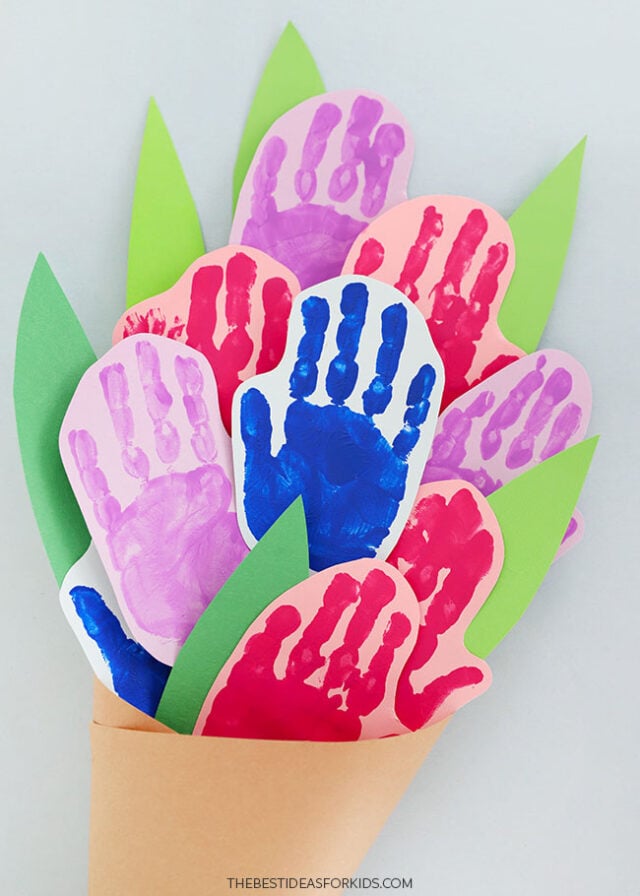
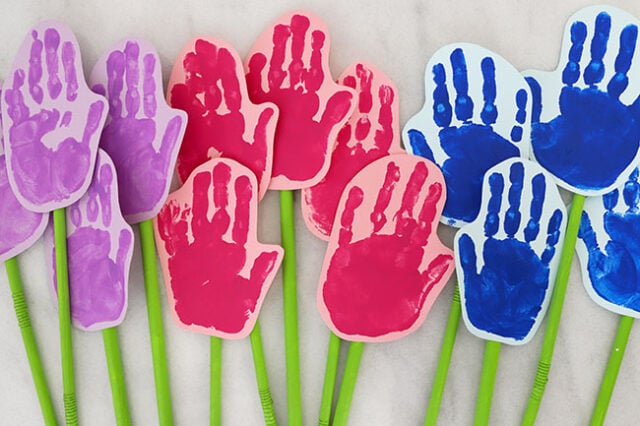
1. Make the handprints.
Apply a coat of non-toxic tempera paint onto your child’s palm.
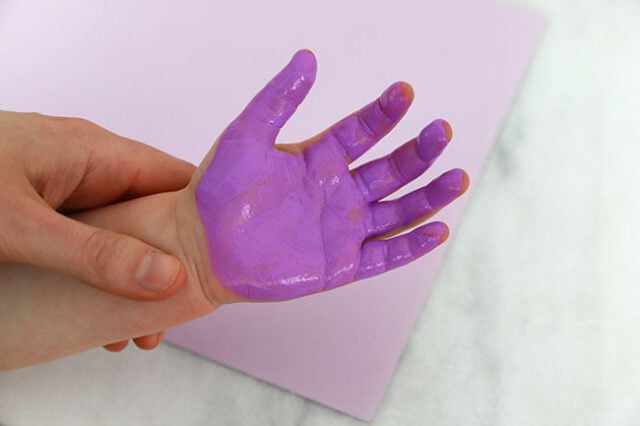
Gently guide them in stamping their hand onto cardstock.
We used light purple cardstock, light pink and light blue but you can also use white cardstock.
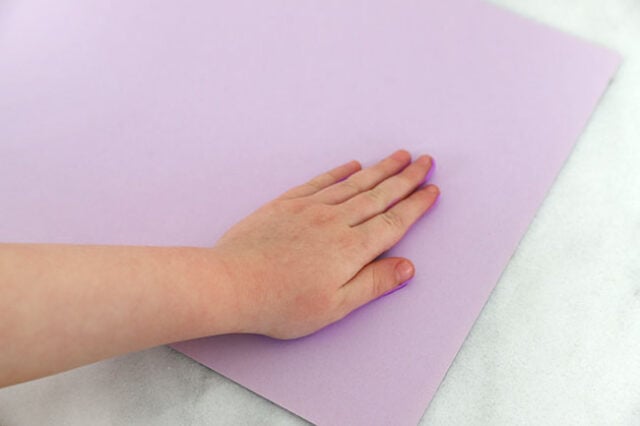
Don’t worry if the handprint isn’t perfect, you can touch up any missing spots with some extra paint.
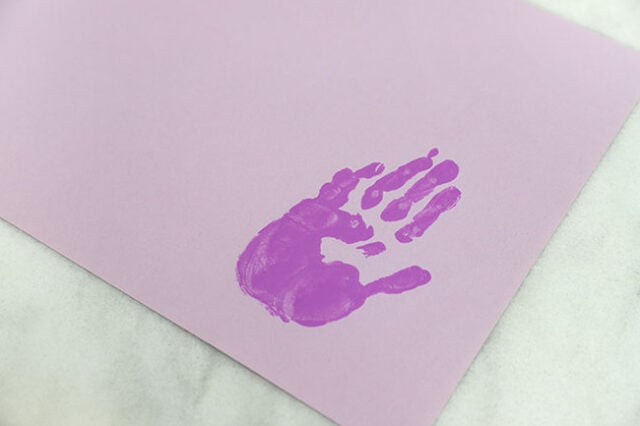
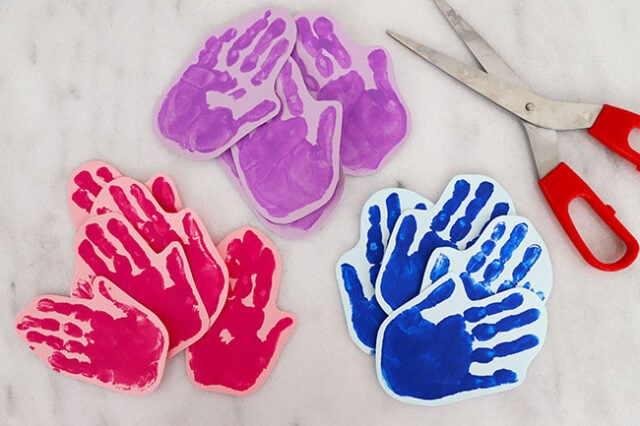
Make more handprints if you want to make a bouquet. When you have 3-5 prints in the same color, help your child wash their hand with warm soapy water.
Be sure their hand is completely dry before repeating this process with another color of paint.
Use their other hand to make prints as well, so that your bouquet has a mix of right and left hands.
Let the handprints dry completely and then cut them out.
2. Assemble the flowers.
If you are using green paper straws, you can skip this step.
Otherwise, apply a coat of bright green paint onto the white straws. You’ll need 1 straw for each handprint, so paint as many as you plan on using.
Set aside to dry completely.
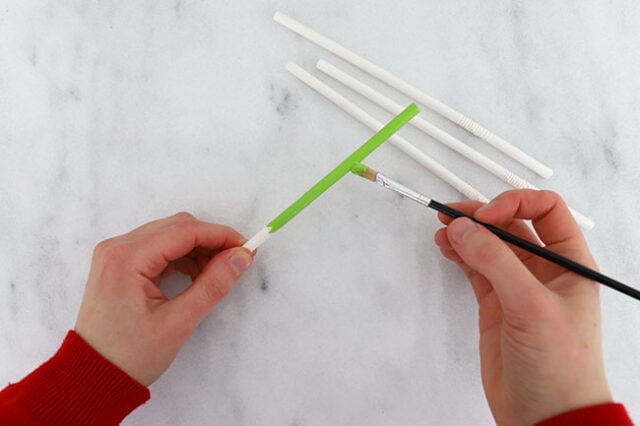
Once dry, use tape to secure the ends of the straws onto the backs of the handprint flowers.

Repeat for all of the flowers.
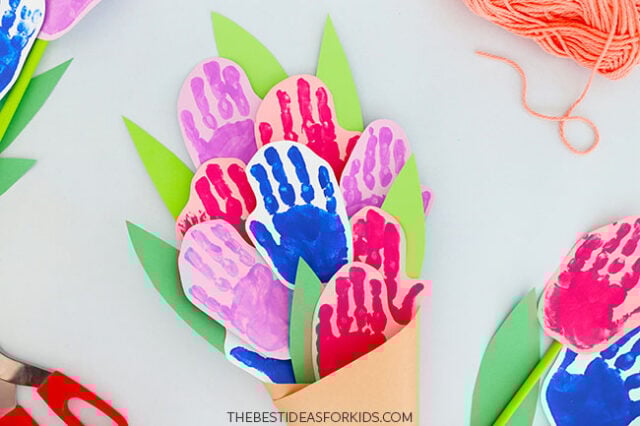
3. Arrange the flowers.
Hold all the flowers together in one hand, roughly arranging them in a way that you like, so that the various colors of flowers are visible.
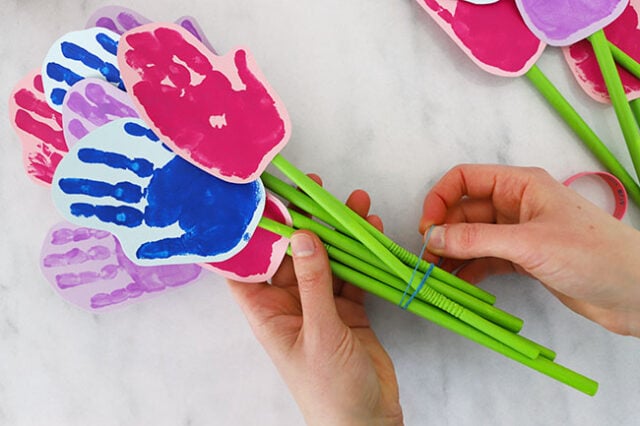
Wrap an elastic band around the stems to hold them loosely in place. Continue to adjust the placement of the flowers – the elastic band will allow you to do this while still keeping them together.
When you’re happy with the arrangement, wrap the stems with a piece of tape over the elastic band to lock the flowers in their placement.

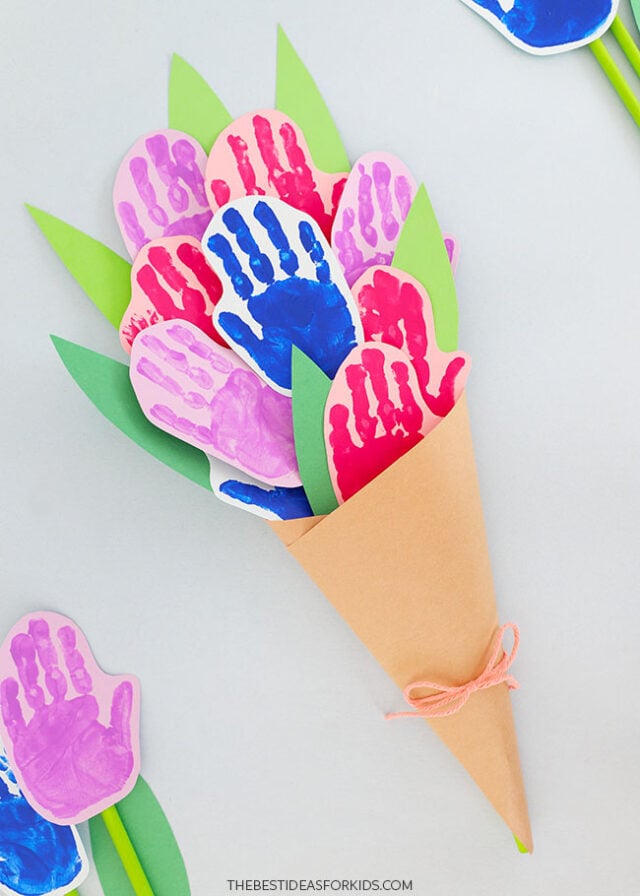
4. Wrap the flowers.
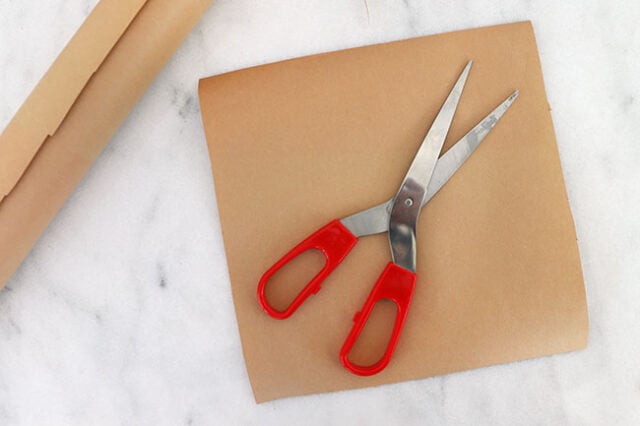
Cut out a piece of brown craft paper in a 9″ by 9″ square.
Place the bouquet onto the square so that the flowers sit on one corner and the ends of the stems are on the opposite corner.
Take the left corner of the paper and gently fold it over the stems, holding it in place.

Then take the right corner and wrap it over the stems as well, adjusting it until you’re happy with the placement.
Use clear tape to secure it in place, forming a slightly flattened paper cone around the flower stems.
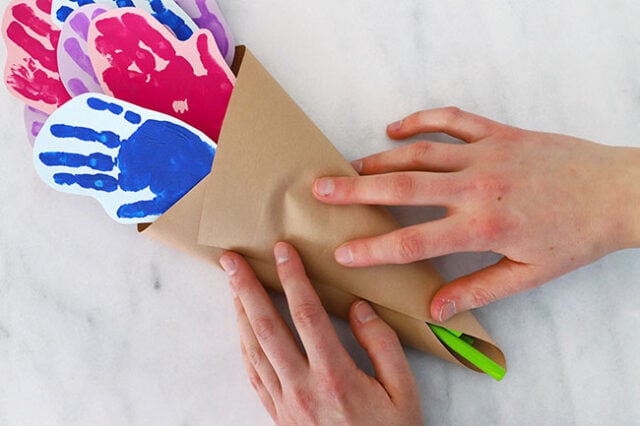
We found that the bouquet would wiggle in and out of the paper wrap, so use a piece of clear tape on the back of the bouquet to attach a flower to the paper wrap to prevent the wrap from moving.
5. Add leaves.
Cut out long pointed leaves from green cardstock. You can draw one and use it as a template to make more.
If you don’t have green cardstock you can also paint leaves and cut them out or draw them with markers.
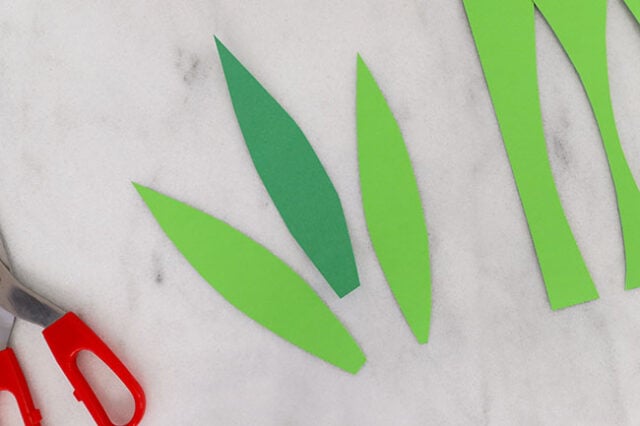
Add them into the arrangement, poking out from behind flowers, using a glue stick or tacky glue to glue them in place.

6. Add the bow.
Cut a piece of yarn about 18″ long. Tape the center of the yarn to the back of the paper wrap and bring the ends around to the front and tie a bow.
Trim off the excess length.
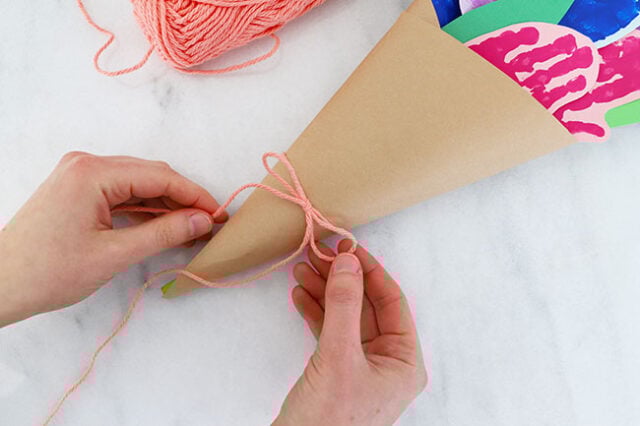
Your bouquet is now ready! You can also add a little tag with a special note on the bow, if you’d like!
This handmade bouquet is sure to be a treasured gift this Mother’s Day!


Always excited to see an email arrive in my mailbox from you. You have the best ideas. Your site is well named
Thank you Coleen – that means a lot!