

These salt dough handprint ornaments are a wonderful Christmas craft to make with kids. Make a Santa handprint ornament, an elf or a reindeer. Kids can help to make the salt dough and also decorate them! They will love pressing their hands into the dough and painting them too. Make just one or try all three Christmas characters!
RELATED: Salt Dough Handprint Ornament

We made these ornaments to look like our Christmas handprint cards. You can make this same Santa, elf and reindeer but turn them into a handprint card that opens up. We loved the way they looked so much we thought they would make adorable ornaments too!
Working with salt dough for Christmas is one of our favorite Christmas activities. You only need a few ingredients which you probably already have on hand. Kids love helping to mix and knead the dough too.
Here are the 3 ornaments we made:
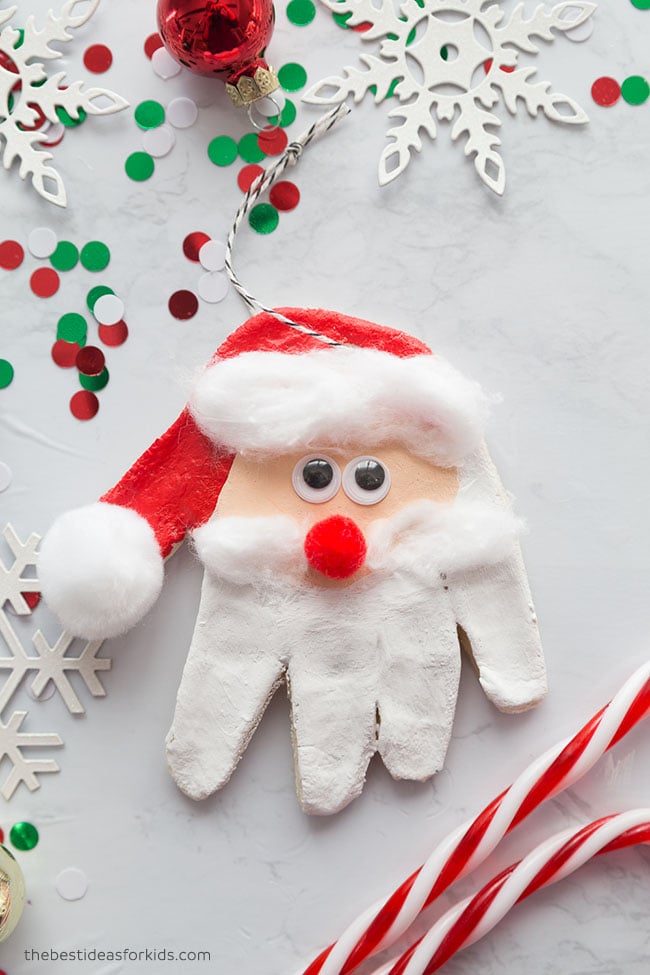
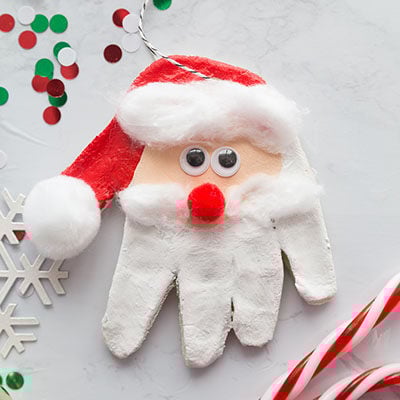
Handprint Santa Ornament
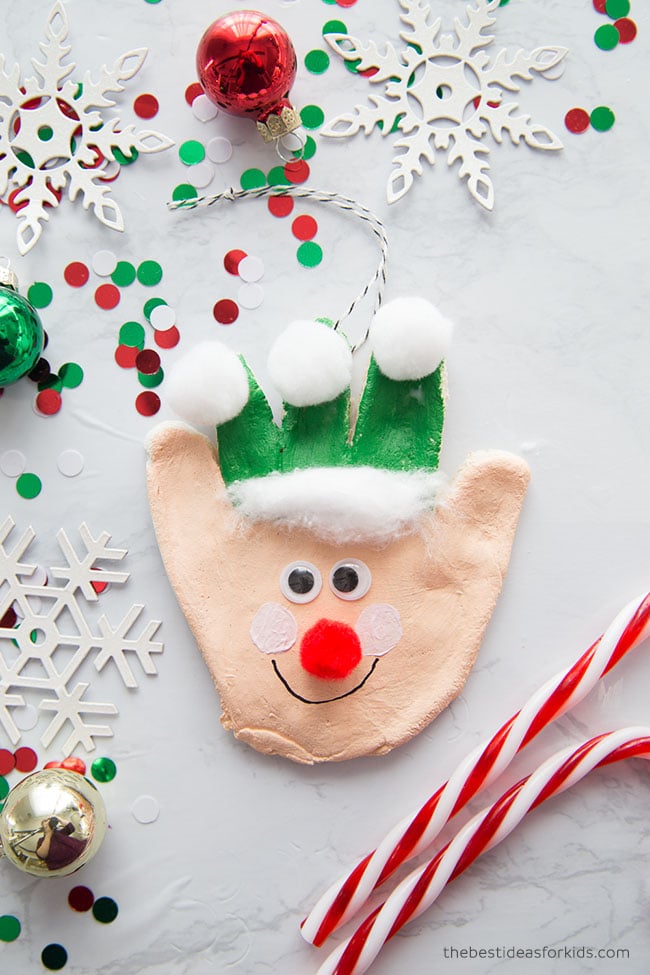
Elf Handprint Ornament
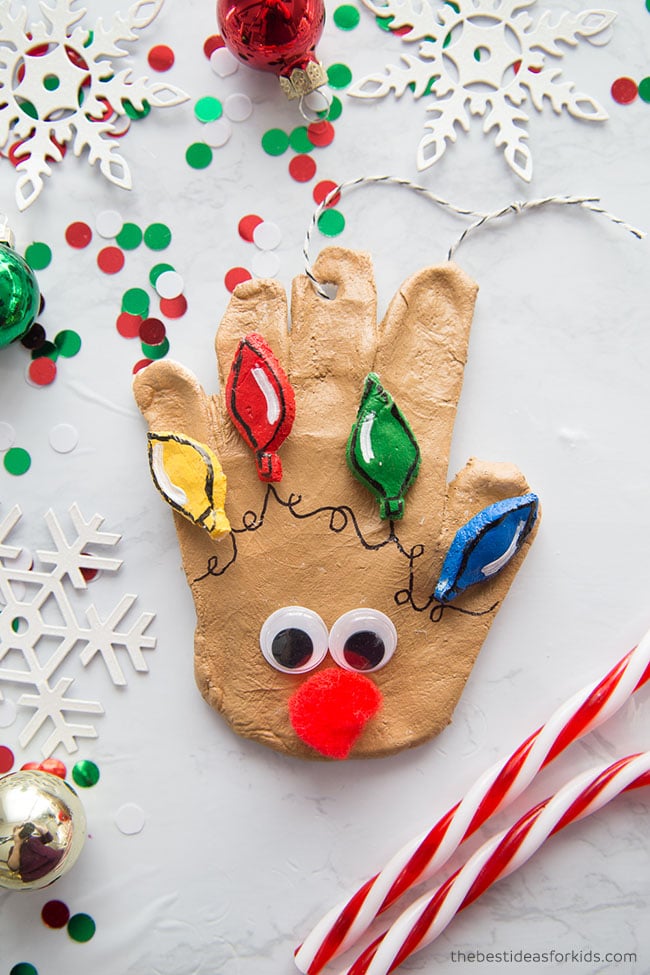
Reindeer Handprint Ornament
Watch the Video Tutorial
Supplies Needed
Salt Dough
- Flour
- Salt
- Warm Water
- Straw (to make hole)
- Twine (for hanging)
- Sealer – seal with either mod podge or a clear glaze spray. We like this spray for a durable finish. Adults should do the spraying and always follow directions of the product chosen. Sealing the final ornaments will help stop them from cracking in a few years.
REMINDER: Just a friendly reminder to keep these out of reach of pets (they can be toxic to dogs if ingested).
Santa
- White Paint
- Paint for the face – here is a set with an assortment of colors
- Red Paint
- Large White Pom Pom
- Small Googly Eyes
- Small Red Pom Poms
- Cotton Ball
Elf
- Green Paint
- Paint for the face – here is a set with an assortment of colors
- Cotton Balls
- Small Googly Eyes
- Small Red Pom Poms
- Small White Pom Poms
- Sharpie
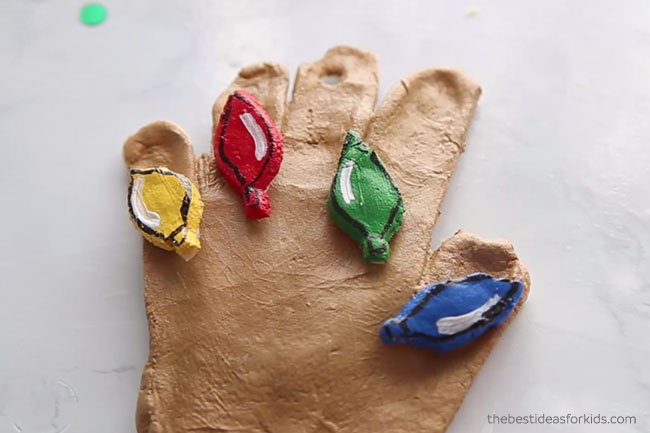
Reindeer
- Light Brown Paint
- Yellow, Red, Green, Blue and White Paint (for the light bulbs)
- Medium Sized Red Pom Pom
- Medium Sized Googly Eyes
- Sharpie
How do I seal the ornaments?
Once you are done, don’t forget to seal with either mod podge or a clear glaze spray. Make sure to do the sealing before adding the embellishments (pom poms, cotton balls, etc). We like this spray for a durable finish. Adults should do the spraying and always follow directions of the product chosen. Sealing the final ornaments will help stop them from cracking in a few years.
What Glue Should I Use?
Hot glue is going to work best for gluing onto salt dough. You want the ornaments to last and the craft items to stay on. Adults should help with this part for younger kids.
Santa Handprint Ornament
Video
Materials
- 4 cups all purpose flour
- 1 cup salt
- 1.5 cups warm water
Instructions
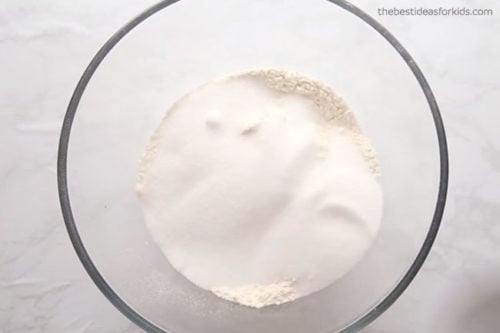
- Begin by mixing 4 cups all purpose flour with 1 cup of salt.

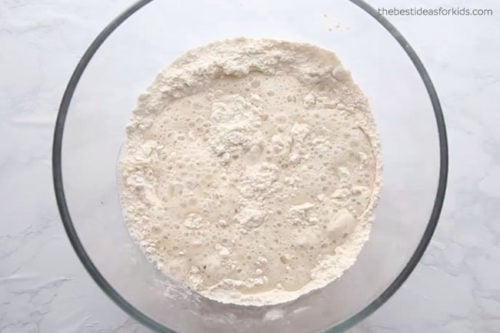
- Add 1.5 cups warm water until it starts to form a dough.
- If it feels a little dry, you can add more water. Add one tablespoon at a time. If it is too sticky, then add a little more flour in.
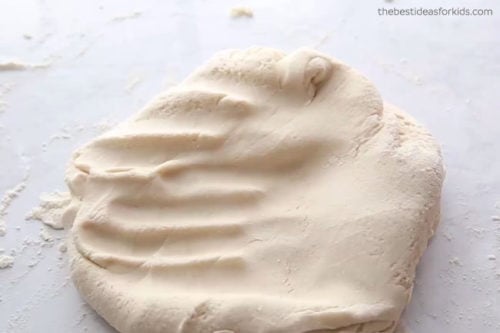
- Knead the dough until it forms a soft ball. You will need to knead for at least 5-10 minutes to get it to a good consistency. Roll it out to about 1/2 inch in thickness.
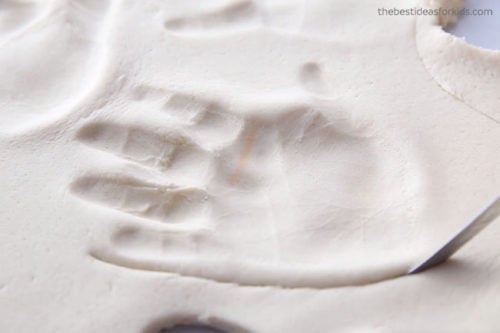
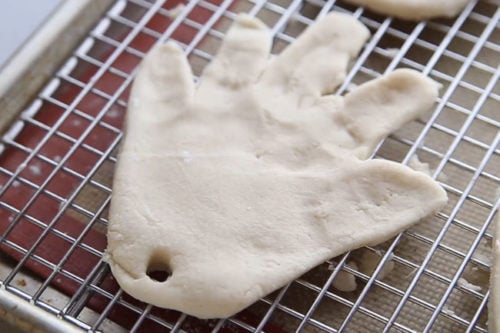
- Press a hand into the dough to make a handprint. Carefully cut out handprints with a knife (adults only). Leave a little bit of space around each finger so that the fingers don't turn out too skinny once they are baked. Repeat this step 2 more times if making all of the ornaments.
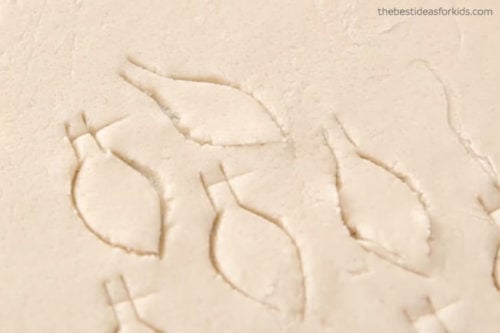
- Cut out 4 small shapes for the light bulbs. You can free-hand draw and cut these out with a knife (adults only).
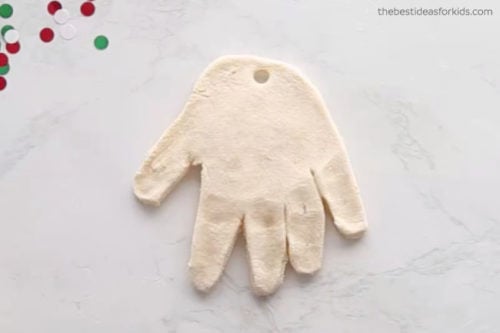
- Make a hole with a straw on the top of the middle finger for the elf and reindeer and a hole on the opposite side (fingers hanging down) for the Santa.
- Bake for 2 hours at 250 degrees Fahrenheit then let the bottoms of the ornaments air dry on a cookie drying rack for one day before painting.
Notes
Directions to Decorate the Salt Dough Handprint Ornaments
Santa
1. Paint the middle of the face and let it dry.
You may need 2 coats of paint.
Next, paint the top and thumb red for the hat and the bottom white for the beard.
Seal the ornament before adding other craft items (see our recommended sealers above).
Add cotton balls to the brim of the hat.
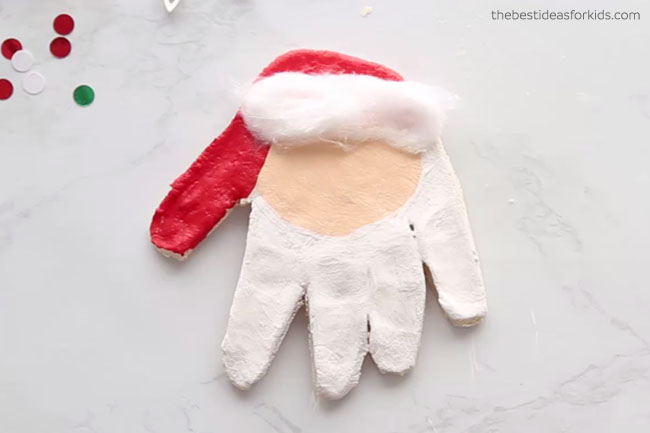
2. Add the googly eyes and pom pom nose.
Stretch out another cotton ball and glue down on each side of the pom pom for a mustache.
Add the white pom pom to the bottom of the hat.
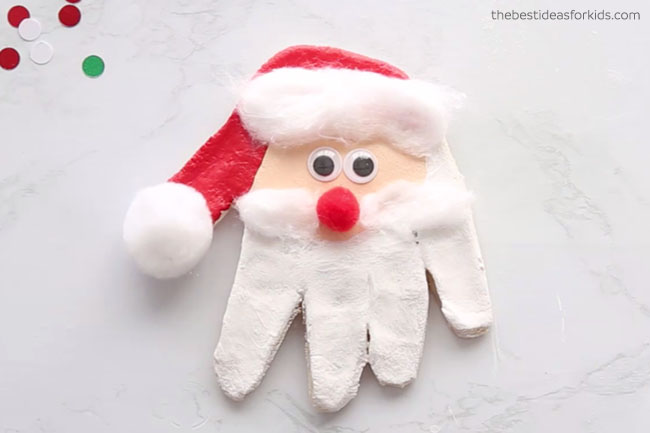
3. Tie on some twine to hang the ornament.
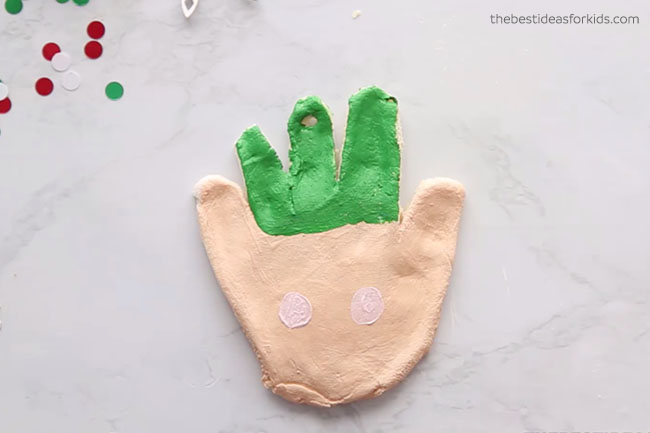
Elf
1. Paint the middle three fingers green.
Paint the rest of the handprint the color of your choice for the face. Add two small light-pink circles for the cheeks.
Draw on the smile with a Sharpie before sealing.
Seal the ornament before adding other craft items (see our recommended sealers above).
2. Glue on the googly eyes and pom pom nose.
Add the pom poms to the top fingers. Then stretch out a cotton ball and glue down to make the brim of the hat.
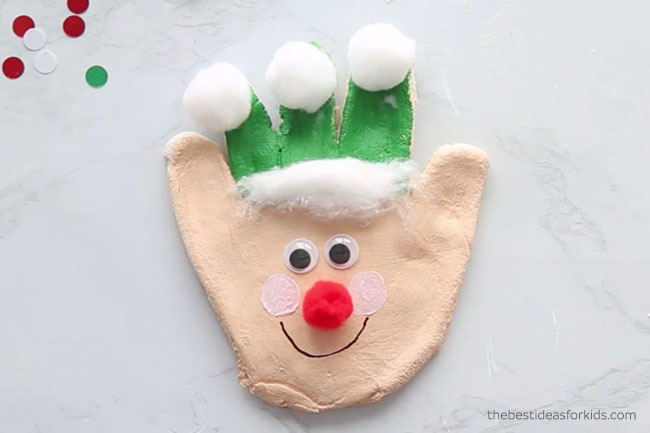
3. Tie on some twine to hang the ornament.
Reindeer
1. Paint the entire handprint brown.
2. Paint the light bulbs each a different color – yellow, red, green, blue.
With a black Sharpie, outline the light bulbs and then add some white paint to the side for the reflection.
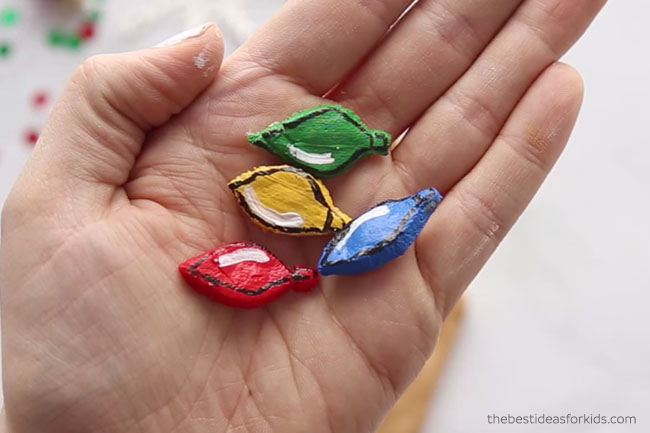
3. Glue the light bulbs to the handprint.
Hot glue will work best for this (adults only).
Then draw on the light strings with a black Sharpie.
Seal the ornament before adding other craft items (see our recommended sealers above).
4. Glue the googly eyes and pom pom nose on.
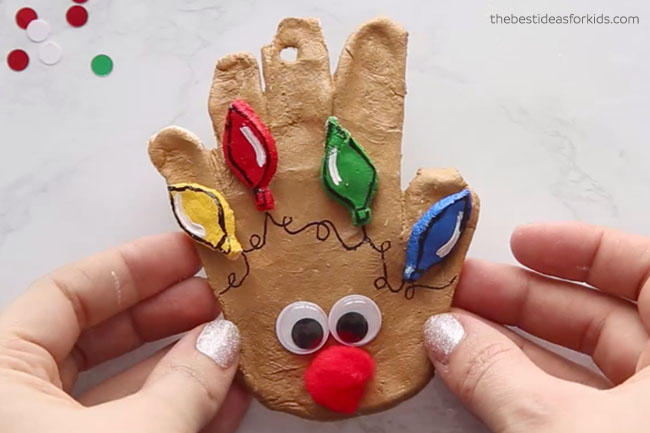
5. Tie on some twine to hang the ornament.
We know you will love making these salt dough handprint ornaments this holiday season. All three of these characters will make cherished keepsakes or gifts this Christmas!
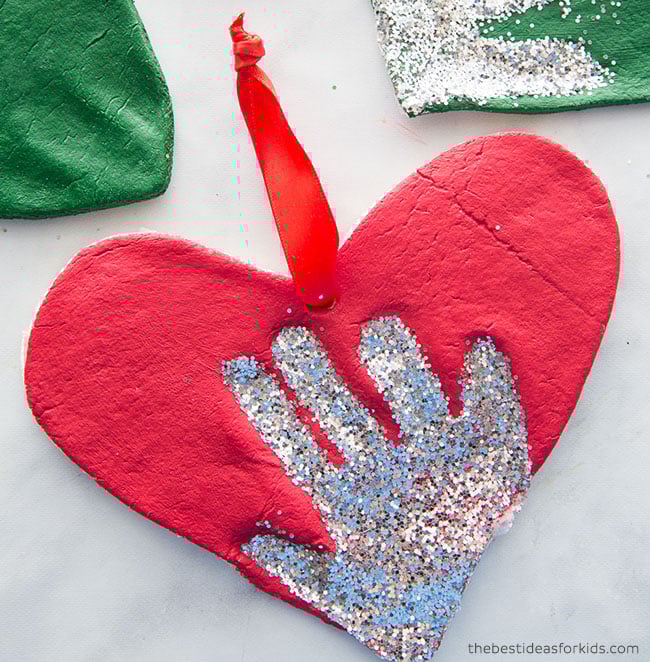
More Salt Dough Ornaments
See these glittery handprint salt dough ornaments. This is another fun and easy way to make handprint ornaments for Christmas!
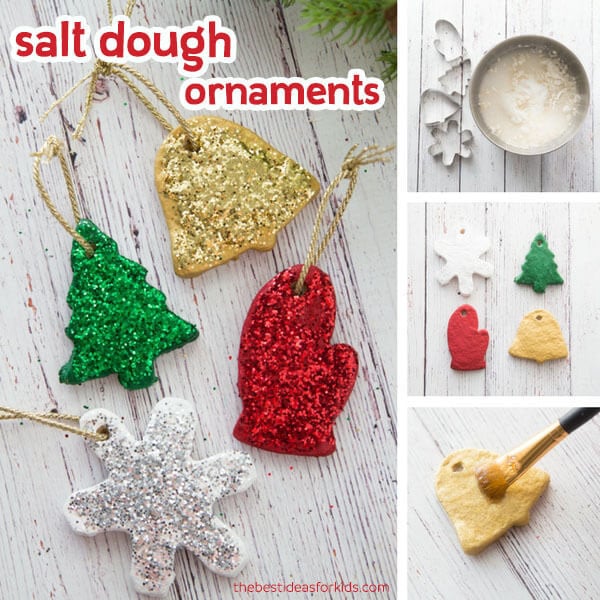
You can also use cookie cutters to make these easy salt dough ornaments.


Worked perfectly! Wish I could post the pictures! Thanks for the idea!
Could you use epson salt or no?
No just regular table salt.
Hi! Hoping to make these, but was curious how many this recipe makes, roughly? Thanks!
It should make between 6-8 handprints depending on the size of the hand and thickness of ornaments.
Do these go on a baking sheet without spraying the baking sheet? Would you recommend parchment paper?
You can sprinkle some flour down so they don’t stick or you can use parchment paper. Either works well!
I would love to make with my students however there is no oven available until I’d get home. Would it be ok to make the mold/shape, keep on a baking pan, and then bake as soon as I’d get home? Any advice or way to accomplish would be great! Thanks
Yes definitely! You can let them completely air dry too. It would take 2-3 days and you’d need to make sure the bottoms get exposed to air by placing on a cookie drying rack on Day 2.