

Suncatchers are a fun craft to make with kids that brighten up windows in your house. And this melted crayon pumpkin suncatcher couldn’t be easier to make! You only need crayons, wax paper and some colored paper.
RELATED: Leaf Suncatchers
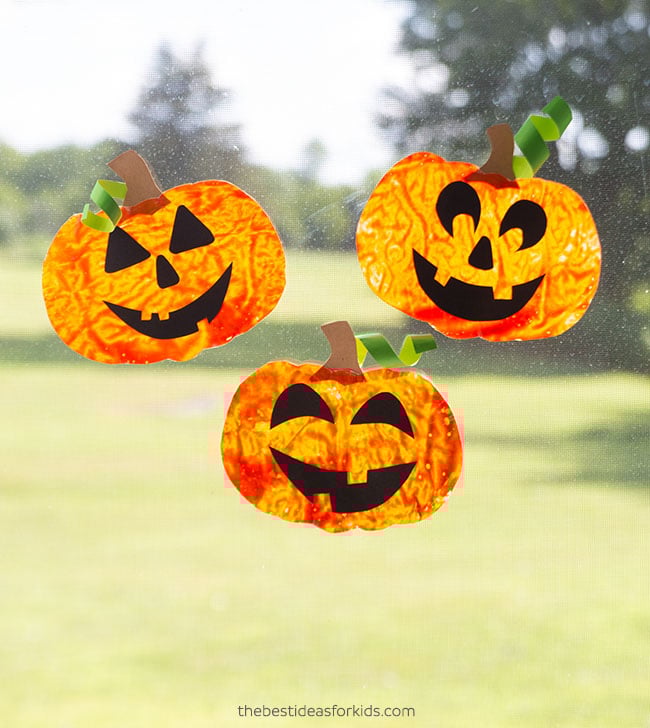
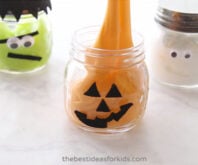
Melted Crayon Pumpkin Suncatcher
Using wax paper and crayons is a great way to create suncatchers! Alternatively, you can make these with tissue paper and some contact paper.
Contact paper can sometimes be difficult to find. That’s why these melted crayon suncatchers are sometimes easier to create – because you may already have wax paper and crayons on hand.
Supplies to Make Crayon Melted Pumpkin Suncatchers
Here are the supplies you’ll need:
– Wax Paper
– Cardstock – we used black, brown and green
– Crayons – we mixed the Crayola tones ‘Yellow Orange’, ‘Orange’ and a little bit of ‘Neon Orange’. Do not use a darker orange than the regular orange or it will turn out too dark. You’ll need about 2-3 crayons for each suncatcher.
– Sharpener or Grater – we used a regular pencil sharpener to make the shavings. You can also use a crayon sharpener or a cheese grater. Adults should supervise or do this part for younger kids.
– Hair Dryer
– Extra-strong glue – we like this Elmers extra strong non-toxic glue
– Tape or double-sided tape – for placing on your windows
– Templates – you can get the free template at the bottom of the post (on the form with a preview of the template).
Watch the Video Tutorial Here
How to Make a Pumpkin Suncatcher
Note: Do not place your suncatchers in direct sunlight or extreme heat where the windows get hot as the crayons may melt. We placed in a window that was not in direct sunlight.
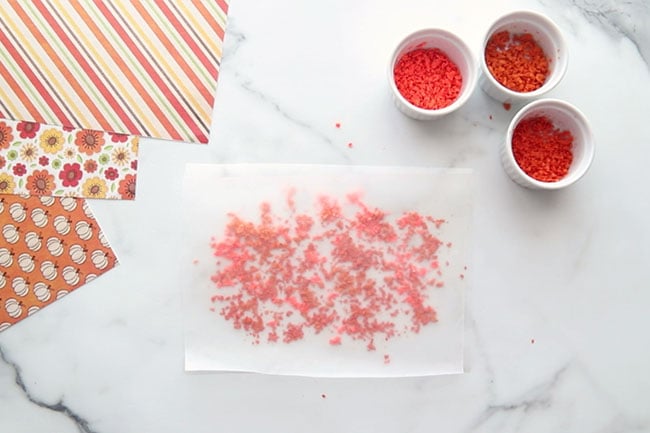
1. Start by shaving the crayons to get crayon shavings. You’ll need 2-3 crayons per suncatcher.
This part can be a little tedious but once you figure out how to shave the crayons it goes faster.
We used a regular pencil sharpener to make the shavings. You can also use a crayon sharpener or a cheese grater. Adults should supervise or do this part for younger kids.
2. Take a piece of wax paper large enough to fit the pumpkin shape and place on your table.
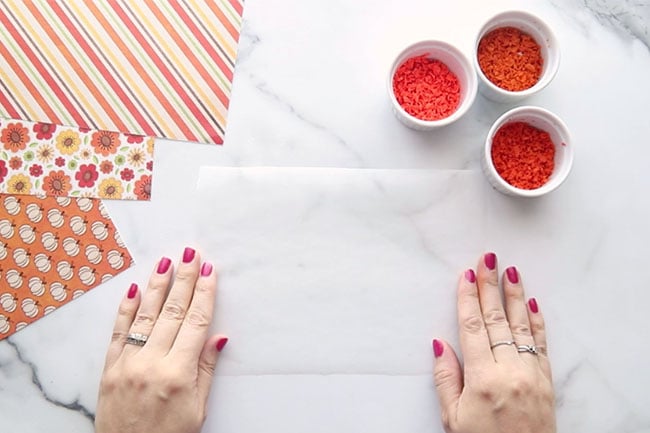
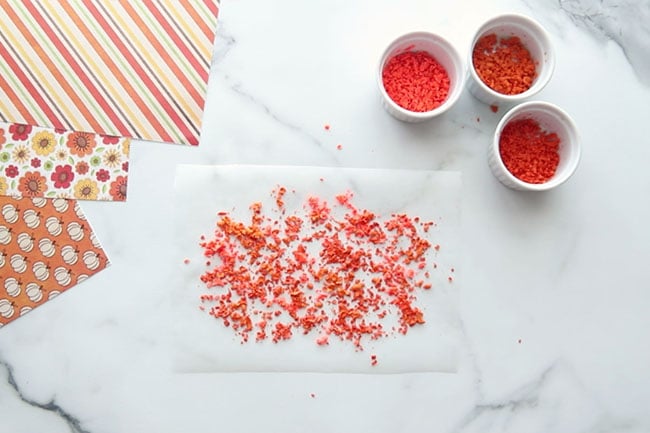
3. Add your crayon shavings to the wax paper.
Mix up where you place the different colors. Make sure to fill a space large enough to fit the pumpkin shape.
You don’t need to completely cover every space. When the crayon melts it will fill in some of these tiny areas.
4. Place another piece of wax paper on top and press down to flatten together.
5. Using a hair dryer, direct the hair dryer on the area where the crayons are. Note: Adults to help or supervise with this step.
The crayon shavings should start to melt.
If you have any open spots without color you can try to direct the crayon shavings into those areas with the hair dryer.

6. Keep melting until it looks like most of the crayons are melted and you have a shape large enough to fit your pumpkin template.
Caution: the wax paper may be slightly hot. Be careful not to touch the crayon portion until the wax cools.
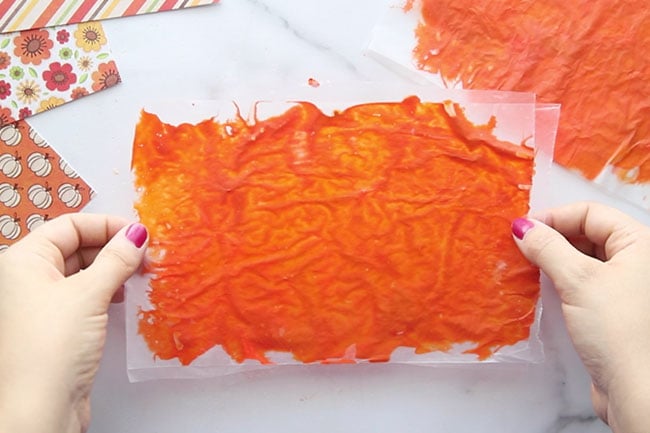
7. Allow the melted crayon to cool and dry.
The wax paper pieces should naturally stick together when the crayon dries.
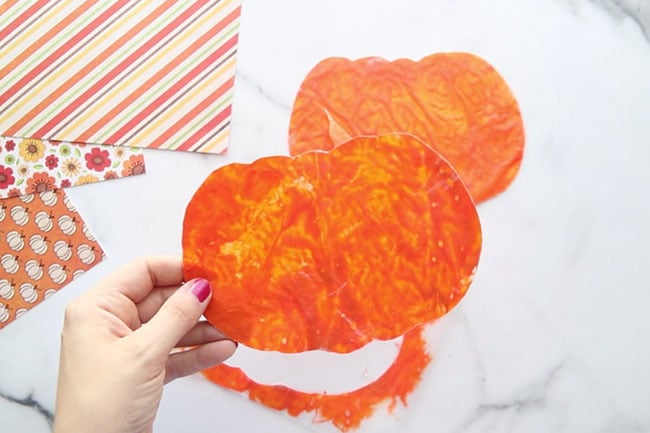
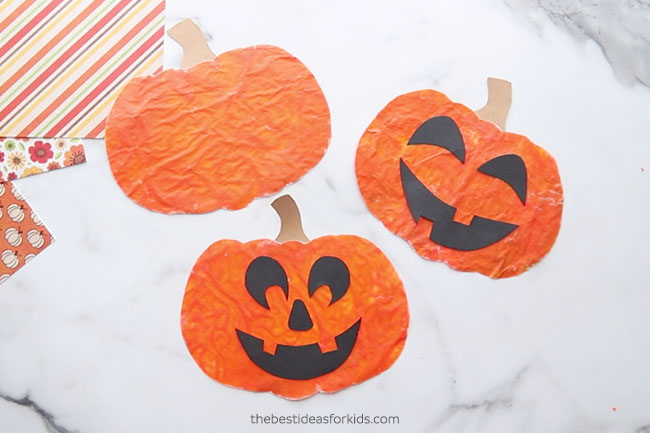
8. Cut out the pumpkin shape from the wax paper by placing the pumpkin template on top of the wax paper and cutting around it for the shape.
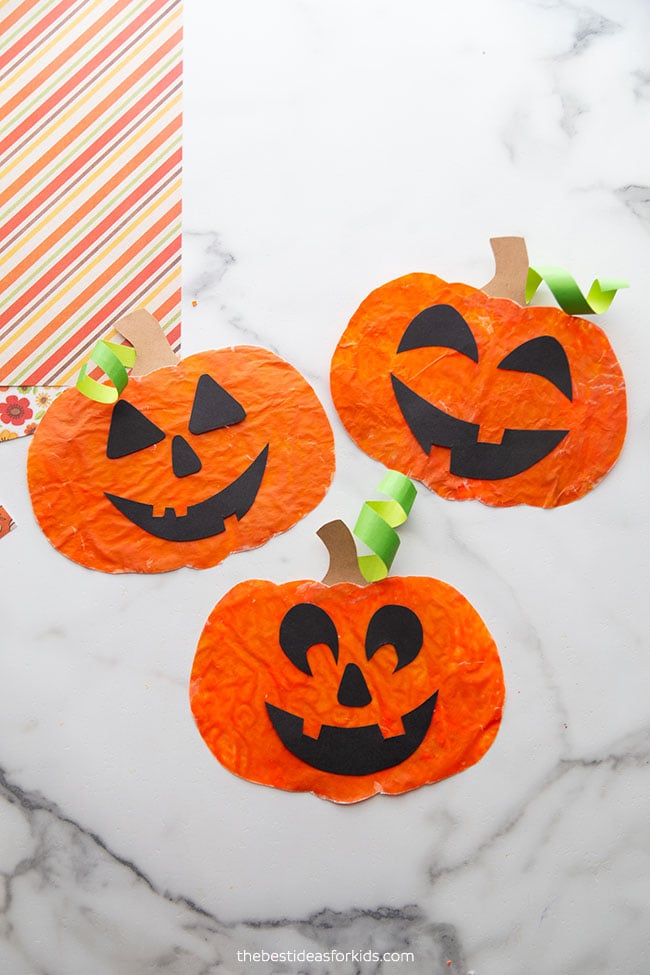
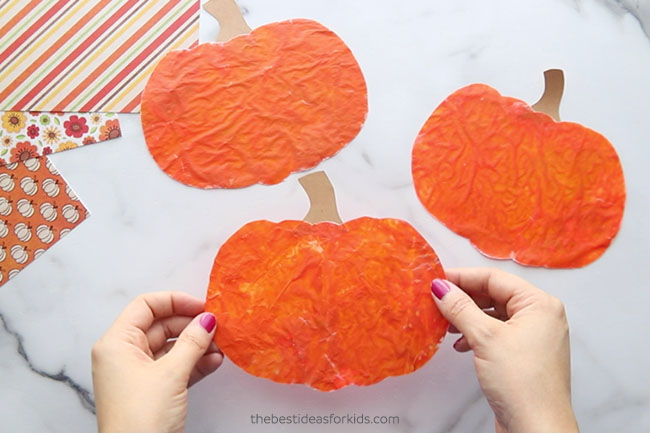
9. Trace the stem template onto brown cardstock. Then glue the stem to the top back of the pumpkin.
10. Trace the pumpkin face templates on black cardstock and cut them out.
Then glue the pumpkin face pieces on.
12. Cut out a strip of green cardstock and curl around a pencil and glue behind the stem.
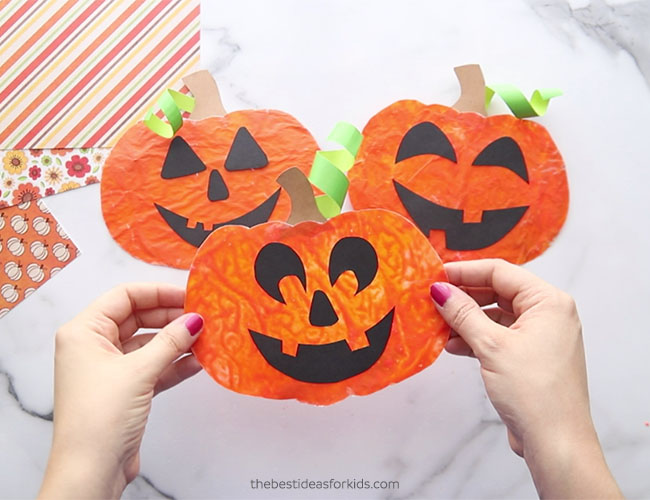
Your pumpkin suncatcher is now complete!
Note: Do not place your suncatchers in direct sunlight or extreme heat where the windows get hot as the crayons may melt. We placed in a window that was not in direct sunlight.
You can use tape or double-sided tape to stick on the window.
Get the free printable pumpkin templates. Subscribe to our newsletter and get these free templates as a bonus. Make sure to check ALL folders for the confirmation email.
More Halloween Crafts


Share a Comment!
We LOVE hearing from you! Submit your question or comment here.
Your email address will not be published.
Required fields are marked *